Key takeaways
- Wave income. Small but constant. It should fund stages 1 and 2 on its own — if you’re dipping into banked bonuses before the size-up, you’re upgrading too slowly.
- Duplicate pulls. The real bottleneck. Never convert duplicates of your anchor line into currency, even when the offer looks generous. That trade is almost always a net loss on progression speed.
- One-time rewards — daily bonuses, milestone clears, event drops. Bank these specifically for the size-up step. Early merges are cheap enough that spending a lump sum on them wastes most of its value.
- Skip entirely until the giant exists: cosmetics, side-line plants, and any upgrade that doesn’t feed the anchor line.
Grow giant plants in Plants vs Brainrots by funneling every duplicate and every coin into one plant line until it reaches its top size tier, instead of spreading upgrades across five mid-tier plants. A single giant typically out-damages a full board of mid-tiers while costing less than half as much to reach. The four levers that decide how fast you get one are upgrade order, resource priority, tile placement, and wave timing. There’s also a physical lever nobody plans for: a grind long enough to matter is a furniture problem, and we cover the measurements for that at the end.
A note on numbers: exact costs, cooldowns, and rarity names shift with every balance patch. Treat the figures below as planning benchmarks — the ratios between them are what stay stable across updates.
The upgrade path, stage by stage
Most players stall because they upgrade horizontally — a little on this plant, a little on that one — and end up with a board that clears early waves but leaks badly from the mid-game. The vertical path is slower for the first ten minutes and dramatically faster after that.
| Stage | What you’re actually doing | Share of total coins | Move to the next stage when… |
|---|---|---|---|
| 1. Anchor | Place the cheapest plant that clears the opening waves without leaking | Under 5% | You can idle two consecutive waves without losing a tile |
| 2. Duplicate funnel | Spend only on duplicates and merges of that one line | 55–65% | The anchor sits three or four merges deep |
| 3. Size-up | Push the size tier rather than adding new plants | 20–25% | The plant visually covers two or more tiles |
| 4. Giant | Final tier — this is the payoff step, and it is the most expensive single purchase in the run | 10–15% | It one-shots the mid-wave units instead of chipping them |
| 5. Support | One second plant, chosen only for what the giant cannot hit | Remainder | — |
The reason the funnel works is that upgrade costs scale faster than damage does at the low tiers, then flip: the last two tiers give the biggest jump per coin in the entire tree. Spending your early budget on breadth means you never reach the part of the curve where the value is.
Resources: what to farm, what to ignore
- Wave income. Small but constant. It should fund stages 1 and 2 on its own — if you’re dipping into banked bonuses before the size-up, you’re upgrading too slowly.
- Duplicate pulls. The real bottleneck. Never convert duplicates of your anchor line into currency, even when the offer looks generous. That trade is almost always a net loss on progression speed.
- One-time rewards — daily bonuses, milestone clears, event drops. Bank these specifically for the size-up step. Early merges are cheap enough that spending a lump sum on them wastes most of its value.
- Skip entirely until the giant exists: cosmetics, side-line plants, and any upgrade that doesn’t feed the anchor line.
Placement: where a giant earns its cost
Giant plants change the tile math twice over — they occupy more space and their range usually scales with size, so a giant parked in a corner wastes coverage it already paid for. The rule of thumb: put the giant where enemies spend the most time inside its radius, which is almost always a bend, a corner, or a chokepoint rather than the front line.
| Tile position | What belongs there | Why |
|---|---|---|
| Front 1–2 tiles | Cheap disposable blockers | They soak the first contact; a giant here takes damage it can’t replace |
| Path bend or corner | The giant | Enemies stay in range longest, so each shot counts more |
| Back row | Long-range support | Protected, and it covers the full lane behind the giant |
| Off-lane tiles | Nothing, until the giant exists | Coverage you can’t use is coins you can’t spend on tiers |
Timing: upgrade in the gap, not during the wave
Merges and size-ups typically lock the plant for a beat, which is exactly how a clean run turns into a leak. Bank coins during the wave and spend in the three-to-five-second lull after the last enemy dies. Two timing rules cover most situations:
- Never size-up mid-wave. If the plant is your only real damage source, that lock is a free pass for whatever is already on screen.
- Size-up before a boss wave, not during it. The tier jump is usually worth more than a wave’s income, and you want it online before the first heavy unit spawns.
For session pacing, the efficient unit is roughly 20–30 minutes: one anchor, one size-up, one giant. Longer sessions don’t speed progression up much because the resource bottleneck shifts to duplicate pulls, which are rate-limited rather than effort-limited.
Which giant is strongest for progression
| Archetype | Damage profile | Weakness | Best when |
|---|---|---|---|
| Area / splash giant | Rises with the number of enemies in range | Slow against single heavy targets | Most standard maps — best damage per coin overall |
| Single-target burst giant | High, flat, predictable | Wastes output on swarms | Boss-heavy or short-wave maps |
| Scaling / utility giant | Starts weak, climbs through the run | Punishing if you’re forced to upgrade late | Long maps where you can bank early and snowball |
For raw progression speed, the area giant is the safer first pick on most maps: its value scales with enemy count, so it keeps paying off as waves get denser without any further investment. Switch to a burst giant only if your runs keep ending on a single boss rather than a swarm.
The setup around you: measurements that actually matter
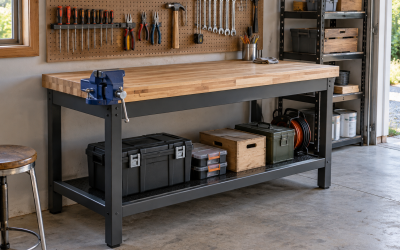
A three-hour progression session is a seating problem as much as a strategy problem, and the numbers are not subjective.
| Measurement | Comfortable range | Why it matters |
|---|---|---|
| Desk height | 28–30 in (71–76 cm) | Forearms level with the desk; anything higher lifts the shoulders |
| Top of monitor | At or just below eye level | Keeps the neck neutral over long sessions |
| Viewing distance | 20–30 in | Close enough to read wave timers without leaning in |
| Clearance behind the chair | 30 in minimum | Room to roll back and stand without clipping a wall |
| Room footprint | 10 x 12 ft fits a 60 x 30 in desk, chair, and shelving | Below that, go 47 in wide and skip the side unit |
Two buying notes if you’re setting this up: a height-adjustable desk usually runs $300–$700, and solid-wood desks $400–$1,200 — but check the box weight. A 60 x 30 in solid-wood top typically ships at 60–90 lb versus 40–60 lb for engineered wood, and a standard 30 in doorway is tight enough that the assembled desk won’t fit through it. Plan on assembling in the room.
Get the anchor line to its top tier first, place it where the path bends, and bank your bonuses for the size-up. Everything else — supports, side upgrades, cosmetics — is what you do with the leftover coins once a giant is already on the board.