
Our Top Picks
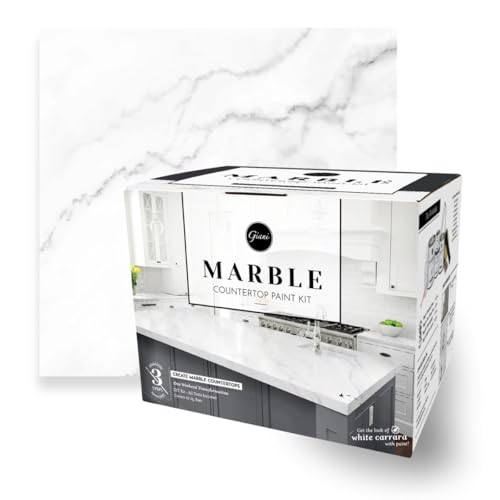 Giani Marble Easy Epoxy Countertop Paint Kit1 Count (Pack of 1)13.75 x 12.75 x 12.25 inches6 poundsCheck on Amazon
 SKIL 5” Random Orbital Sander with Cyclonic Dust5 inches7.87 x 4.8 x 5.51 inches3.44 poundsCheck on Amazon
Short answer: the best countertop resurfacing kit depends on your existing surface and how you use the kitchen. For worn laminate, a multi-step kit with bonding primer, color coats and a durable clear topcoat is the usual DIY route. For a deeper, glossy, stone-like look, epoxy kits can deliver it but are less forgiving and require strong ventilation. For a modern, matte, concrete feel, a thin cement-based overlay is an option for patient DIYers. No resurfacing product matches a new solid slab for heat and cut resistance, so the best kit is one you choose realistically, prepare meticulously and cure fully.
What is covered in this guide
- Resurfacing kit types compared
- Which existing surfaces can be resurfaced
- How to choose a kit
- Key features and what a kit should include
- Measuring and planning
- Prep and application overview
- Curing and care
- Safety and food-surface notes
- Common mistakes
- Who should choose what
- Project checklist
- Frequently asked questions
- Conclusion
Resurfacing kit types compared
Resurfacing means coating or overlaying an existing countertop rather than tearing it out. Kits bundle the materials into a system, which is easier than buying each component separately, but the systems differ widely in chemistry, difficulty and results.
Paint-based kits for laminate usually include a cleaner or deglosser, a bonding primer, color coats, decorative flakes or a stone-effect element, and a protective clear coat. They are the most accessible kits, low in cost relative to other options, and suited to flat laminate surfaces. They give a convincing look from a few feet away, but the finish is a thin coating, so it can scratch, chip and be damaged by hot pans.
Epoxy kits pour a two-part resin over the surface, producing a thick, glossy, glass-like layer. Metallic pigments can create marble or swirling effects. Epoxy is waterproof once cured and looks dramatic, but it is sensitive to temperature, mixing accuracy and dust. It can yellow in strong sunlight unless the product is UV-stable, and heat can soften or mark it.
Concrete or cement-based overlay kits apply a thin skim of polymer-modified cement that is troweled, sanded and sealed. The result is an organic, hand-finished texture. It requires patience, multiple coats and a good sealer, and it can crack if the substrate flexes.
Stone-effect and granule coating kits use a base color followed by multicolor chips or granules and a clear sealer, mimicking granite. Surface texture is more pronounced and the sealer determines how easy it is to clean.
Peel-and-stick or adhesive film kits are not strictly coatings but are often grouped with makeover kits. They are quick and reversible in many cases but show seams and are vulnerable to heat and knife cuts.
| Kit type | Typical look | Difficulty | Heat and scratch resistance | Odor and fumes |
|---|---|---|---|---|
| Paint-based laminate kit | Stone or solid color effect | Moderate | Low to moderate, protect with trivets | Moderate, depends on coatings |
| Epoxy kit | Glossy, deep, marbled or solid | Moderate to hard | Moderate, heat can mark it | Strong, needs ventilation and respirator |
| Cement overlay kit | Matte, concrete, handmade | Hard, many steps | Good once sealed, sealer can wear | Dust during sanding, sealer fumes |
| Granule or stone-effect kit | Granite-like speckle | Moderate | Low to moderate | Moderate |
| Adhesive film | Printed pattern | Easy | Low, avoid heat and knives | None to very low |
Which existing surfaces can be resurfaced
Resurfacing only works when the surface underneath is sound. A coating cannot fix a countertop that is delaminating, swollen from water damage, or sagging.
| Existing surface | Suitability | Notes |
|---|---|---|
| Laminate | Often good | Must be bonded firmly; repair chips and lifting edges first |
| Ceramic tile counters | Possible with overlay or filler | Grout lines show through unless filled and skimmed |
| Cultured marble or solid surface | Sometimes | Check the kit’s compatibility; sanding is needed to give tooth |
| Natural stone | Rarely worthwhile | Usually better to clean, polish or seal than to coat |
| Wood butcher block | Not typical | Better to refinish with a food-safe oil or finish |
| Water-damaged particleboard | Not suitable | Replace the substrate before any coating |
Check the sink and cooktop edges, seams and the area around the faucet. Water seeping at seams swells particleboard cores. If the laminate is lifting near the sink, a coating will fail there first.
How to choose a kit
Begin with what you want the counter to do. A baking-heavy kitchen with hot pans and a chopping habit needs a toughness that thin paints rarely give. Consider whether you can live with trivets and cutting boards. If you cannot, a resurfacing kit may disappoint, and replacement counters or a thin laminate refresh could be more satisfying.
Consider the look and shape of the existing counters. A countertop with a rolled front edge, a bullnose or a heavy built-up backsplash needs a kit that works on curves. A flat, square-edged countertop is simpler. Heavily textured laminate will show through thin coats unless sanded or skim-coated.
Consider your tolerance for work. Paint kits are a weekend or two. Epoxy needs a clean, dust-free, temperature-controlled setting and fast action while mixing. Cement overlay takes many days between layers, plus sanding. Be realistic about your time and the number of days the kitchen will be out of commission.
Consider food contact. A fully cured coating may still not be intended for direct food contact. Read the label carefully, and treat the surface like a protected countertop rather than a cutting board unless the manufacturer states otherwise.
Key features and what a kit should include
- Complete system. Cleaner or deglosser, primer or bonding layer, color or effect coat, topcoat or sealer, and application tools.
- Clear instructions. Look for step-by-step guidance with temperature ranges, dry times between coats and full cure times.
- Coverage rating. Compare the area the kit covers with your measurement and buy extra if you have a large island or a thick edge.
- UV stability. Particularly important for epoxy near bright windows, where clear coats can yellow.
- Heat and stain guidance. The maker should state what temperatures the surface can handle and what chemicals to avoid.
- Safety information. Look for a safety data sheet and clear statements about ventilation, respirators and skin protection.
Measuring and planning
Measure the length and depth of each countertop section, including islands and peninsulas, and calculate total area. Add the front edges and any backsplash you plan to coat. Compare the total with the kit’s stated coverage, leaving a margin for sanding, spills and the second coat. For complicated layouts or deep textures, consider a second kit rather than stretching one thin.
Plan a temporary kitchen. The sink and cooktop may be unusable for several days, so set up a small area elsewhere with a kettle, microwave and paper plates, and plan meals accordingly. Turn off the dishwasher if it vents near the counters, and make a plan for children and pets.
Plan the sink, faucet and appliances. Some projects can be done with the sink in place by masking and taping carefully, while others look better if the faucet is disconnected and lifted away. Do not disconnect plumbing or gas without knowing how, and shut off water supplies at the valves before any work on fittings.
Prep and application overview
Preparation decides the outcome. Clear the counters completely and remove small appliances. Clean with a strong degreaser and rinse thoroughly, because kitchen counters hold grease, wax and polish residue that stop coatings from bonding. Repair chips, gouges and lifting edges with a suitable filler or adhesive and sand them flush. Sand the entire surface to dull the gloss and give the primer something to hold, wipe off the dust with a damp cloth, vacuum and let it dry.
Mask the walls, cabinet faces and sink edge, and cover the floor. Seal the gap between counter and wall with a paintable caulk if the instructions say so. Then follow the system’s order exactly. For a paint-based kit, that usually means primer, one or more color coats, an effect layer, and a protective clear coat applied in thin, even passes with the specified roller or sponge. Do not shortcut drying times between coats.
For epoxy, measure resin and hardener precisely in the stated ratio, mix thoroughly while scraping the sides and bottom of the container, then pour and spread within the working time. Pop surface bubbles with a method recommended by the maker and keep dust off the wet surface with a loose cover held above it. Do not touch it while it cures.
For a cement overlay, apply thin coats with a trowel, sand between layers once cured, and finish with a penetrating or film-forming sealer made for kitchens. Expect a hand-worked finish with natural variation.
Curing and care
A coating can feel dry long before it is cured. Follow the label for light use and full cure, which can mean a few days for light use and a couple of weeks or more before it reaches full hardness. Until then, avoid placing heavy items, sliding appliances, water pooling, and cleaning with anything stronger than a soft damp cloth.
Once cured, use cutting boards, trivets and hot pads. Do not set hot pans or slow cookers directly on the surface, since heat can soften, mark or discolor resurfaced counters. Wipe spills quickly, especially acidic ones such as citrus, vinegar and wine, and clean with mild soap and water. Avoid abrasive powders, scouring pads and harsh solvents. Re-seal cement overlays as the sealer maker recommends, and keep a small amount of leftover material for spot repairs. Place felt pads under small appliances and heavy items so they do not scratch.
Safety and food-surface notes
- Ventilation. Open windows, run exhaust fans and use fans that move air outdoors. Epoxy, primers and solvent-based sealers release vapors that can irritate eyes, nose and throat, and they should not be breathed for extended periods.
- Respirators. Use a respirator with organic vapor cartridges for epoxy and solvent-based products, and a dust respirator for sanding. A basic paper dust mask does not stop vapors. Make sure the respirator fits the face closely.
- Skin and eyes. Wear chemical-resistant gloves, eye protection and long sleeves when mixing resin, as uncured epoxy can cause skin sensitization with repeated contact. Wash skin with soap and water, and do not use solvents on skin.
- Lead and old finishes. If the kitchen is old, do not dry-sand unknown old paint on walls or cabinets nearby. Test it for lead first.
- Heat. Resurfaced counters are not as heat-resistant as stone or quartz. Treat them as vulnerable to hot cookware.
- Food contact. Do not assume a cured coating is food safe. Read the manufacturer’s statement, use cutting boards for food preparation and treat the counter as a work surface only.
- Kids, pets and others. Keep people and animals away from the work area and out of the home during heavy fume periods where practical, and keep products locked away from children.
- Fire and disposal. Keep ignition sources and pilot lights away from solvent vapors, avoid piling up rags that have soaked up certain oils or solvents, and dispose of leftover product as local rules direct.
Common mistakes
- Coating a damaged substrate. Swollen or lifting laminate will keep failing.
- Skimping on cleaning. Residual grease and polish cause peeling.
- Skipping sanding. Without it, a smooth old surface offers little bond.
- Rushing between coats. Trapped solvent leaves a soft, tacky finish.
- Measuring epoxy by eye. Wrong ratios can leave a permanently sticky surface.
- Setting hot pans on it. Always use trivets.
Who should choose what
Budget-minded owners with sound laminate are the best candidates for paint-based kits, provided they accept careful care.
Owners who want a glossy, high-impact look can consider epoxy if they can ventilate well and work cleanly.
Fans of industrial style may enjoy a cement overlay, if they are patient with many steps and sealing.
Renters and short-term occupants are generally better served by adhesive film or by covering counters temporarily, after checking the lease.
Heavy cooks and families with a rough-and-tumble kitchen should think about whether resurfacing will meet expectations or whether new counters are a better long-term investment.
People with damaged or crumbling counters should repair or replace the substrate rather than coat it.
Project checklist
- Inspect the counter for lifting, swelling and damaged seams, and repair or abandon the plan if the core is damaged.
- Read the kit’s instructions fully before buying anything else.
- Measure the counter area and compare it with the stated coverage.
- Buy a respirator, gloves and eye protection suited to the product.
- Set up a temporary kitchen and clear the counters.
- Degrease, rinse and sand the entire surface.
- Fill chips and seams and sand them flush.
- Mask walls, cabinets, sink and floor.
- Apply each layer in order, respecting dry times.
- Keep the room ventilated through curing.
- Wait for the full cure time before regular use.
Supplies that may help include a countertop refinishing kit, an epoxy countertop kit, an orbital sander and a respirator with organic vapor cartridges.
Frequently asked questions
Do countertop resurfacing kits really work?
They can, when the surface is sound and the instructions are followed closely. The finish is a coating rather than a new slab, so expect it to be less durable than replacement counters.
Can I resurface laminate countertops?
Yes, laminate is the most common surface for DIY kits. It must be well bonded, clean and sanded, and any chips or lifting corners should be repaired first.
How long does a resurfacing kit take to cure?
Time varies by product. Many surfaces can take light use within a few days but need a couple of weeks or more to fully harden. Use the manufacturer’s schedule as a minimum.
Are resurfaced countertops food safe?
Do not assume so. Read the label for food-contact statements. Even if a coating is rated for food contact, use cutting boards and avoid cutting directly on the surface.
Can I put hot pans on a resurfaced counter?
Avoid it. Most coatings tolerate far less heat than stone or quartz, and heat can soften, mark or discolor them. Always use trivets.
Is epoxy better than paint kits?
Epoxy makes a thicker, glossier surface but is less forgiving and has stronger fumes. Paint kits are easier but thinner. The better choice depends on skill, ventilation and the look you want.
Can I resurface over tile?
Sometimes. The grout lines must be filled or skimmed so they do not show through. A cement overlay is often used for this, but results depend on how flat and well bonded the tile is.
How do I repair a chip in a resurfaced counter?
Clean the area, lightly sand the edges, fill the chip with the maker’s recommended filler or leftover material, blend the color and re-seal with the clear coat. Small repairs are easier than coating the whole counter again.
Conclusion
The best countertop resurfacing kits are the ones that match your existing surface, your skill and your kitchen habits. Paint-based kits are the practical starting point for sound laminate, epoxy offers a dramatic result for people who can manage fumes and mixing, and cement overlays reward patience with a distinctive texture. None of them turns an old counter into solid stone, so plan on trivets, cutting boards and gentle cleaning.
Check the substrate, prepare it thoroughly, follow the system step by step, protect yourself from fumes and dust, and give the finish its full cure. Done carefully, resurfacing can refresh a kitchen at a fraction of the effort of replacement.
Disclosure: As an Amazon Associate, diyideas4home.com may earn from qualifying purchases made through links on this page, at no extra cost to you.
More from Amazon
Programs that pair well with the guide above. Offers and eligibility are set by Amazon and may change.
A free business account with business pricing and bulk-buying tools for work, shop or home office.
Create a business accountFree shipping on eligible items, Prime Video and more. Eligible new members can start with a free trial.
Start a Prime free trialAudiobooks and podcasts to listen to on the go. Eligible new members can start with a free trial.
Try Audible freeAd-free music streaming. Eligible new subscribers can start with a free trial.
Try Music Unlimited freeAs an Amazon Associate we earn from qualifying purchases.
