Key takeaways
- 2mm – 3mm polyethylene (PE) netting: Common on youth and budget goals. Usually lasts 1-2 seasons with puck use before fraying at the posts. Best for foam or plastic balls.
- 3mm – 4mm braided nylon or polyester with UV coating: Standard for mid-range to regulation goals. Resists abrasion from pucks and sun-fading for 3-5 seasons. Knots stay tight and absorb impact better.
- 5mm braided nylon, knotless or double-stitched: Found on pro-style goals. Heaviest and most abrasion-resistant; designed for repeated slap shots and goalie training.
The best hockey goals for backyard practice balance regulation proportions for realistic shooting, a steel or heavy-gauge metal frame for outdoor durability, and a size that fits your available flat space with at least 10 to 15 feet of shooting distance in front.
For most families, a 54-inch wide by 44-inch tall street hockey goal hits the sweet spot between authentic practice and backyard practicality, while serious players who want NHL-regulation training should plan for a full 72-inch wide by 48-inch tall by 40-inch deep goal and the larger footprint it requires. Your choice ultimately comes down to who is shooting, what surface you have, and how often you need to move or store the goal.
Our top picks


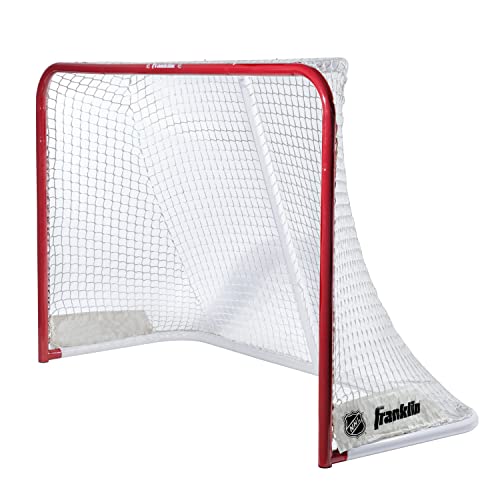

As an Amazon Associate we earn from qualifying purchases at no extra cost to you. Ratings are shown as listed on Amazon.
How to Choose the Right Size Goal
Hockey goals are not one-size-fits-all. Width, height, and depth affect shooting angle practice, goaltending training, and how much yard space you need to use the goal safely.
| Goal Category | Opening (W x H) | Depth at Base | Best For | Minimum Safe Space Needed (W x D) |
|---|---|---|---|---|
| Regulation / Official | 72″ x 48″ (6′ x 4′) | 40″ – 44″ | Teens, adults, goalie training | 12′ x 18′ (goal + 10-12′ shooting lane + 3′ clearance behind) |
| Mid-Size Training | 54″ x 44″ (4.5′ x 3.7′) | 32″ – 36″ | Most backyards, youth to adult practice | 10′ x 16′ (goal + 8-10′ shooting lane + 2′ clearance behind) |
| Youth / Street | 48″ x 36″ (4′ x 3′) | 24″ – 30″ | Kids under 10, small driveways | 8′ x 14′ (goal + 6-8′ shooting lane) |
| Mini / Knee Hockey | 32″ x 24″ – 36″ x 24″ | 18″ – 24″ | Toddlers, indoor/basement use | 6′ x 10′ |
The minimum safe space matters more than the goal’s footprint. A puck or ball rebounding off a post can travel several feet, so leave at least 3 feet of open space behind the goal and 2 feet on each side to avoid fence damage and to allow netting to flex. In front, you need a flat run-up of 10 to 15 feet for a realistic wrist shot or slap shot practice. That means a regulation goal needs a flat area roughly the size of a 12×18 ft patio or a two-car driveway section, while a mid-size goal fits comfortably on a 10×16 ft concrete pad.
If you are practicing on grass, add 2 extra feet of depth in front of the crease because shooters will naturally stand farther back to keep footing. On concrete, asphalt, or sport tiles, you can shoot closer and work on quick-release shots.
Regulation vs. Practice Proportions
A true regulation goal uses a 72″ x 48″ opening with a 40-inch deep base and curved posts that taper. This is essential if you are training a goalie, because angles, post lean, and coverage are different than on a square-box street goal. For shooters only, a mid-size goal with the same 4:3 width-to-height proportion still trains accuracy without dominating the yard. Avoid ultra-narrow practice targets under 40 inches wide for beginners, they encourage aiming for the center of the net rather than corners.
Frame Materials Compared
The frame determines weight, rust resistance, and whether the goal stays put when hit with a puck.
| Material | Typical Weight | Durability Outdoors | Portability | Trade-Off |
|---|---|---|---|---|
| 1.5″ – 2″ Steel Tubing (powder-coated) | 35 – 55 lbs (regulation) | Excellent; resists puck impact and warping | Low; needs two people to move, often folds flat but heavy | Most durable and stable, can rust at welds if coating chips |
| 1″ – 1.25″ Light Steel / Alloy | 22 – 32 lbs (mid-size) | Good; handles balls and street pucks | Moderate; one person can carry and fold | Best balance for families, may dent with heavy slap shots |
| PVC / Plastic Tubing | 10 – 18 lbs | Poor for pucks; good for foam balls only | Very high; tool-free assembly | Lightest and cheapest, cracks in sun/cold and moves on impact |
For backyard use with real street hockey pucks or green biscuits, avoid PVC. Powder-coated steel with welded corners and bolted crossbars will last 5 to 10 seasons outdoors if stored under cover in winter. Look for goals with interior steel backing bars and reinforced bottom rails, these prevent the frame from bowing when the net is tensioned tightly. If you live in a humid or coastal climate, check that the tubing has capped ends and that weld points are sealed, as moisture entry causes rust from the inside.
Net Durability: What Actually Fails First
Frames rarely fail before nets do. Net wear is determined by twine thickness, knot type, and UV treatment.
- 2mm – 3mm polyethylene (PE) netting: Common on youth and budget goals. Usually lasts 1-2 seasons with puck use before fraying at the posts. Best for foam or plastic balls.
- 3mm – 4mm braided nylon or polyester with UV coating: Standard for mid-range to regulation goals. Resists abrasion from pucks and sun-fading for 3-5 seasons. Knots stay tight and absorb impact better.
- 5mm braided nylon, knotless or double-stitched: Found on pro-style goals. Heaviest and most abrasion-resistant; designed for repeated slap shots and goalie training.
The first wear points are always the same: where the net wraps around the top corners, along the bottom rail where pucks drag, and at the Velcro or hook attachment points. Goals that use metal D-rings or bungee loops instead of thin Velcro straps hold tension longer and are easier to replace. A replaceable net, usually $25 to $70 depending on size and thickness, is far cheaper than replacing the entire goal, so confirm the model sells replacement nets separately before you buy.
Portability and Storage Realities
Backyard goals live outside but rarely stay in one place. Consider how you will move and store it.
- Folding vs. Fixed: Folding goals with hinged posts collapse to 4 to 6 inches thick and can slide against a garage wall or fence. Fixed welded goals are more rigid but require full garage floor space. A 72-inch regulation steel goal folded flat measures about 72″ x 48″ x 6″ and will not fit through a standard 32-inch interior doorway without tilting.
- Box Weight and Assembly: Expect a shipping box of 38 to 52 lbs for a regulation steel goal and 24 to 36 lbs for a mid-size goal. Assembly typically takes 30 to 45 minutes with two people, a wrench, and included Allen keys. PVC goals assemble in 10 to 15 minutes with no tools.
- Anchoring: Light goals under 25 lbs will slide on concrete when hit. Use sandbags on the bottom rail or ground anchors on grass. Heavy steel goals over 35 lbs usually stay put without anchoring for ball and street puck use.
Outdoor Surface Space and Placement
Your surface dictates which goal works best and how long it lasts.
- Concrete or Asphalt Driveway: Ideal for shooting accuracy. Provides true puck glide and bounce. Place the goal with the back 3 feet from any garage door, car, or window. Add a backstop net or use the garage wall as a buffer if space is tight, but leave a 6-inch gap to prevent net abrasion against brick or siding.
- Grass or Lawn: Softest on pucks and joints, but uneven ground makes lightweight goals wobble. Level the area and use ground stakes. Expect more net contact with soil and faster bottom-edge wear. Mow low around the crease to keep footing consistent.
- Sport Tiles or Roller Hockey Rink: Best for puck control. Make sure the goal has flat bottom rails with rubber feet to protect tiles. A 12×20 ft tile area is enough for a mid-size goal plus shooting lane; 16×24 ft is better for regulation.
If your yard slopes even 2 to 3 degrees, position the goal at the high end so pucks roll back toward the shooter rather than away. For year-round use, store steel goals under a tarp or in a shed during snow months to prevent coating cracks from freeze-thaw cycles.
Decision Matrix: Which Goal Fits Your Situation
| Your Situation | Recommended Goal Type | Why |
|---|---|---|
| Small driveway or patio (under 12′ wide), kids ages 5-11 | 48″ x 36″ steel street goal | Fits tight space, light enough for parents to move, low cost usually $80–$180 |
| Average suburban yard, mixed kids and adults, balls and pucks | 54″ x 44″ mid-size steel goal with 3mm+ nylon net | Proportional training, handles real pucks, needs only 10×16 ft flat area, usually $120–$250 |
| Serious shooter or goalie training, age 13+ | 72″ x 48″ regulation steel goal, 4mm+ braided net | True angles and coverage, stable for hard shots, usually $180–$400 |
| Renter or needs daily storage | Folding light-steel mid-size goal | Collapses flat, one-person carry, no ground anchors needed on hard surface |
| Multi-sport family, mostly foam balls / no pucks | PVC or light alloy goal | Cheapest and lightest, easy for kids to set up, but not puck-rated |
Brands and Specs to Look For
Established hockey brands that regularly produce backyard goals include Franklin Sports, Bauer, Warrior, and Winwell. Rather than chasing a specific model year, check the spec sheet for these non-negotiables in 2026: 1.25-inch minimum steel tubing for puck use, 3mm or thicker UV-treated braided nylon net, steel or aluminum corner brackets rather than plastic connectors, and a 1-year or longer warranty on frame and net sold separately. Goals that meet these specs typically fall in the $120 to $300 range for mid-size and $200 to $400 for regulation steel, excluding backstop nets and shooting pads.
Assembly, Moving and Long-Term Durability Tips
Longevity depends less on brand and more on setup. Tighten all bolts after the first week of use as the net stretches and settles. Replace Velcro straps with zip ties or bungee cords if they loosen. Hose off pollen and dirt monthly and let the net dry before folding to prevent mildew. If the powder coating chips, touch up with rust-inhibiting paint to stop spread. Most quality nets need replacement every 2 to 4 seasons with regular puck use; frames often last twice that long.
FAQ
Can I use a street hockey goal on ice?
Yes, if it is heavy steel and has flat bottom rails. Light PVC goals will crack in cold and slide on ice. Remove rubber feet before placing on ice to prevent slipping, and do not leave steel goals on ice overnight as frozen-in rails can bend when removed.
Do I need a backstop behind the goal?
If you have less than 5 feet behind the goal to a fence, wall, or neighbor’s yard, yes. A simple 10×10 ft sports net or high-density mesh backstop catches high shots and protects property. It also extends net life by reducing direct impact tension.
What puck should I use with a backyard goal?
For concrete or asphalt, use a street hockey puck or green biscuit designed for rough surfaces, standard ice pucks chip and bounce unpredictably. For sport tiles, a standard puck or roller puck works. For grass, use a street ball or felt puck to prevent turf damage.