
Our Top Picks
 DYMO LetraTag 100H Silver Handheld Label Maker &3.15 x 4.75 x 10.25 inches0.88 poundsCheck on Amazon
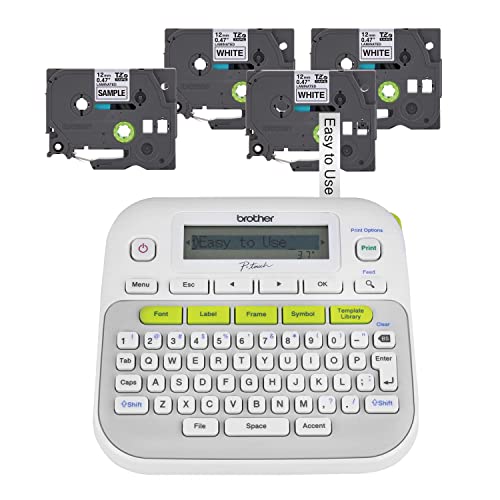
The short answer: the best label maker is the one that matches how many labels you will print and where they will live. For a handful of pantry jars, bins and cables, a compact handheld unit with a keyboard is plenty. For a whole-house overhaul, a Bluetooth or desktop thermal printer that works from a phone or computer saves time on fonts, icons and repeated text. What matters more than the brand is tape availability, print quality on the surface you are labeling, the way the machine is powered, and whether the label will still be readable and stuck down a year from now.
Labels turn a tidy-looking room into one that stays tidy, because everybody can see where things go. They are also an easy purchase to regret: tape that peels off a textured bin, a printer that needs a smartphone app you do not like, or a machine that eats expensive cartridges. This guide does not rank products or claim hands-on test results. It explains the types, the tape and label options, what to check, and how to label safely around food, medicines and household chemicals.
Contents
- Types of label makers
- Comparison table
- Tape, ink and label materials
- Features that matter
- Power, size and portability
- Where labels earn their keep
- Safety and labeling cautions
- Buyer checklist
- Mistakes to avoid
- FAQ
- Bottom line
Types of label makers
Handheld keyboard label makers
These are the familiar pocket-sized machines with a small screen, a keyboard and a cutter. You type, preview, print and snip. They are quick for a few labels, they need no app or computer, and they are good for people who do not want another account to create. The trade-off is limited editing: you may not see a full preview, fonts are modest, and typing long lists is tedious on a small keypad.
Look at screen size, whether you can save frequently used text, and how the cutter behaves. A handheld label maker is the usual starting point for a first organizing project.
Bluetooth and app-driven label makers
These small printers pair with a phone or tablet. You design on a bigger screen, pick icons and fonts, and print many labels at once. The advantages are speed and design freedom, plus the ability to reuse templates. The drawbacks are a dependence on the app, which may change or be discontinued, and the need to keep phone software and the printer firmware compatible. Before buying, read current specifications and instructions about supported operating systems and whether basic printing works without an account.
Desktop and computer-connected label printers
Desktop units connect by cable or wireless and are aimed at bulk jobs: shipping, mailing, filing and storage boxes. They often take wider rolls and handle barcodes. If you run a small online shop or label a lot of archive boxes, this class can be worth it. For a household that just wants neat shelves, it is often more than needed.
Thermal versus thermal transfer
Direct thermal printers heat special paper to darken it, so there is no ink or ribbon to replace. The paper can fade with heat, sunlight and time, which matters for labels on a garage shelf or a car. Thermal transfer machines melt ink from a ribbon onto the label and generally suit long-lasting uses, but they add a consumable. Many consumer machines use their own cartridge format, so check which approach the one you like uses and how many label styles are available for it.
Embossing and manual options
Mechanical embossers punch raised letters into plastic tape. They need no power, they last, and some people like the retro look. They are slow, the letters can be hard to read on dark tape, and the choice of tape is limited.
Comparison table
The table compares categories in general terms. Always check the specifications and instructions on any current listing.
| Type | Best for | Strength | Trade-off |
|---|---|---|---|
| Handheld keyboard | Pantry, cables, small projects | Simple, no app needed | Limited preview and editing |
| Bluetooth app-driven | Whole-home projects, repeat labels | Easy design, many fonts and icons | Relies on app and phone support |
| Desktop printer | Shipping, archives, bulk jobs | Wide rolls, speed, barcodes | Larger, costlier, more than most homes need |
| Direct thermal | Short-term or indoor labels | No ink or ribbon | Can fade with heat or sunlight |
| Thermal transfer | Long-lasting labels | Durable print | Ribbon or cartridge consumable |
| Embosser | Light, occasional use | No power, sturdy | Slow, limited readability |
Tape, ink and label materials
Over time, the cost and usefulness of a label maker are driven by its consumables. A cheap machine with pricey, hard-to-find tape is a poor deal, so consider supply before you commit.
Laminated tape. A clear film protects the print from scratches, moisture and cleaning. It is a common pick for kitchens, bathrooms, tool chests and garages. It tends to be thicker and a little stiffer, which can matter on a tight curve.
Non-laminated tape. Thinner and often cheaper, it suits dry indoor use, such as files and drawers.
Flexible tape. Designed to wrap around cables and cords without lifting. If you plan to label chargers, look for tape described as flexible or for cable wrapping.
Strong or extra-adhesive tape. Intended for rough or textured surfaces such as some plastic bins and painted walls. It can be hard to remove, so test it somewhere hidden first.
Removable and repositionable labels. Good for items you rearrange, such as school folders and freezer containers. They may not stay on in damp or cold conditions.
Specialty options. Some systems offer iron-on fabric labels, heat-shrink sleeves, cloth ribbon for clothing and wall-mount tags. Check that the label type you want exists for the specific model before buying.
Width and colour options also matter. Wider tape holds more text; narrow tape is neater on jars. A choice of colours helps you code categories, for example one colour for tools and another for crafts. For general guidance, stock a few common colours and widths rather than every option. You can browse label maker tape refills to see how widely a given format is supported.
Features that matter
Print quality and readability
Look for clear, crisp letters at the sizes you will actually use. Small text on narrow tape can be hard to read at arm’s length, and a fancy font can reduce legibility. For labels at eye level on high shelves, choose bigger type and high contrast.
Keyboard, screen and preview
A backlit or larger screen helps if you label in dim cupboards. A preview avoids wasted tape. Check that the keys are comfortable and that you can add symbols, since arrows and simple icons make labels quicker to read.
Cutter and waste
Some machines print a blank margin before every label, which wastes tape. Look for a feature that trims the leader or lets you chain several labels before cutting. A clean cut matters if you hate peeling a jagged edge.
Memory, templates and symbols
If you will print the same phrases again, saved text and templates are a time saver. Apps often handle this best, but some handheld units also store frequently used labels.
Barcodes and QR codes
Useful for storage boxes with a digital inventory. If you want one, confirm the model supports it and test that your phone camera can scan the printed code before labeling dozens of boxes.
Compatibility and updates
For smartphone models, read the product page to check the supported operating system and whether the manufacturer maintains the app. A label maker that depends on software has a shorter useful life if the software is abandoned.
Power, size and portability
Label makers are powered by batteries, a rechargeable pack, a wall adapter or a combination. Each has trade-offs. Disposable batteries can run down at awkward times, and a unit left with batteries inside can leak, so remove them if you are putting the machine away for months. Rechargeable units are convenient, but a battery that cannot be replaced limits the life of the product. Wall adapters are reliable at a desk but awkward in the garage.
Think about how you will use it. If you label while moving around the house, a small, light device that fits in one hand is better. If it lives on a desk, size matters less. Where the unit has a lithium battery, follow the maker’s charging directions, do not charge it unattended on soft furnishings, and stop using it if the battery swells or gets unusually hot.
Where labels earn their keep
Pantry and kitchen. Labels on jars and bins show what is inside and, if you decant dry goods, can record the use-by details copied from the original package. A set of pantry label sheets can complement a printer if you prefer a handwritten look.
Freezer and fridge. Use removable or freezer-friendly labels, and choose ones designed for cold, damp surfaces. Standard tape often lifts in the freezer.
Office and cables. Cable flags help you identify chargers, and file labels tidy drawers. Label both ends of a cable if you can.
Garage and workshop. Use laminated, strong-adhesive labels on bins and drawers, and avoid direct thermal paper in hot spaces.
Kids’ rooms. Use pictures with words for young children, and avoid sticking labels anywhere that small hands can pick them off and put them in a mouth.
Moving and storage boxes. Print the room and a short contents list, and put labels on the side as well as the top so they remain visible when stacked.
Safety and labeling cautions
- Never cover or replace safety markings. Leave the original warnings, instructions, expiry details and hazard symbols visible on household chemicals, fuels and medicines. A homemade label should be an addition, not a substitute.
- Do not decant hazardous products without proper labeling. If you transfer a cleaning product to another container, follow the manufacturer’s guidance, copy the product name and warnings clearly and keep it out of reach of children. Avoid using food or drink containers for chemicals.
- Be careful with medicines. Do not relabel or move prescription medicines in a way that hides dosing instructions. Ask a pharmacist if you want help organizing them.
- Allergens. If you share a kitchen with someone who has an allergy, label containers clearly, but do not rely on a homemade label as the only safeguard. Check original packaging.
- Surface damage. Strong adhesive can lift paint or leave residue. Test in a discreet place and check current specifications and instructions for removal advice.
- Batteries and heat. Follow maker directions for battery type and charging. Keep the unit away from heaters and direct sun.
- Small parts. Tape offcuts, backing paper and button batteries are hazards for small children and pets. Dispose of scraps promptly and store the machine out of reach.
- Blades. The cutter is a blade. Keep fingers clear and store the unit out of the reach of children.
Buyer checklist
- Estimated how many labels you will print in the first month and over a year.
- Decided whether you want a keyboard unit, an app-driven one, or a desktop printer.
- Checked that tape in the widths and colours you want is readily available for that model.
- Compared the cost of replacement tape or cartridges, not just the machine.
- Confirmed the tape type suits your surfaces: laminated, flexible, strong or removable.
- Checked the power options and whether batteries are replaceable.
- Read the app’s supported devices and whether you can print without an account.
- Looked at print resolution, text size and preview options.
- Checked the cutter, margins and tape waste.
- Considered how heat, damp and sunlight will treat the labels where they will live.
- Read current specifications and instructions and the return policy.
Mistakes to avoid
Buying the machine without checking the tape. A model with scarce refills becomes useless when the first cartridge runs out. Look at the range of tape first.
Labeling before decluttering. Printing labels for things you do not need makes the clutter permanent. Sort first, then label what remains.
Using direct thermal labels in hot places. Labels left in a hot car or a sunny garage may darken or fade. Choose a more durable type for those spots.
Applying labels to dirty or damp surfaces. Adhesive needs a clean, dry, room-temperature surface. Wipe first and let it dry fully.
Choosing tiny text. If the label cannot be read from the distance you stand at, it is decoration. Increase the size or shorten the words.
Ignoring category colours and consistency. A mix of random styles looks messy. Choose a simple system, such as one colour per zone, and stick with it.
Over-labeling. Not every drawer needs a label. Focus on shared, hard-to-guess or rarely used items.
FAQ
1. Do I need a Bluetooth label maker, or is a basic one enough?
If you only label a few items, a basic handheld is enough. Choose a Bluetooth model for large projects, repeating labels or when you want better design control.
2. Will labels stay on in the freezer?
Not all will. Use labels intended for cold and damp surfaces and apply them to a clean, dry container before it goes in. Check the maker’s instructions.
3. Can I remove labels without leaving residue?
It depends on the adhesive and the surface. Warming the label gently and peeling slowly often helps. For strong adhesives, test removal in a hidden area first and follow any guidance from the maker.
4. How do I choose tape width?
Match the width to the text and the surface. Narrow tape is neat on jars and cables, while wider tape suits boxes and shelf edges. Check which widths your model supports.
5. Are label makers waterproof?
Output varies. Laminated tape is generally more resistant to moisture and scratches, but you should check the specifications on the particular product before relying on it in wet areas.
6. Can I label medicine bottles?
Do not cover or alter the pharmacy label or dosing instructions. If you need help organizing medicines, ask a pharmacist, and keep them away from children.
7. What if the app stops working?
That is a risk with app-dependent models. Check for a model that prints without the app, and see whether the manufacturer clearly supports it.
8. How do I make labels last longer?
Choose laminated or transfer print for tough spots, clean the surface, press firmly, give the adhesive time to set and avoid heat and direct sun.
Bottom line
Pick a label maker for the job in front of you: a simple handheld for small tasks, an app-driven printer for bigger projects, and a desktop model only if you print in bulk. Look closely at tape, power and surfaces, and keep safety markings intact. When you are ready, compare label makers against the checklist above, and check current specifications and instructions before you order.
Disclosure: As an Amazon Associate, we earn from qualifying purchases. Links marked as sponsored may earn us a commission at no extra cost to you.
More from Amazon
Programs that pair well with the guide above. Offers and eligibility are set by Amazon and may change.
A free business account with business pricing and bulk-buying tools for work, shop or home office.
Create a business accountFree shipping on eligible items, Prime Video and more. Eligible new members can start with a free trial.
Start a Prime free trialAudiobooks and podcasts to listen to on the go. Eligible new members can start with a free trial.
Try Audible freeAd-free music streaming. Eligible new subscribers can start with a free trial.
Try Music Unlimited freeAs an Amazon Associate we earn from qualifying purchases.
