Key takeaways
- Always cut pegboard with the finished (face) side up when using a circular saw, since the blade enters from that direction and minimizes chip-out on the visible surface.
- Replace blades frequently — dull teeth are the number-one cause of rough edges on MDF and hardboard products.
- Label your cut pieces with masking tape and a marker before separating them from the sheet; it saves hours of confusion when you’re assembling a multi-panel tool wall.
- Run a fine-grit sanding block (220 grit) along the fresh cut edge to knock down any remaining fuzz — it takes ten seconds and makes the panel look factory-cut.
What's inside
Pegboard is one of those workshop materials that looks simple until you actually try to cut it. The pre-drilled holes grab blade teeth, thin edges chip out fast, and a sloppy cut ruins the whole panel. Whether you’re building a custom tool wall, sizing a sheet for a closet organizer, or trimming a piece to fit behind a workbench, the method you choose makes a massive difference in both accuracy and finish quality.
In this guide I’ll walk you through the best cutting approaches for pegboard depending on your tools, budget, and the size of the job. You’ll learn which saws deliver the cleanest edge, how to prevent blowout around those signature holes, and a few tricks that separate a pro-looking result from a frustrated trip to the hardware store. I’ll also recommend specific tools that handle pegboard (and similar thin panel materials) particularly well.
As an Amazon Associate we earn from qualifying purchases.


🛒 Best Price Today on Amazon
Prime members get fast, free shipping on everything above, plus member-only deals. New members get a 30-day free trial — cancel anytime.
Choose the Right Blade Before You Make a Single Cut
Pegboard is typically hardboard or MDF, roughly 1/8 to 1/4 inch thick. That means a high tooth count matters more than raw power. Look for a blade with at least 60 teeth on a circular saw or 18+ teeth per inch on a hand saw. Fine-tooth blades slice through the fiber structure instead of ripping chunks out of it, which is exactly where chip-out starts. A carbide-tipped blade lasts noticeably longer on abrasive MDF than plain steel. If you’re using a jigsaw, switch to a T-shank scroll-cutting blade — the short, narrow profile lets you follow a line without wandering, and the fine teeth leave a surprisingly smooth edge.
Score Your Cut Line First to Eliminate Blowout
This is the single most important habit for clean pegboard cuts. Clamp a straightedge along your marked line and run a utility knife across the surface two or three times with firm pressure. That scored groove gives your saw blade a path to follow and, more critically, severs the surface fibers before the blade tears into them. The result is a crisp edge on the visible face with almost no chipping. For curved cuts, trace the line with the knife first, then follow it slowly with a jigsaw. You can also stick painter’s tape over the cut line and mark on the tape — the adhesive holds the fibers down while you cut, acting as a sacrificial layer.
Match Your Tool to the Cut
Straight rip cuts across a full 4×8 sheet call for a track saw or a circular saw with a clamped straightedge guide. The SEESII Mini Circular Saw works well here for smaller panels — its compact size and laser guide give you control that a full-size saw sometimes lacks on thin, flexible material. For crosscuts and shorter straight lines, a laminate floor cutter like the 13-In Laminate Floor Cutter handles pegboard effortlessly. You line it up, press down, and get a clean shear cut with zero dust. It’s fast, quiet, and doesn’t require electricity. The 8-In-1 Multi Blades Hand Saw is a solid manual backup — its quick-change mechanism lets you swap to a fine-tooth blade in seconds, and the lightweight frame keeps fatigue low on longer cuts. Curved or irregular shapes are best handled with a jigsaw or multi-tool. The Multi-Cut 401 handles softer pegboard and thin hardboard but isn’t designed for compressed wood or hardwood, so check your material thickness before relying on it.
Support the Panel to Prevent Vibration
Pegboard is thin and flexible, which means it vibrates and bounces under a saw blade. That vibration is the root cause of rough edges and wandering cut lines. Lay the sheet flat on a stable surface with rigid foam insulation board underneath — the foam supports the pegboard right up to the cut line while letting the blade pass through without hitting your workbench. If you’re cutting a smaller piece, clamp it between two sacrificial boards. Never let a pegboard panel hang unsupported past the edge of your table; the flex will cause the blade to pinch, which is both a safety risk and a guaranteed ugly cut.
Dealing with Tight Spaces and Trims
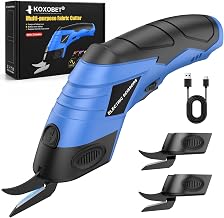
Sometimes you need to notch a pegboard panel to fit around an electrical box, shelf bracket, or door frame. For those detail cuts, a rotary tool with a cutting disc or an oscillating multi-tool gives you surgical precision. Fanttik cordless cutting tools and similar compact shears handle fabric and thin sheet goods well but aren’t the right choice for rigid pegboard — stick with a powered blade tool for these jobs. Mark your notch carefully, drill a relief hole at the inside corner so the blade has room to turn, and cut to the line slowly.
Tips
- Always cut pegboard with the finished (face) side up when using a circular saw, since the blade enters from that direction and minimizes chip-out on the visible surface.
- Replace blades frequently — dull teeth are the number-one cause of rough edges on MDF and hardboard products.
- Label your cut pieces with masking tape and a marker before separating them from the sheet; it saves hours of confusion when you’re assembling a multi-panel tool wall.
- Run a fine-grit sanding block (220 grit) along the fresh cut edge to knock down any remaining fuzz — it takes ten seconds and makes the panel look factory-cut.
Frequently Asked Questions
Can I cut pegboard with regular scissors?
Standard household scissors won’t cut pegboard cleanly — the material is too rigid and will crush rather than shear. Heavy-duty tin snips can work on very thin 1/8-inch hardboard pegboard for small notches, but for any straight or long cut you’ll get far better results with a saw or a dedicated cutting tool.
What’s the best saw for a full-sheet straight cut?
A track saw or a circular saw with a clamped straightedge guide is the gold standard. The track keeps the blade perfectly on line across the entire 8-foot span, and with the right blade you’ll get a furniture-grade edge. If you don’t own a track saw, a long level or aluminum ruler clamped to the panel works as a reliable alternative.
How do I keep pegboard from cracking at the holes?
Cracking usually happens when a blade catches the edge of a pre-drilled hole mid-cut. Scoring your line first prevents this by creating a clean channel the blade follows. Keeping the blade sharp and cutting at a steady, moderate feed rate also helps — rushing the cut is what causes the blade to snag on hole edges.
Is it worth renting a saw for a one-time pegboard project?
If you’re cutting a single sheet or less, a manual tool like a fine-tooth hand saw or a laminate floor cutter will handle the job without the cost of a rental. Renting makes sense if you’re tackling multiple large panels or also need to cut thicker lumber for the same project. Many tool rental shops carry track saws specifically, which are expensive to buy but inexpensive to rent for a weekend.
Conclusion
Cutting pegboard cleanly comes down to three fundamentals: a sharp fine-tooth blade, a scored cut line, and solid panel support. Get those right and pegboard stops being a frustrating material to work with — it becomes the fast, affordable organizer backbone it’s meant to be. Pick the tool that matches your cut type, take your time on setup, and you’ll end up with a tool wall that looks like it was built by someone who does this for a living.