If you want to know how to clean gutters, start from a stable working position: lift out leaves, clear the downspout, and run water through the system to confirm that it drains. For reachable single-story gutters, a scoop and hose may be enough. For gutters above a difficult landing, a ground-operated attachment or professional service is a better choice than stretching from a ladder. Cleaning removes the blockage, but it does not repair damaged hangers or leaking seams.
Quick Answer: Choose a dry day, inspect the ladder and ground, protect your eyes and hands, and remove the loose debris before flushing the gutter toward its outlet. Test the downspout separately if water backs up. Stop if you cannot maintain stable footing, if power lines are nearby, or if the roof edge shows signs of damage.
As an Amazon Associate we earn from qualifying purchases.
By DIY Ideas 4 Home Editorial Team
Before You Start: Tools, Materials and Safety
Home Depot’s gutter-cleaning guide, updated in 2024, estimates roughly 2 to 4 hours for a basic job, but that is not a promise for a particular house. Access, length, packed mud, and blocked downspouts can change the workload substantially. Gather the equipment first so there is no reason to climb down repeatedly for supplies or carry an awkward load up the ladder.
| Tool or Material | Size or Spec | Why You Need It | Substitute |
|---|---|---|---|
| Work gloves and eye protection | Cut-resistant work gloves; wraparound safety glasses | Protect from sharp flashing, grit and splashes | None for hand clearing |
| Gutter scoop | Narrow plastic head fitting your gutter channel | Lift wet leaves and compacted sediment | Small plastic garden trowel |
| Bucket and debris container | Secure ladder-compatible hanging bucket | Collect material instead of dropping it onto beds | Ground tarp with careful disposal |
| Garden hose and spray nozzle | Adjustable, moderate-pressure spray | Trace flow and rinse fine grit toward the outlet | Ground-operated hose attachment where compatible |
| Suitable ladder and stabilizer | Manufacturer-rated for user and gear; firm level placement | Safe positioning where ground access is impossible | Ground-access cleaning tool or professional service |
| Downspout clearing tool | Flexible drain auger suited to accessible outlet | Loosen a stubborn clog without prying at joints | Careful hose flushing after outlet inspection |
Set Up a Ladder Without Guessing
Start by inspecting the ladder’s rails, feet, locking mechanisms, and duty rating. CDC/NIOSH ladder-safety guidance, reviewed in 2024, advises setting an extension ladder at approximately 75 degrees and avoiding overreaching. OSHA’s construction ladder standard expresses a similar setup as positioning the base about one-quarter of the ladder’s working length from the support. That is useful positioning guidance, not permission to ignore the ladder maker’s instructions.
Place the ladder on solid, level ground, never on a box or loose landscaping stone. Maintain three points of contact when climbing, keep your body centered between the side rails while working, and reposition the ladder rather than leaning across another section of gutter. A gutter-edge ladder stabilizer can reduce pressure on thin metal channels if compatible with the ladder, but it cannot correct a slippery surface, inadequate reach, or an unstable ladder. Ask another adult to remain nearby and keep the surrounding work area clear.
Check for Wires, Weather and Sharp Edges
Look for overhead service wires before you bring out a ladder, pole, or blower tube. OSHA’s construction electrical-safety guidance specifies at least 10 feet of separation from overhead power lines. Treat this as a serious hazard indicator rather than an invitation to approach a wire that looks insulated: if maintaining clearance is uncertain, leave the work to a properly equipped professional and consult the utility.
Skip cleaning during rain, gusty winds, ice, or thunderstorms. Home Depot recommends letting gutter debris dry after wet weather when possible, which also reduces heavy mud sticking to your tools. Gloves are especially important around sheet-metal joints and exposed screws, while protective glasses keep dirty spray out of your eyes. Do not walk on a wet roof to reach a corner from above.
Know When the Job Is Beyond DIY
Distance from the ground is only one part of the decision. A second-story gutter over a sloped driveway may be much less accessible than a higher section above a flat patio. Roof pitch, landscaping obstacles, overhead cables, and rotten fascia can each turn a simple cleaning task into a fall or structural hazard. If the ladder cannot sit correctly, do not improvise a support or work from the top rungs.
Also pause when the gutter is visibly detached, its hangers are pulling out, the downspout disappears into a blocked underground line, or water has damaged the wood behind the gutter. Those conditions call for inspection or repairs before heavy flushing. If you are uncomfortable at height, hiring a gutter professional is a normal maintenance choice, not a failed do-it-yourself project.
How to Clean Gutters Step by Step
The order matters: clear solid material before adding rinse water, and always confirm that the downspout can accept the flow. Home Depot’s 2024 guide starts debris removal near the downspout, then recommends flushing from the far end toward that outlet. The steps below separate those tasks so you can identify where the blockage sits instead of simply pushing it farther into the drainage system.
Step 1: Walk the Perimeter and Pick an Access Method
From the ground, check the whole roofline for sagging sections, plants growing in the channel, overflowing corners, and downspouts that discharge against the foundation. Make a rough plan for where to collect debris and how to get the hose to each section. If water is ponding near a basement wall, check that the discharge route is open before starting; a clean gutter will not solve poor drainage at the end of the pipe.
Choose a scoop and ladder only if every work position permits safe access without leaning sideways. A ground-operated blower or vacuum tube may clear light leaves from a reachable straight run, but it can throw debris toward you and may not extract rooted plants or packed mud. Use the method that can actually reach the problem rather than assuming an advertised extension length is sufficient for your home.
Step 2: Clear the Outlet and Lift Out Loose Leaves
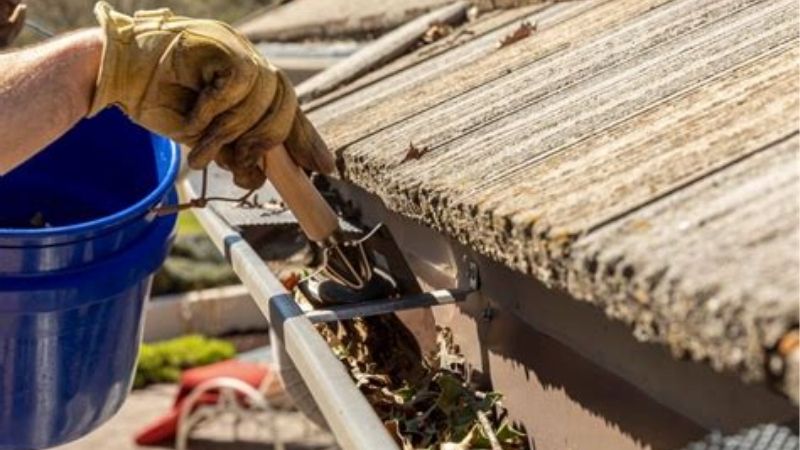
Begin at an accessible point next to the downspout opening. If there is a removable strainer, take it out and clean it without dropping the packed leaves into the pipe. Lift larger clumps with a narrow plastic scoop and transfer them to the bucket. A plastic edge is preferable to a sharp metal blade that could gouge a painted gutter or catch under its seam.
Work along a comfortable, arm’s-length section, then descend and reposition the ladder for the next section. The goal is to expose the bottom of the trough so rinse water can move freely. Wet organic debris can be heavy, so fill the bucket conservatively and lower it by a safe method; do not climb while holding an overflowing container or a long-handled tool.
Step 3: Remove Packed Silt and Check Gutter Guards
After the leaves are out, scrape remaining sediment gently from the corners and around hangers. A film of soil is normal, but a ridge that blocks the trough can trap water after every storm. Avoid scraping a plastic liner with a metal screwdriver or disturbing sealant at a joint. If you uncover a split, hole, or detached bracket, flag that location for repair rather than trying to force it back into shape from the ladder.
For screened systems, follow the guard manufacturer’s removal instructions. Some designs hinge open, while others are fixed under roofing material and should not be pulled loose during cleaning. Shake debris from a removable cover while standing in a stable position, then reinstall it only after the gutter underneath has been checked. A screen can reduce leaf accumulation but will not make inspection unnecessary.
Step 4: Rinse Toward the Downspout and Watch the Flow
Once the solid debris is out, turn the garden hose to a controlled spray and begin at the end farthest from the downspout. Watch the water move through the cleaned channel rather than blindly adding pressure. The Home Depot cleaning guide advises directing flow toward the outlet while avoiding spray beneath the shingles, where water could reach the roof underlayment instead of the gutter.
Water should travel consistently to the outlet without overflowing the back edge or collecting behind a hanger. A little residual moisture after spraying is different from a pool that remains in the same section. If the flow backs up, turn off the hose and investigate the downspout before adding more water. High-pressure washers can damage seals or force water into roof details when used carelessly, so they are not the default tool for this job.
Step 5: Unclog the Downspout From a Safe Opening
If little water emerges from the downspout, check the accessible outlet for a mat of leaves, twigs, or roofing granules. Remove any detachable elbow only if its connection is straightforward and you can keep both feet on the ground. If the outlet leads into an underground drain, do not send a thick plug into it: disconnect the appropriate accessible section when the installation permits, or ask a drainage contractor to isolate the buried line.
Home Depot’s 2024 instructions describe using a hose from the downspout outlet or a plumber’s snake if flushing does not release the clog. Use moderate pressure first, keeping your face away from the opening, and feed a flexible auger gently if necessary. Stop if the pipe bulges, a seam opens, or a solid obstruction will not move. Confirm the plug has exited before reconnecting any elbow or extension.
Step 6: Inspect the Slope, Seams and Hangers
With water moving again, observe the channel at a few points. Home Depot gives a reference slope of about one-quarter inch per 10 feet of gutter toward a downspout. That is a useful diagnostic benchmark, not a substitute for the layout specified by your gutter installer. Several outlets, complex corners, and existing gutter profiles can call for a different designed arrangement.
If water continually pools in one place, investigate a sagging run or misplaced hanger instead of adding more hose pressure. Look for drips at end caps, staining along fascia boards, pulled fasteners, and joints that separate when full. Mark the location from the ground for later repair. Rehanging a long section and correcting rotten fascia are separate tasks best done with secure work access and the correct fastening details.
Step 7: Clean Up and Verify the Discharge Path
Collect the debris from the bucket or tarp and keep it out of storm drains. Clean leaves may be accepted with municipal yard waste, but roofing grit, sharp metal scraps, and suspect contamination should be handled according to local disposal rules. Return downspout strainers or detachable elbows to their original positions, checking that every connection is secure before the next rain.
Run a short final rinse, then walk the building perimeter to see where the water lands. An extension that discharges into a flower bed beside the basement wall may still need attention even if the gutter is clean. Make a note of problem spots for the next inspection. Home Depot recommends seasonal attention in early spring and fall; a heavily wooded lot may need additional checks after leaf drops or storms.
Products That Help
For hands-on clearing of reachable gutters, the Amerimax Gutter Getter 8300HP is a curved plastic scoop sold for 5-inch and 6-inch channels, according to Lowe’s product listing. It is worth considering when your ordinary garden trowel catches on hangers, but it does not make ladder work safer. If you already own a compatible shop vacuum, RIDGID’s VT2515 gutter-cleaning kit uses 2-1/2-inch vacuum fittings and includes two locking extension wands plus an angled gutter elbow, as listed on RIDGID’s product page. Check the hose size before ordering.
For dry leaf debris within ground-access range, the WORX WA4092 gutter-cleaning kit is an alternative to climbing; the maker lists up to 11 feet of reach using 8 feet of tubes. WORX also excludes Turbine Fusion blowers from that model’s compatibility. Those figures describe an accessory configuration, not proof that it can clear every two-story gutter. Confirm the exact blower connection and keep clear of wires, windows, and bystanders before using a powered attachment.
Common Mistakes to Avoid
A common shortcut is to spray water into a gutter full of leaves. That turns a visible obstruction into a wet blockage inside the downspout, where it is harder to remove. Another is standing on the roof edge to avoid moving the ladder. Neither saves enough time to justify pushing debris downstream or exposing yourself to a fall. Clear by hand or by a suitable ground-operated device before flushing.
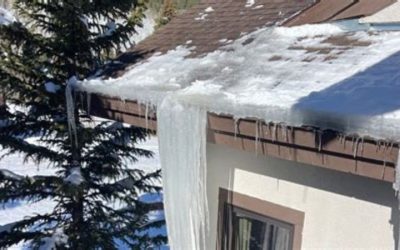
Do not treat every overflow as a maintenance problem. A gutter with adequate flow during a hose test can still spill during a severe storm if the roof sheds water faster than the system was designed to handle. Likewise, recurring winter ice ridges require attention to attic heat loss and roof conditions, not only leaf removal. Those topics warrant separate diagnosis rather than endless cleaning or adding a gutter guard without checking the underlying cause.
Frequently Asked Questions
The cleaning method depends on access and the condition of the gutter. These answers cover practical decisions homeowners commonly face before deciding whether to repeat a cleaning, change tools, or arrange an inspection.
Can You Clean Gutters Without a Ladder?
Yes, sometimes. A compatible pole-mounted vacuum or blower accessory can reach certain straight gutters from stable ground. RIDGID’s VT2515 and WORX’s WA4092 illustrate different approaches, but their fit and actual reach must be checked against your equipment and building. Ground-operated tools also make it harder to see packed mud under guards or inside tight corners, so a follow-up drainage check is still necessary.
Are Gutter Guards Still Worth Checking?
Yes. Screens and covers reduce some kinds of debris buildup, but leaves can settle along the top, fine grit can pass through openings, and downspout outlets can still obstruct. Inspect the visible guard surface after major leaf drops and watch the water discharge during rain. If removing a guard requires disturbing shingles or working at a hazardous height, schedule a qualified installer rather than pulling it apart.
Should You Use Bleach or Gutter Cleaner?
Not for an ordinary blockage. Most leaf clogs need physical removal, not chemicals, and strong cleaners do not reliably dissolve twigs or sediment. Mixing household cleaning products can create hazardous fumes and may discolor gutter finishes or harm landscaping below. If exterior staining needs treatment, use a cleaner that the gutter material’s manufacturer allows and keep runoff away from plants and storm drains.
What If the Gutter Is Clean but Water Still Overflows?
Check the outlet first, including any buried drain connection that may be obstructed. If water drains freely during a gentle hose test but spills during heavy rain, the problem may involve gutter size, roof runoff concentration, or poor alignment at a valley. Ask a gutter contractor to assess sizing and installation before buying another attachment. The next repair decision should follow the point at which flow actually stops.
Final Thoughts
Knowing how to clean gutters is useful only when the method fits the access you have. Clear debris first, confirm that water can leave through the downspout, and document any standing water or leaking joint for repair. If you would have to reach beyond the ladder rails or work close to a utility line, choose ground-level equipment where appropriate or hire a professional. Before buying a cleaning accessory, measure the gutter height and verify compatibility with your existing hose, vacuum, or blower so the tool solves the actual access problem.