To learn how to drain garden hoses before winter, start by shutting off the faucet, releasing pressure, and removing any spray attachment. Then disconnect the hose and work along its length with the higher section raised so water can run out through an open end. A basic garden hose normally needs no pump or compressor. The job is straightforward on level, accessible ground, but a long hose on a fixed reel requires extra attention to trapped water.
Quick Answer: Turn off the water, open the nozzle to depressurize, remove it, and disconnect the hose from the faucet. Lay the hose toward a lower drainage point and lift each successive section to move the remaining water toward the outlet. Drain a reel’s inlet and swivel separately according to its manufacturer, then loosely coil and protect the hose from freezing conditions.
As an Amazon Associate we earn from qualifying purchases.
By DIY Ideas 4 Home Editorial Team
Before You Start: Tools, Materials and Safety
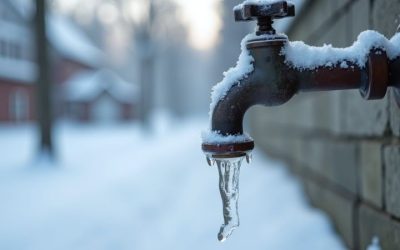
Water trapped in a hose or fitting can freeze and expand, leaving a split or a leak you may not discover until the next watering season. ELEY’s freeze-damage guidance identifies 32°F as the freezing threshold to plan around, while Gilmour’s hose-storage instructions describe a simple hand-lifting method that clears most standing water without specialized equipment. Pick a place where runoff will not create a slick sidewalk or ice patch.
| Tool or Material | Size or Spec | Why You Need It | Substitute |
|---|---|---|---|
| Open drainage area | Ground sloping away from buildings | Gives water a downhill exit | Level ground with an elevated hose section |
| Work gloves | Comfortable outdoor pair | Protects hands from dirty or sharp fittings | Careful bare-hand handling if fittings are sound |
| Small towel | Absorbent cloth | Wipes wet hose ends before storage | Clean rag |
| Hose hanger or reel | Capacity compatible with hose length | Supports loose coils off the ground | Wide loops on a dry shelf |
| Fitting cap, if available | Correct hose-thread connection | Helps keep dirt and insects out after draining | Store the open end protected and accessible |
Keep Pressure and Runoff Under Control
Always close the outdoor faucet before loosening a connection. Squeeze the nozzle or open the watering wand while it is still attached so any pressurized water leaves through its intended outlet. Do not point the stream toward another person or an electrical outlet. If a quick-connect fitting has a locking sleeve, release it only after pressure is gone, following the fitting’s instructions.
Choose a patch of lawn, gravel, or another suitable drainage surface rather than a driveway where water could freeze. Keep the hose clear of steps and paths while you work. A hose that is already stiff with ice should be allowed to thaw in a suitable place instead of being bent sharply or struck with tools. Forcing a frozen fitting can damage both the hose and the faucet.
Identify the Hose and Any Reel Connections
Ordinary rubber, vinyl, and hybrid-polymer garden hoses usually have an open water passage that can be drained by elevation and gravity. Expandable hoses, flat hoses, soaker hoses, and equipment-fed hoses may have additional layers, valves, or drainage instructions. Check the care information for the exact type before squeezing, blowing out, or hanging it; an expandable hose may not behave like a standard round one.
A hose reel is a separate water-holding assembly. ELEY’s wall-reel documentation describes a feed hose and a swivel fitting inside the reel; disconnecting the outdoor spigot does not automatically empty those components. Look for the maker’s winterization procedure, especially if the reel cannot be removed from a wall. Do not assume that a garage or shed stays above freezing merely because it is enclosed.
Know When to Stop Instead of Forcing It
If the hose coupling is seized onto the spigot, do not wrench hard enough to rotate the plumbing in the wall. A corroded coupling, cracked faucet body, or leaking shutoff is a plumbing problem, not a reason to use more force on the hose. Stop and arrange repair if the faucet or attached pipe moves, since a hidden joint can be damaged before you see water outside.
For an installed irrigation system or buried pipe, this procedure is not sufficient. Such systems often need manufacturer-specific drain valves or professional winterization. Similarly, a household air compressor is not part of the basic method: an incorrect pressure or nozzle setup can cause damage or injury. Reserve any compressed-air procedure for equipment whose manufacturer expressly specifies it.
How to Drain Garden Hoses Step by Step
Gilmour’s guide to storing a hose recommends removing the nozzle, disconnecting from the spigot, and lifting the hose progressively until remaining water has flowed out. That sequence works because the raised section encourages water to move toward a lower, open outlet. It is more reliable than leaving a tightly coiled hose on the lawn and assuming the water will find its own way out.
Step 1: Shut Off the Supply and Release Pressure
Turn the faucet fully off. With the nozzle still attached, squeeze its trigger to let residual water escape; keep it aimed at a drain-safe surface. This avoids an unexpected spray when you undo the threaded connection. If the faucet continues to feed water even while closed, stop and deal with the faulty valve rather than trying to drain a hose that is still being supplied.
For a hose connected to a timer, splitter, or irrigation accessory, close the supply and remove the device only as its instructions permit. Some devices retain water in internal chambers or require their own winterization. The first visible sign that the main line is ready to disconnect is that the stream has stopped and the hose feels no longer pressurized.
Step 2: Remove Sprayers, Nozzles, and Adapters
Unscrew the spray nozzle or watering wand to leave the discharge end fully open. Hold each removable attachment with its outlet facing down so trapped water can drain separately. Gilmour’s seasonal tool-cleanup advice notes that nozzles need draining too; a dry hose does not protect a water-filled spray head. Inspect the rubber washer inside the female fitting and keep it from dropping into grass.
Remove compatible quick-connect fittings and timers where the manufacturer calls for winter removal. Do not pry an insert out of a fitting that is designed to remain assembled. Set the accessories on a towel to drip dry, and keep small washers with the matching parts so they are available when watering resumes.
Step 3: Disconnect the Hose and Establish an Outlet
Unscrew the hose from the faucet after pressure is released. Lay the hose out so one open end faces a safe drainage area. A gentle downhill run is convenient, but it is not a requirement if you can lift sections by hand. Flexzilla’s winterizing instructions advise stretching the hose along a slope so the remaining water can leave through the low end rather than collecting inside a loop.
Keep the open outlet lower than the part you plan to raise. On flat ground, move the outlet to the edge of a lawn and work toward it with each section elevated. A second person can hold the outlet away from shoes or stored equipment if the hose is long or awkward. Do not block either end with a stopper while draining.
Step 4: Lift and Walk the Water Toward the Opening
Starting at the end farthest from the intended outlet, raise a manageable section to roughly waist or shoulder height and walk toward the open end. As you move, hold the next section up so water behind you cannot run back into the hose. Gilmour’s storage guidance uses this progressive lifting technique, not forceful squeezing, to clear water along the hose’s full length.
Maintain a smooth bend when crossing over your arm. A tight fold traps water on one side and can leave a weakened kink in the wall. You should hear or see water leave the low outlet as you advance. If flow stops suddenly before you reach the end, look for a dip, twist, or kink and straighten that section without yanking the fittings.
Step 5: Check Low Spots and Drain Both Couplings
After the first pass, lay the hose straight again and gently lift any sagging sections that could hold small pools of water. Raise the end connectors individually with the opposite end open; metal couplings can retain droplets even after the main hose seems empty. Repeat the walking motion if you still hear sloshing or see water run out. The aim is to eliminate pockets that could freeze, not to claim the inside is laboratory dry.
Look particularly carefully at the first few inches behind each connector. Flexzilla’s cold-weather hose advice identifies the area near fittings as a common point of cracking when a cold, stiff hose is bent repeatedly. If the material is already damaged, draining it will not repair the wall. Mark the hose for later repair or replacement instead of winding it tightly and forgetting the defect.
Step 6: Drain a Hose Reel’s Inlet and Swivel
For a reel-mounted hose, first check the brand’s reel-specific winterization document. ELEY’s instructions call for disconnecting the inlet hose, extending the garden hose so its free end lies below the reel, clearing water from the swivel and inlet, and then rewinding slowly while water escapes. This distinction matters because the reel’s plumbing can retain water even after the garden hose itself has been drained.
ELEY’s Model 1041 is a wall-mounted example with an inlet connection and swivel assembly; its reel-capacity information lists up to 125 feet of 5/8-inch hose in the standard configuration. Capacity alone does not indicate how completely a reel drains. If your unit uses an enclosed cabinet or a different swivel design, follow that maker’s drain-port and disassembly directions rather than copying steps for another brand.
Step 7: Coil Loosely and Put the Hose Away
Once drainage has slowed to a stop, form broad loops without crushing the hose wall. Gilmour’s hose-storage guide suggests coils about 3 feet across when the material is still pliable. That figure is a maker’s handling suggestion, not an exact size required for every hose; a thicker or stiffer hose may need wider loops. Avoid sharply bending the connectors into the coil.
Support the hose on a hanger, shelf, or properly drained reel, away from lawn equipment and direct sun. A heated basement or protected utility area may be safer in severe cold than an unheated shed, provided the hose is clean enough for the space. ELEY cautions that attached garages can fall below freezing, so storage indoors does not replace draining. Keep the ends accessible for a final inspection rather than burying them under other tools.
Products That Help
For a permanently mounted setup, the ELEY Model 1041 Wall Mount Garden Hose Reel is a concrete storage option, with the manufacturer listing standard capacity for up to 125 feet of 5/8-inch hose. Its usefulness here is organized, controlled rewinding after the reel is drained, not automatic winter protection. Confirm mounting space, reel configuration, and whether the hose is included before purchasing. A basic loose hanger is enough if your existing hose is short and easy to move.
If the existing hose has split behind a fitting, the Flexzilla HFZG550YW Garden Hose is a specific replacement listed in Flexzilla’s product bulletin at 50 feet long with a 5/8-inch inside diameter. Its flexible construction may make coiling easier, but its cold-weather performance does not make trapped water harmless. Buy a replacement only when the current hose cannot be repaired economically; a new hose needs the same gravity-drain routine.
Common Mistakes to Avoid
The easiest mistake is draining only the visible outer hose while leaving a nozzle, Y-splitter, timer, or reel swivel full of water. Treat each removable accessory as a separate container and follow its own manufacturer’s storage advice. Another common error is winding the hose first, then hoping water can escape through a tightly packed loop. Extend and drain it before rewinding, and do not block the open end until drainage is complete.
Do not depend on a cap, insulated faucet cover, or winter-rated hose material as a substitute for emptying water. Flexzilla explicitly advises draining before freezing weather even for its flexible polymer hoses. And although some reel manufacturers publish compressed-air alternatives for their equipment, a random blowgun attached to a household hose is not the beginner-friendly default; wrong pressures or trapped attachments can create hazards. Gravity is sufficient for the ordinary detachable hose described here.
Frequently Asked Questions
Outdoor hose setups differ in length, construction, and where water can pool. These additional questions help decide how far to go beyond the standard gravity-draining pass without adding unnecessary steps or unsafe equipment.
How Can I Tell Whether Water Is Still Trapped Inside?
Lift an end and listen for a moving pocket of water, then repeat the progressive walk if liquid continues to leave the outlet. A completely dry interior is difficult to establish visually, so concentrate on clearing standing water and visible low spots. If a hose remains heavy, remember that some materials are naturally heavy even when empty. Do not use weight alone as proof of trapped water.
Should I Empty the Hose After Every Summer Watering?
Not necessarily for freeze protection in warm weather, but releasing pressure and draining excess water makes storage tidier and helps keep a hose from sitting in puddles. Gilmour’s routine care advice recommends draining and storing hoses off the ground rather than leaving them where they may be crushed by yard equipment. Before predicted freezing weather, disconnecting and draining become substantially more important.
Does a Soaker or Expandable Hose Need Different Handling?
Yes, it may. The valve arrangement and wall construction can make trapped water harder to remove than in a single open-bore garden hose. Refer to that product’s storage instructions, allow the material to contract or drain naturally when specified, and avoid applying pressure or compressed air without a supported procedure. Do not assume that a heavy soaker line, drip system, and standard hose share one winterization method.
Can I Leave a Drained Hose on an Outdoor Reel?
Sometimes, if both the hose and the reel’s internal plumbing are fully drained and the reel manufacturer permits that storage arrangement. ELEY’s winterization instructions specifically address the inlet hose and swivel because these components hold water independently. A reel that looks empty on the outside can still freeze at a fitting. If you cannot reach or drain its internal connection, consider manufacturer-approved removal or protected storage instead.
Final Thoughts
The next time a freeze is forecast, reserve a spot for the disconnected hose before you start draining it. Knowing where a long hose can lie downhill and where its reel will be stored makes the job faster without risking a rushed, tight coil in cold weather. After you finish learning how to drain garden hoses, inspect the actual faucet connection for drips or damage; the separate outdoor-faucet winterizing steps still matter if supply water can remain in exposed plumbing. Replace damaged fittings only after identifying the correct size, and keep usable hose parts ready for spring.