Key takeaways
- Using 1-inch brads for baseboards. A 1-inch brad through 1/2-inch trim and 1/2-inch drywall has zero penetration into wood. It is held by paper and gypsum, and the base will pull away within a year.
- Going too long into a wall with pipes or wires. A 2.5-inch nail through 1/2-inch trim and 1/2-inch drywall reaches 1.5 inches into the stud bay, which is exactly where plumbing and electrical live. Stay at 2 inches unless you know the wall is clear.
- Nailing crown only into drywall. Crown that misses the top plate and joists sags at the joints in the first heating season. Mark framing first.
- Choosing 16-gauge for everything. The larger hole is visible on stained trim and takes more filler on painted trim; it also splits thin returns and small profiles.
- Nailing through the thickest part of the profile. Nail at the flats. The tool tip cannot seat on a curve and the brad blows out the side.
- Running the compressor too hot. Brads set at 100 PSI in soft pine leave craters; 70 to 80 PSI is usually right. Test on a scrap and adjust the depth-of-drive dial in 2026 tools rather than the regulator when possible.
- Buying too few nails. A room with 60 feet of base and crown uses roughly 150 to 250 brads. A 1,000-count box at $5 to $8 covers several rooms.
The Short Answer
An 18-gauge brad nailer that shoots 5/8- to 2-inch brads is the right size for most crown molding and for baseboards up to about 5/8 inch thick. Use 1.25-inch brads for crown into drywall and framing, 1.5- to 2-inch brads for baseboards, and always aim for the nail to penetrate at least 3/4 inch into solid wood behind the trim. For baseboards thicker than 3/4 inch, tall hardwood base, or MDF over 5 inches wide, step up to a 16-gauge finish nailer with 2- to 2.5-inch nails. The brad nailer’s advantage is a hole small enough to hide with a fingertip of filler; the finish nailer’s advantage is holding power.
Standard Sizes
Trim nailers are grouped by the gauge of the fastener they drive. A higher gauge number means a thinner nail. The table shows what each tool fires and where it belongs on a trim job.
Our top picks


As an Amazon Associate we earn from qualifying purchases at no extra cost to you.
| Nailer | Nail diameter | Nail length range | Head | Typical tool weight | Best use on trim |
|---|---|---|---|---|---|
| 23-gauge pin nailer | 0.025 in (0.64 mm) | 1/2 to 1-3/8 in (1.3 to 3.5 cm) | Headless or slight head | 2 to 3 lb (0.9 to 1.4 kg) | Holding small returns and moldings while glue sets; not structural |
| 18-gauge brad nailer | 0.047 in (1.2 mm) | 5/8 to 2 in (1.6 to 5.1 cm) | Small rectangular head | 2.5 to 4 lb (1.1 to 1.8 kg) pneumatic; 5 to 7 lb cordless | Crown molding, shoe molding, quarter round, baseboards up to 5/8 in thick, casing |
| 16-gauge finish nailer | 0.063 in (1.6 mm) | 1 to 2.5 in (2.5 to 6.4 cm) | Small T-head | 3.5 to 5 lb (1.6 to 2.3 kg) pneumatic; 6 to 8 lb cordless | Baseboards 3/4 in and thicker, tall MDF base, door and window casing, chair rail |
| 15-gauge finish nailer | 0.072 in (1.8 mm) | 1.25 to 2.5 in (3.2 to 6.4 cm) | Round head, angled magazine | 4 to 5 lb (1.8 to 2.3 kg) | Heavy hardwood base, stair trim, door jambs, exterior trim |
Nail length is chosen by the material stack. A general rule is total nail length equals trim thickness plus drywall thickness plus at least 3/4 inch into framing. For 1/2-inch drywall and 5/8-inch trim, that works out to 1-7/8 inches, which is why 2-inch brads exist. For crown nailed through the top edge into the ceiling joists or through the bottom into the wall plate, the trim is often only 1/2 inch thick at the nailing flat, so 1.25- to 1.5-inch brads reach solid wood.
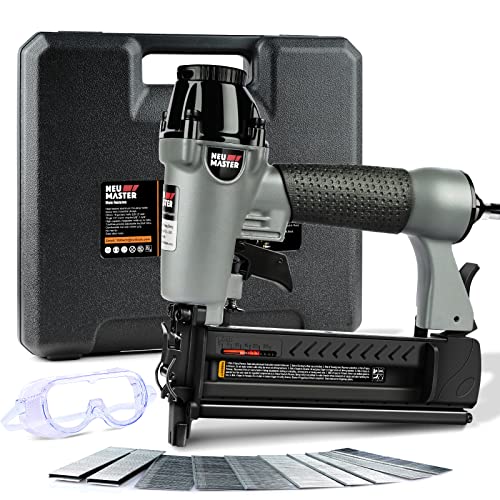
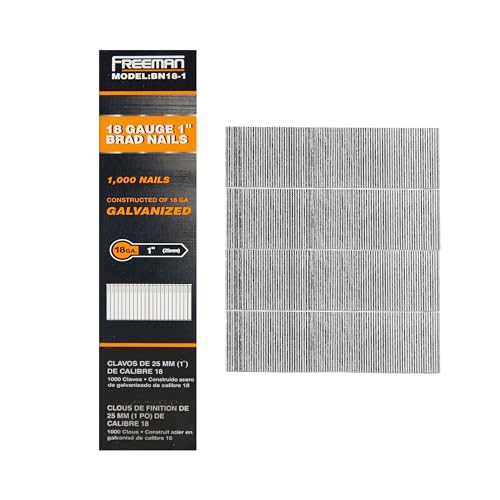
Budget tools cover this range well. A 2-in-1 pneumatic brad nailer and stapler like the NEU Master, about $40, fires 18-gauge brads from 5/8 to 2 inches and needs only a small pancake compressor. A box of 1,000 1-inch 18-gauge galvanized brads such as Freeman BN18-1 runs about $5 to $6; longer brads cost a little more per box.
How to Measure Your Space
- Measure the trim thickness. Use calipers or a tape on the nailing flat, not the thickest point of the profile. Most stock baseboards are 1/2 or 9/16 inch at the flat; crown is commonly 1/2 to 5/8 inch where it meets the wall.
- Confirm the drywall thickness. Standard walls are 1/2 inch (1.3 cm); ceilings and some garages use 5/8 inch (1.6 cm). Check at an outlet box or a door casing gap.
- Locate the framing. Studs are 16 or 24 inches on center; the bottom plate runs continuously along the floor. For crown, find ceiling joists and the top plate with a stud finder and mark every location with painter’s tape before you start.
- Add it up. Trim plus drywall plus 3/4 inch minimum penetration equals your nail length. Round up to the nearest stock length: 1.25, 1.5, 1.75, or 2 inches.
- Check the compressor and hose. An 18-gauge brad nailer uses about 0.5 CFM per shot at 70 to 100 PSI, so any 1- to 6-gallon compressor works. A 25-foot 1/4-inch hose is plenty for a bedroom.
- Measure the room for a cut list. Wall lengths in feet plus 10 percent waste tells you how much trim to buy. For crown, note ceiling height and the spring angle of the molding (38/52 or 45/45) so miter and bevel settings match.
By Room or Use Case
Baseboards up to 5/8 inch thick (standard colonial, ranch, or shoe)
An 18-gauge brad nailer with 2-inch brads is enough for 1/2- to 5/8-inch stock over 1/2-inch drywall. Fire one brad into the bottom plate every 16 inches and one into each stud near the top edge. Shoe molding and quarter round take 1.25-inch brads into the baseboard, angled slightly downward, never into the floor.
Tall or thick baseboards (3/4 inch and up, 5- to 8-inch MDF)
Switch to a 16-gauge finish nailer with 2- to 2.5-inch nails. Thick base and wide MDF tend to bow away from an uneven wall, and 18-gauge brads do not have the shank to pull them tight. Use two nails at every stud, one high and one low.
Crown molding in a living room or bedroom
An 18-gauge brad nailer with 1.5-inch brads handles standard 3.5- to 5-inch crown. Nail through the flats where the molding contacts the wall and ceiling, into the top plate and ceiling joists respectively. Where joists run parallel to the wall and you cannot hit one, install a beveled backer strip first or rely on glue at the ceiling edge and nails into the wall plate only. A helper or crown molding clips, sold in 4-packs for about $8, will hold a long run in place while you nail.
Cutting crown accurately
The nailer is only half the job. Cutting crown flat on a miter saw requires compound angles (for 38/52 crown, 31.6 degrees miter and 33.9 degrees bevel), and a mistake wastes an 8-foot stick. A crown positioning jig such as the Kreg Crown-Pro, about $34, holds the molding at its spring angle so you cut with a simple 45-degree miter instead. For a first crown project, it saves more material than it costs.
Kitchens and bathrooms with tile or cabinets
Shoe molding at a tile edge and light rail or scribe molding on cabinets are 18-gauge or even 23-gauge territory. Use 1- to 1.25-inch brads into the cabinet frame or baseboard only. Never fire into tile; a brad will chip the glaze and will not hold.
Stair skirts, hardwood base, and exterior trim
Oak, maple, or PVC exterior trim need a 15- or 16-gauge finish nailer with 2- to 2.5-inch nails. Brads bend in dense hardwood and lack the shear strength for exterior movement. Use galvanized or stainless nails outdoors to prevent rust streaks.
Common Sizing Mistakes
- Using 1-inch brads for baseboards. A 1-inch brad through 1/2-inch trim and 1/2-inch drywall has zero penetration into wood. It is held by paper and gypsum, and the base will pull away within a year.
- Going too long into a wall with pipes or wires. A 2.5-inch nail through 1/2-inch trim and 1/2-inch drywall reaches 1.5 inches into the stud bay, which is exactly where plumbing and electrical live. Stay at 2 inches unless you know the wall is clear.
- Nailing crown only into drywall. Crown that misses the top plate and joists sags at the joints in the first heating season. Mark framing first.
- Choosing 16-gauge for everything. The larger hole is visible on stained trim and takes more filler on painted trim; it also splits thin returns and small profiles.
- Nailing through the thickest part of the profile. Nail at the flats. The tool tip cannot seat on a curve and the brad blows out the side.
- Running the compressor too hot. Brads set at 100 PSI in soft pine leave craters; 70 to 80 PSI is usually right. Test on a scrap and adjust the depth-of-drive dial in 2026 tools rather than the regulator when possible.
- Buying too few nails. A room with 60 feet of base and crown uses roughly 150 to 250 brads. A 1,000-count box at $5 to $8 covers several rooms.
FAQ
Can I use an 18-gauge brad nailer for baseboards?
Yes, for baseboards up to about 5/8 inch thick, using 1.75- to 2-inch brads driven into studs and the bottom plate. For 3/4-inch or thicker base, wide MDF, or hardwood, a 16-gauge finish nailer with 2- to 2.5-inch nails holds far better.
What length brad nail for crown molding?
1.25 to 1.5 inches for crown that is 1/2 to 5/8 inch thick at the nailing flats, over 1/2-inch drywall. That gives 3/4 inch or more into the top plate and joists. Go to 2 inches only where you are nailing through a built-up backer or thick crown.
Is a 16-gauge or 18-gauge nailer better for trim overall?
If you can only own one, 16-gauge is the more versatile choice because it handles door casing, thick base, and jambs as well as most crown. If your projects are mainly crown, shoe, small casing, and cabinet trim, 18-gauge is lighter, leaves a smaller hole, and its nails are cheaper. Many trim carpenters carry both.
Do I need a special compressor for a brad nailer?
No. An 18-gauge brad nailer consumes well under 1 CFM at 70 to 100 PSI. Any 1- to 6-gallon pancake or hotdog compressor, typically $80 to $180, will drive several brads per second without falling behind. Cordless 18-gauge nailers eliminate the compressor entirely but weigh 5 to 7 pounds and cost $150 to $300.