A butcher block workbench top that never gets oiled dries out, and dry maple or beech drinks up glue drips and finish spills as permanent stains, checks along the end grain, and moves more with the seasons. Oil it wrong and you get a different set of problems: a gummy surface from cooking oil gone rancid, or a film finish that chips under hammer blows. The right treatment is a penetrating oil, applied thin and often, that soaks into the top 1/16 inch and leaves a matte surface that shrugs off glue and can be renewed in 20 minutes whenever it looks thirsty.
What You Need
| Item | Why | Optional? |
|---|---|---|
| Food-grade mineral oil or a mineral oil and wax conditioner (Howard Butcher Block Conditioner, 12 oz, about $9.18) | Penetrates without curing, never goes rancid, easy to renew; the wax adds mild water resistance | No, unless using a curing oil |
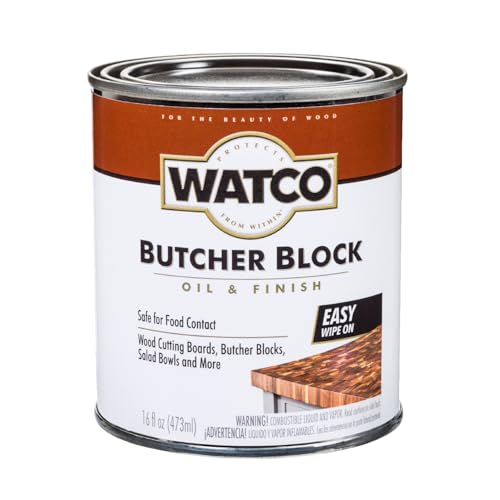
| Curing oil finish (Watco Butcher Block Oil and Finish, about $18.54) as an alternative | Polymerizes in the wood for a harder, more glue-resistant surface; needs fewer recoats | Alternative |
| Lint-free cotton rags or blue shop towels | Apply and wipe back oil without leaving fibers | No |
| Cabinet scraper or 120 to 180 grit sandpaper on a block | Removes glue, dents, and gray oxidized wood before oiling | Usually needed |
| Plastic putty knife | Pops dried glue blobs without gouging | Yes |
| Shop vacuum and tack cloth | Clears dust so it does not get sealed into the finish | No |
| Nitrile gloves | Keeps oil off your hands; mandatory with curing oils | Yes |
| Metal can with water for rag disposal | Curing-oil rags can self-heat and ignite in a pile | No, with curing oils |
Step-by-Step
Step 1: Clear and clean the top (10 minutes)
Remove everything from the bench, including the vise jaws’ wooden faces if they overlap the top. Scrape off dried glue with the plastic putty knife. Wipe the surface with a rag barely damp with mineral spirits to lift oil, pencil, and grime, then let it flash off for 10 minutes. Do not soak the wood with water; it raises the grain and can open glue joints.
Our top picks

As an Amazon Associate we earn from qualifying purchases at no extra cost to you.
Step 2: Sand or scrape the surface (15 to 30 minutes)
Sand with the grain using 120 grit to level dents and remove the gray, oxidized layer, then finish with 180. A random orbit sander speeds a 24 by 60 inch top to about 15 minutes. Stop at 180; finer grits burnish the surface and reduce oil penetration. Vacuum thoroughly and wipe with a tack cloth. If the top is new, a light 180 grit pass is enough.
Step 3: Apply the first coat heavily (10 minutes)
Pour or squeeze oil onto the surface and spread it with a rag in a thin, even layer that looks wet everywhere, including the edges and 2 inches of the underside near the edges to slow uneven moisture movement. A new or very dry 24 by 60 inch top drinks 4 to 6 ounces on the first coat. End grain absorbs the most; keep feeding the edges until they stop looking dull.
Step 4: Let it soak, then wipe back (20 minutes soak, 5 minutes wipe)
Wait 15 to 20 minutes for mineral oil, or the time the label specifies for a curing oil (typically 15 to 30 minutes). Then wipe every trace of surface oil off with clean rags. Anything left on top of mineral oil stays greasy; anything left on top of a curing oil turns into a sticky skin that never hardens properly. Buff until the surface feels dry to the touch.
Step 5: Repeat coats (10 minutes each, spaced hours or days apart)
A dry top needs 3 to 5 coats of mineral oil applied a few hours apart until the wood stops absorbing and the surface stays uniformly satin. Curing oils need 2 to 3 coats spaced 24 hours apart. Between coats you can use the bench for light work; avoid glue-ups until the final coat has had a day (mineral oil) or 72 hours (curing oil) to settle.
Step 6: Optional wax topcoat (10 minutes)
If you used plain mineral oil, a conditioner containing beeswax or carnauba adds water resistance and helps glue drips peel off. Rub on a thin coat, wait 20 minutes, and buff. Skip wax if the bench doubles as a glue-up surface for parts that will later be finished, since wax transfers.
Step 7: Dispose of rags safely (2 minutes)
Mineral oil rags can be tossed or laundered. Rags soaked in curing oil generate heat as they oxidize and can ignite in a crumpled pile; spread them flat outdoors to dry or submerge them in a water-filled metal can before disposal.
Mistakes to Avoid
Using cooking oil, which goes rancid and stinks within weeks. Applying polyurethane or varnish to a working bench top, where it chips, shows every hammer mark, and cannot be spot-repaired. Leaving surface oil to “soak in overnight,” which produces a gummy film. Sanding above 220 grit before oiling. Oiling over glue spots and dents you should have sanded out. Sealing only the top face and letting the underside stay bare, which drives cupping. Storing curing-oil rags in a pile.
How Often
New or freshly sanded tops: monthly for the first three months while the wood saturates. Established tops with mineral oil: every 2 to 3 months, or whenever a drop of water no longer beads and soaks in within a few seconds. Curing-oil tops: a light recoat every 6 to 12 months. Recoat immediately after any heavy sanding session on the bench or after cleaning off a large glue spill, and expect to oil more often in a heated shop in winter when humidity drops below 30 percent.
When to Call a Pro or Replace
You will almost never need a professional for a workbench top. The exceptions are a top cupped more than 1/8 inch across 24 inches, which needs a wide-belt sander at a millwork shop ($60 to $150), and open glue joints between staves, which need regluing and clamping. Replace the top when splits run more than a third of its length, when it is under 1-1/4 inches thick after repeated flattening, or when a new 1-1/2 inch maple slab costs less than the shop time to save the old one, which in 2026 is often true for tops under 5 feet.
FAQ
Mineral oil or a curing oil for a workbench?
Mineral oil is easier, cheaper, and infinitely renewable, and it suits a bench that gets abused daily. A curing oil finish gives a harder, more glue-resistant surface and needs fewer recoats, but it takes 72 hours to cure and requires careful rag disposal.
How much oil does a workbench top need?
Plan on 8 to 16 ounces total for the initial saturation of a 24 by 60 inch top and 2 to 3 ounces per maintenance coat. A 12 ounce bottle of conditioner covers a year of upkeep.
Can I glue up on an oiled bench?
Yes. PVA glue does not bond to oiled wood and pops off with a plastic scraper once dry. That is one of the main reasons to oil rather than leave the top bare.
Why is my bench top sticky after oiling?
Too much oil was left on the surface. Wipe it hard with a clean rag dampened with mineral spirits, let it dry, and buff. With curing oils, a sticky surface means the excess was never wiped off; the fix is the same, followed by a properly wiped thin coat.