Key takeaways
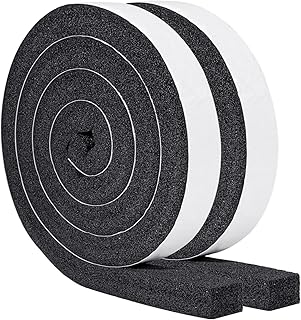
- Thick compression foam for gaps between 1/2 inch and 1 1/2 inches. A 1×1-inch high-density foam tape, like the Yotache seal kit or a comparable high density foam tape, compresses to fill the sash-meets-sash gap and the space under the raised sash. It needs to be squeezed to work, so slightly oversize is correct.
- Flat sealing tape for hairline seams and panel edges. A wide, thin product such as SWRT 20 Mil weather sealing tape at 3 inches spans the accordion panel folds without bulk, and the residue-free formula matters if you’re on a rental window frame.
- Rigid insulated panels to replace the flimsy accordion vinyl entirely. Pre-cut side panel kits at 17 inches high by 9 inches wide give you real R-value where the factory plastic gives you almost none.
What's inside
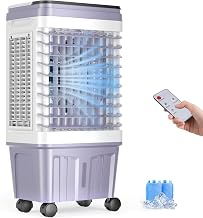
A window air conditioner is essentially a hole you cut in your house on purpose. That hole moves a lot of cold air, but the gaps around it — the accordion side panels, the sash channel, the seam where the top sash meets the bottom — leak conditioned air, invite in humidity, and give insects an open door. I’ve pulled units out in September and found daylight visible along three edges. The compressor was working fine. The install was the problem.
Sealing a window unit properly takes about forty minutes and under $30 in materials. Below I’ll walk through how I approach it: reading the gaps before you buy anything, which materials belong where, how to handle the accordion panels that ship with almost every unit, and what changes when you’re sealing a portable AC hose instead. Everything here assumes standard double-hung windows, though most of it transfers to sliders with minor adjustment.
As an Amazon Associate we earn from qualifying purchases.




Start By Mapping Every Gap
Before ordering foam, close the unit up as it currently sits and go looking for leaks. Do it at night with a flashlight outside, or on a windy day with a stick of incense held near each seam. You’re looking for five distinct problem areas: the vertical gaps at the accordion panels, the horizontal gap where the raised bottom sash meets the top sash (this one is the biggest offender and most people miss it), the seam between the unit’s chassis and the window sill, the gap above the unit under the closed sash, and the side channels where the accordion panel tracks sit. Write down rough dimensions. A 1-inch gap needs a different material than a 1/8-inch gap, and buying the wrong thickness means you either can’t close the window or the foam does nothing.
Match The Material To The Gap Size
This is where most DIY sealing goes sideways. Three material classes cover nearly every situation:
- Thick compression foam for gaps between 1/2 inch and 1 1/2 inches. A 1×1-inch high-density foam tape, like the Yotache seal kit or a comparable high density foam tape, compresses to fill the sash-meets-sash gap and the space under the raised sash. It needs to be squeezed to work, so slightly oversize is correct.
- Flat sealing tape for hairline seams and panel edges. A wide, thin product such as SWRT 20 Mil weather sealing tape at 3 inches spans the accordion panel folds without bulk, and the residue-free formula matters if you’re on a rental window frame.
- Rigid insulated panels to replace the flimsy accordion vinyl entirely. Pre-cut side panel kits at 17 inches high by 9 inches wide give you real R-value where the factory plastic gives you almost none.
Deal With The Accordion Panels Honestly
The vinyl accordion panels included with units like the BLACK+DECKER 12,000 BTU BWAC12WTB are there to make installation universal, not to insulate. They’re a single layer of pleated plastic. Two workable approaches: extend them fully and seal each pleat seam with wide tape, then back the whole panel with rigid foam board cut to fit — or skip them and cut your own panels from 1-inch foam board, which is what I do on units that stay in year-round. If you go the DIY panel route, cut 1/8 inch oversize and friction-fit, then run foam tape around the perimeter. Don’t screw into the window frame; you’ll want it removable.
Seal The Sash Gap Last, And From Inside
Once panels and chassis edges are handled, the raised-sash gap gets its own treatment. Cut compression foam to the full width of the window opening and press it into the channel where the top of the lower sash meets the upper sash. Work from inside so the adhesive isn’t exposed to UV and rain, which will cook it in one season. Then run a bead of removable caulk or a strip of flat tape along the interior sill seam. Check that the window still locks or add a sash lock — a sealed unit that can be lifted from outside is a security gap, not just an air gap.
Portable ACs Need A Different Approach
If you’re venting a portable unit rather than mounting a window AC, foam tape isn’t the answer. A zippered window seal like the HOOMEE 197-inch universal kit uses hook-and-loop fastener around the window opening and a zip pass-through for the exhaust hose, which lets you open the window without dismantling anything. Insulate the exhaust hose itself while you’re at it — bare hoses radiate serious heat back into the room and quietly undercut the unit’s output.
Tips
- Clean and dry every surface with isopropyl alcohol before applying adhesive foam. Dust is why tape fails in July.
- Apply compression foam in one continuous piece per gap. Butt joints leak; overlaps prevent closing.
- Photograph your finished install before removing the unit in fall. Next spring you’ll thank yourself.
- Add a shallow outward tilt (about 1/4 inch over the chassis depth) so condensate drains outside instead of pooling on your sill.
Frequently Asked Questions
Can I use expanding spray foam around a window AC?
No. It bonds permanently, expands unpredictably against glass and sash, and makes the unit nearly impossible to remove without damage. Stick to compression foam and removable tape.
How thick should the foam tape be?
Measure the gap and buy foam roughly 25–50% thicker. A 3/4-inch gap wants 1-inch foam so it compresses under load. Foam that isn’t compressed isn’t sealing.
Should I remove the unit for winter?
If it’s practical, yes — that eliminates the leak path entirely. If it stays, add rigid insulated side panels and cover the exterior grille with a fitted cover.
Will sealing improve cooling performance?
Noticeably. Sealing gaps cuts the humidity load the unit fights, which shortens run cycles and drops indoor humidity faster than adding BTUs would.
Conclusion
Good sealing isn’t about buying one magic product; it’s about matching the right material to each specific gap and taking the time to find all of them. Map the leaks, use compression foam where things squeeze together, flat tape where things sit flush, and rigid panels where the factory vinyl falls short. Do it once carefully and the unit gets quieter, the room gets drier, and your energy bill reflects the effort.