Key takeaways
- Solid ER70S-6 wire with an argon-carbon dioxide mix: the cleanest and most beginner-friendly option for indoor mild-steel work.
- Self-shielded flux-core wire: useful outdoors because it does not need shielding gas, but it creates more smoke, spatter, and slag.
- 75% argon/25% carbon dioxide: a common gas blend for smooth mild-steel MIG welding.
- 100% carbon dioxide: generally cheaper and able to provide deeper penetration, but it usually produces more spatter.
- Aluminum: usually requires a spool gun or a suitable push-pull setup; do not assume a standard MIG torch will feed soft aluminum reliably.
The best MIG welders for beginners are the Hobart Handler 140 for simple 120-volt projects, the Lincoln Electric Handy MIG for the lowest-cost learning setup, and the Miller Millermatic 211 if you need room to grow into thicker steel or 240-volt work.
Our top picks
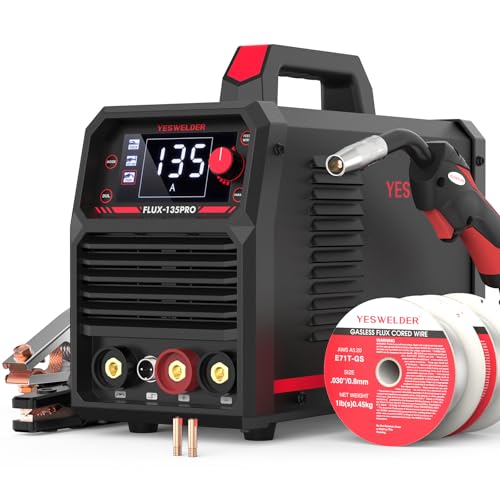


As an Amazon Associate we earn from qualifying purchases at no extra cost to you. Ratings are shown as listed on Amazon.
Best MIG welders for beginners at a glance
| Welder | Power | Output range | Beginner advantage | Typical market range |
|---|---|---|---|---|
| Lincoln Electric Handy MIG | 120V | Approximately 25–90A | Compact, inexpensive, simple controls | Usually $300–$450 |
| Hobart Handler 140 | 120V | 25–140A | Better low-voltage adjustment and included setup guidance | Usually $500–$700 |
| Eastwood MIG 180 | 120V | Approximately 30–180A | More output in a home-garage format | Usually $500–$750 |
| Miller Millermatic 211 | 120V/240V | Approximately 30–230A | Automatic voltage adjustment and strong upgrade path | Usually $1,000–$1,400 |
Prices vary by package, included spool gun, and promotions. Output and duty-cycle figures can also differ slightly by revision, so confirm the specification plate and manual before buying.
Our picks by workspace and project
Best for a small garage: Hobart Handler 140
The Hobart Handler 140 is the safest all-around recommendation for a new welder who has an ordinary household outlet. It runs on 120 volts, accepts solid wire with shielding gas, and can also use self-shielded flux-core wire for outdoor or less-controlled work. Its 25–140 amp range covers sheet metal, brackets, carts, garden repairs, and many projects made from 1/8-inch steel.
Its main limitation is duty cycle. At higher settings, you cannot weld continuously for long periods; you weld for a while, then allow the machine to cool. That is rarely a problem for furniture frames or occasional repairs, but it matters if you plan to fabricate a large workbench or many long seams.
Best budget learning machine: Lincoln Electric Handy MIG
The Lincoln Electric Handy MIG is suitable when your first projects are light-duty and your budget is limited. Its controls are less intimidating than those on a multiprocess machine, and its small footprint works well on a garage shelf or a compact workshop cart.
This is a better choice for thin steel, small brackets, plant stands, and practice coupons than for heavy structural work. Its lower maximum output gives you less margin for thick material, and basic 120-volt machines can trip a shared household circuit if the outlet also powers a compressor, heater, or freezer.
Best for more output on 120 volts: Eastwood MIG 180
The Eastwood MIG 180 gives a beginner more headroom without immediately requiring a 240-volt circuit. The wider output range is useful when moving from sheet metal to thicker tubing and plate. Depending on the package, it may support solid MIG wire, flux-core wire, and spool-gun welding for aluminum.
More adjustment is not always easier. You will need to learn how wire diameter, wire-feed speed, voltage, gas flow, and material thickness interact. Choose it when you are willing to spend time reading the chart and practicing, rather than because a larger amp number automatically produces better welds.
Best long-term upgrade: Miller Millermatic 211
The Miller Millermatic 211 is the premium beginner pick for someone who expects to keep welding for years. It can run from either 120 or 240 volts, so you can begin in a garage with a normal outlet and later use a dedicated 240-volt circuit for thicker material and longer welds. Its automatic setup system reduces the number of initial adjustments, although it does not replace proper fit-up and technique.
The extra cost makes sense for frequent fabrication, trailer repairs, heavier furniture bases, or a workshop where several people may use the machine. It is excessive for occasional tack welds and small decorative projects.
What matters more than the advertised amp maximum
Setup simplicity
A beginner-friendly machine should have a clear polarity diagram, a usable wire-feed chart, accessible drive rolls, and a torch lead that is long enough to reach the work. For a first machine, avoid paying extra for functions you will not use, such as advanced pulse modes or a complex multi-process interface.
Check whether the package includes a regulator, gas hose, contact tips, and a starter spool. A machine advertised as “MIG ready” may still require a gas cylinder, cylinder mounting hardware, welding wire, and safety equipment.
Wire and gas options
- Solid ER70S-6 wire with an argon-carbon dioxide mix: the cleanest and most beginner-friendly option for indoor mild-steel work.
- Self-shielded flux-core wire: useful outdoors because it does not need shielding gas, but it creates more smoke, spatter, and slag.
- 75% argon/25% carbon dioxide: a common gas blend for smooth mild-steel MIG welding.
- 100% carbon dioxide: generally cheaper and able to provide deeper penetration, but it usually produces more spatter.
- Aluminum: usually requires a spool gun or a suitable push-pull setup; do not assume a standard MIG torch will feed soft aluminum reliably.
For indoor furniture-style projects, solid wire and mixed shielding gas are usually easier to control. For driveway repairs or windy outdoor conditions, flux-core may be the more practical choice.
Duty cycle
Duty cycle is the percentage of a 10-minute period that a welder can operate at a stated output before it needs to cool. A 20% duty cycle means roughly two minutes of welding followed by eight minutes of cooling at that tested setting. The percentage drops as output rises, and the stated rating is not a promise that every project can be welded continuously.
Short seams on a table frame rarely stress a small machine. Long, uninterrupted welds on thick plate do. If you expect repeated fabrication, choose a machine with a higher duty cycle and use 240 volts where available.
Decision matrix for a first welder
| Your situation | Best fit | Why |
|---|---|---|
| Apartment or shared garage with no 240V outlet | 120V compact MIG welder | Runs from a standard outlet and is easier to store |
| Thin steel furniture, brackets, and small repairs | Lincoln Electric Handy MIG or Hobart Handler 140 | Simple controls and enough range for light fabrication |
| Outdoor work or uncertain wind conditions | Welder that supports self-shielded flux-core | No gas cylinder is required while welding outdoors |
| Frequent fabrication or future 1/4-inch steel projects | Miller Millermatic 211 or another 120V/240V model | More output, better upgrade potential, and less circuit limitation |
| Limited storage and occasional use | Compact 120V machine under about 40 lb | Can be moved without a permanent welding bench |
Allow space for the machine, cylinder, and safety area
A welder may occupy only about 18 by 10 inches, but the working setup needs more room. Reserve at least 24 inches of clear space around the machine’s ventilation openings, keep the gas cylinder upright and secured, and leave a 3-by-6-foot clear zone for handling long stock. A 10-by-12-foot garage can accommodate a compact welding station, but only if fuel, paint, cardboard, sawdust, and upholstered furniture are kept outside the spark area.
Do not weld on furniture indoors simply because the finished item will be used in a living room. Welding sparks can ignite foam, fabric, wood dust, and hidden debris. Use a nonflammable welding table, a proper helmet, leather gloves, flame-resistant clothing, eye protection, ventilation, and a fire extinguisher. Never weld a container or furniture component that may have held fuel, solvent, or pressurized gas.
What to buy with the welder
- A compatible gas regulator and hose if using solid wire
- 0.023-inch wire for thin sheet and 0.030-inch wire for general mild steel
- Spare contact tips and the correct drive roll
- A reliable auto-darkening helmet, welding gloves, and flame-resistant clothing
- Clamps, an angle grinder, wire brush, and a nonflammable work surface
- A properly secured cylinder and enough ventilation to control fumes
Final recommendation
For most first-time buyers, choose the Hobart Handler 140 if you want the simplest dependable 120-volt setup. Choose the Lincoln Electric Handy MIG when price and compact storage matter most. Choose the Eastwood MIG 180 for more output without immediately installing a 240-volt circuit, and choose the Miller Millermatic 211 when buying once for years of increasingly ambitious work is more important than minimizing the initial cost.