Key takeaways
- Confirm material compatibility: Check the manual for mortar, grout, thinset, or other materials you plan to mix. A tool suited to one compound may not suit every mix.
- Check the electrical setup: Compare the tool’s voltage and current requirements with your outlet and extension-cord guidance. Avoid undersized cords and keep connections protected from wet work.
- Look at handling: A loaded bucket or drum is heavy. Plan where the mixer will sit, how you will transfer material, and whether you can safely tip and pour without straining.
- Compare total cost: A drill-and-paddle setup is generally the lowest-cost entry, a dedicated paddle mixer costs more, and a drum mixer is a larger investment. As broad market guidance, basic paddle setups often run from tens to a few hundred dollars, dedicated mixers from roughly $100–$400, and homeowner drum mixers from a few hundred dollars upward. Specifications and regional pricing vary.
- Account for transport: A paddle mixer is manageable in a car; a drum mixer may need a larger vehicle or delivery and may be awkward to move alone. Check whether its frame folds or separates for storage.
Best mortar mixers: choose by batch size, cleanup, and storage
For small repairs, tile work, and occasional DIY, the best mortar mixers are usually a corded drill with a mixing paddle; for repeated medium-size batches, choose a dedicated paddle mixer; and for larger masonry jobs, a drum mixer is the more practical choice. The key trade-off is control and easy cleanup with a paddle versus greater batch capacity and less hand-guiding with a drum.
Don’t choose by motor power alone. Match the mixer’s rated capacity to the amount you can place before the mortar stiffens, check whether its speed suits the material, and make sure you have room to move and clean it. Mortar formulas vary, so follow the mix maker’s water, batch-size, and mixing instructions.
Our top picks


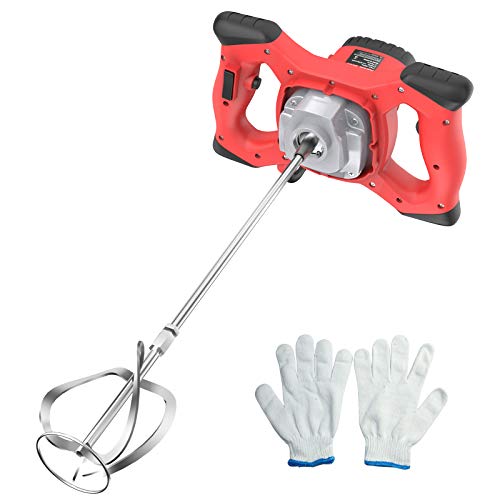
As an Amazon Associate we earn from qualifying purchases at no extra cost to you. Ratings are shown as listed on Amazon.
Paddle vs. drum: what changes on the job?
| Factor | Paddle mixer | Drum mixer |
|---|---|---|
| Practical batch size | Often a few gallons at a time; suited to controlled, smaller batches | Commonly around 3–6 cubic feet of rated drum capacity; useful for multiple batches |
| Motor power | Drills may be roughly 7–10 amps; dedicated paddle mixers often fall around 10–15 amps | Many homeowner models use motors around 3/4–1 hp; check the maker’s rating and duty guidance |
| Mixing and control | You guide the paddle through the mix; variable speed helps limit splashing and incorporate material | The rotating drum tumbles material; less hand-guiding, but the batch must suit the drum’s design |
| Cleanup | Usually quick: clean the paddle and bucket before mortar hardens | More surfaces to rinse, including the drum interior and blades |
| Portability and storage | Tool and bucket can fit on a shelf; easy to carry between rooms | Bulky frame and drum need floor space and may require a clear path through gates or doorways |
These are broad planning ranges, not a promise of usable output. A drum’s rated capacity is not necessarily the amount of mortar it can mix effectively in one batch. Check the manufacturer’s specifications, and leave enough room to turn the material without spilling.
Choose the mixer for your project
| Your situation | Best fit | Why it fits |
|---|---|---|
| Repointing a small area or setting a few tiles | Drill and paddle, or a compact paddle mixer | Small batches are easier to control and discard less if the work pauses |
| Several rooms of tile or recurring DIY work | Dedicated paddle mixer | Designed for repeated mixing and easier to maneuver than a drum |
| Building a masonry wall with repeated batches | Drum mixer | Higher batch throughput can reduce the number of mixing cycles |
| Limited garage or shed storage | Paddle mixer | Stores as a handheld tool rather than a full machine |
| Working alone on a large placement | Drum mixer, if the work pace and mortar instructions suit it | Can make larger batches, but plan how you will move and place them before they set |
What to look for in the best mortar mixers
Capacity that matches your placing speed
Buy for the batch you can use, not the largest number printed on a drum. Mortar has a working time, and a batch that sits while you prepare tools or move materials can become waste. For patching, repairs, or a single tile area, a bucket-sized batch is often more manageable. For longer masonry runs, repeated small batches can slow progress, making a drum worthwhile if you can keep placing material steadily.
Power, speed, and control
A drill used for mixing should be a suitable heavy-duty model with a side handle and a speed range appropriate to the paddle. A light-duty drill can overheat under sustained load. Dedicated paddle mixers typically offer better ergonomics and variable-speed control for dense mixes. Start slowly to reduce dust and splashing, then increase speed only as the material allows. Follow the paddle and mixer instructions rather than assuming more speed means better mixing.
For a drum, motor power matters, but so do the drum shape, mixing blades, and allowed batch size. A powerful motor cannot compensate for overloading the machine. Check whether the mixer is rated for mortar, not just occasional light concrete mixing, and observe its duty cycle.
Cleanup, wear, and storage
With either design, clean immediately. A paddle can usually be run briefly in a container of clean water, then rinsed and wiped; keep water away from the tool’s motor and electrical parts. Scrape and rinse a drum before residue hardens, following the manufacturer’s cleaning instructions. Do not let mortar dry inside either machine: hardened buildup reduces capacity and can damage moving parts.
On a paddle mixer, the paddle and chuck or attachment connection take regular wear. On a drum mixer, inspect the drum, blades, frame, drive components, and wheels. Store the paddle tool on a shelf or in a case; a drum mixer needs a stable floor area and enough clearance to tip, load, and clean it. Before buying, measure the storage spot and the narrowest route to the work area, including gates and doorways.
Buying checks before you commit
- Confirm material compatibility: Check the manual for mortar, grout, thinset, or other materials you plan to mix. A tool suited to one compound may not suit every mix.
- Check the electrical setup: Compare the tool’s voltage and current requirements with your outlet and extension-cord guidance. Avoid undersized cords and keep connections protected from wet work.
- Look at handling: A loaded bucket or drum is heavy. Plan where the mixer will sit, how you will transfer material, and whether you can safely tip and pour without straining.
- Compare total cost: A drill-and-paddle setup is generally the lowest-cost entry, a dedicated paddle mixer costs more, and a drum mixer is a larger investment. As broad market guidance, basic paddle setups often run from tens to a few hundred dollars, dedicated mixers from roughly $100–$400, and homeowner drum mixers from a few hundred dollars upward. Specifications and regional pricing vary.
- Account for transport: A paddle mixer is manageable in a car; a drum mixer may need a larger vehicle or delivery and may be awkward to move alone. Check whether its frame folds or separates for storage.
Bottom line
For occasional repairs and small batches, choose a drill with a suitable paddle or a compact dedicated mixer. For regular tile or masonry work, a dedicated paddle mixer offers a useful balance of power, control, and storage. For sustained work with repeated larger batches, a drum mixer can save mixing cycles—provided you have room to store it, a workable route to the site, and enough hands to place each batch on time.