Removing surface rust from a wrench, screwdriver, or pair of pliers is often possible without replacing the tool. The key to how to remove rust from tools is to identify the finish before choosing an abrasive or chemical. A rusty hand tool with sound metal can usually be cleaned over an afternoon; heavily pitted cutting edges, cracked jaws, and corroded electrical components require a more cautious decision.
Quick Answer: Brush away loose rust, clean off grease, treat bare steel with a suitable rust remover or a monitored vinegar soak, scrub gently, rinse or wipe as the product directs, and dry immediately. Finish with a light rust-preventive film. Never soak powered tools, batteries, plated precision instruments, or assembled tools with vulnerable bearings.
As an Amazon Associate we earn from qualifying purchases.
By DIY Ideas 4 Home Editorial Team
Before You Start: Tools, Materials and Safety
Not all brown discoloration is equal. Orange surface rust can often be removed, but deep pits on working edges or load-bearing parts may indicate permanent strength loss. Lowe’s rust-removal guidance recommends removing loose scale first, cleaning the metal, and protecting it against moisture afterward; those principles are useful for everyday hand tools, not a promise that every damaged tool is repairable.
| Tool or material | Size or spec | Why you need it | Substitute |
|---|---|---|---|
| Safety glasses and nitrile gloves | Eye protection; chemical-compatible gloves | Protect from rust particles and cleaning solution | Product-label-approved gloves |
| Brush or abrasive pad | Nylon or fine brass for delicate work | Loosens flaky rust with controllable abrasion | Fine synthetic scouring pad |
| Degreaser and clean cloths | Suitable for the tool finish | Removes oil that blocks treatment | Warm soapy water for washable hand tools |
| White vinegar or rust remover | Household vinegar or labeled metal treatment | Softens surface corrosion on suitable bare steel | Commercial chelating remover approved for the alloy |
| Drying and protection | Lint-free towel; light machine oil | Reduces flash rust after cleaning | Manufacturer-approved corrosion inhibitor |
Inspect the metal and finish before choosing a method
Determine whether the part is bare carbon steel, stainless steel, chrome plated, black oxide coated, painted, or a precision-ground surface. A dull film on bare steel is different from blistering chrome: scraping the latter can peel off more plating and expose sharp flakes. The safe starting point is a soft brush and minimal contact time; aggressive sanding is rarely appropriate for calipers, square edges, or precision-fit components.
Open and close pliers, check wrench jaw faces, and inspect screwdriver tips in bright light. If rust has left deep craters where a tool transmits force, the issue is structural rather than cosmetic. Set compromised tools aside instead of dressing down damaged metal until it appears smooth. Do not rely on an acid bath to restore original heat treatment, dimensions, or load rating.
Set up a ventilated, controlled cleaning area
Work on a stable bench lined with a tray that can catch drips and small springs. Wear eye protection during brushing; rust and wire bristles can break loose unexpectedly. Read the safety data and usage directions for any commercial remover, especially its allowed materials, protective equipment, ventilation, and disposal instructions. Keep children and pets away from solutions and rinsing water.
Do not mix vinegar with bleach, ammonia, or another cleaner. Do not heat acidic solutions, use them in food containers that will return to kitchen use, or pour unidentified chemical mixtures into a drain. A separate nonmetal tray makes it easier to see how the treatment is working and prevents chemical contact with the rest of the workbench.
Know when cleaning is the wrong repair
Discard or professionally evaluate a cracked socket, chisel with mushroomed striking end, gouged torque wrench, badly pitted plier pivot, or tool with loose insulation. Rust inside an electric drill or a battery housing is a different problem: unplug or remove the battery as instructed by the manufacturer, and use the appropriate power-tool service procedure instead of immersion cleaning.
Antique tools and valuable marked tools may lose collector value if original patina or finish is stripped. For these, test a tiny concealed area and consider conservation guidance. This article concerns routine workshop hand tools whose condition and purpose make a basic restoration reasonable.
How to Remove Rust From Tools Step by Step
These seven steps progress from the least invasive technique to a stronger treatment. Stop as soon as sound metal is exposed; polishing beyond that point wastes material. Work on one removable hand tool at a time so treatment time and drying are easy to control.
Step 1: Separate tools and assess the rust
Sort light surface rust, moderate scale, and severe pitting into different groups. Lightly stained wrenches may need only brushing and oil, while a solid steel screwdriver shaft might tolerate a short chemical treatment. Keep chrome-plated ratchets, wooden-handled chisels, insulated tools, and precision measuring instruments in a separate pile so they are not accidentally submerged.
Photograph any complex hand tool before removing a pivot screw or detachable component. If a wrench is still stamped with its size and the jaws are square, it is usually more promising than a wrench with rounded jaws and deep oxidation at the working faces. Decide what success looks like before starting: functional clean metal, not necessarily a mirror finish.
Step 2: Remove dirt and old grease
Wipe the tool with a dry rag, then use a cleaner appropriate for the finish to lift dirt and greasy deposits. On washable bare-metal tools, a little mild dish soap and water can help, provided you can dry the item immediately afterward. A rust treatment cannot reach metal under a layer of thick grease, so cleanliness directly affects whether the next step works.
Avoid flooding the joint of pliers or the mechanism of a ratchet. For assembled parts, apply cleaner to the cloth rather than filling cavities with liquid. Dry the accessible surfaces and blow out debris with a hand-operated air bulb or soft brush; high-pressure air can drive particles into bearings and eyes.
Step 3: Brush away flaky surface corrosion
Use a nylon brush first, moving along the grain of the metal when one is visible. On uncoated bare steel, a brass brush or fine abrasive pad can remove remaining loose scale; check frequently to be sure you are not erasing marks, rounding edges, or lifting chrome. Lowe’s recommends mechanical removal of loose rust before applying treatment, which also reduces the chemical work required later.
Pay attention to tool tips, serrations, and hinge gaps. A pick can lift debris from an accessible groove, but it should not be driven into a tight mechanism. After brushing, wipe away dust so you can distinguish remaining rust from marks left by the abrasive itself.
Step 4: Treat stubborn rust only on suitable metal
For a small, all-steel part, apply a commercial remover intended for its alloy and follow the label. Plain household white vinegar is an alternative for appropriate bare steel, but it can etch metal and attack finishes if left too long. Begin with a short monitored exposure, inspect the surface often, and remove the part when the rust loosens rather than assuming an overnight soak is harmless.
Do not immerse coated handles, plated surfaces, springs, electrical parts, or tools whose internal lubricants could wash away. A cloth dampened with remover can localize treatment on an accessible spot if the product label allows it. If the rusty area is not improving with a conservative approach, choose a different labeled product rather than increasing acid concentration by improvisation.
Step 5: Scrub, inspect, and repeat selectively
Work the softened rust gently with a nylon or brass brush, then wipe to assess the metal below. Keep the abrasive moving and use only enough pressure to dislodge corrosion. A stubborn pocket can receive a second controlled treatment, but repeated deep abrasion is not the same as removing loose rust: it changes the tool’s shape and can reduce grip or accuracy.
Look closely at screwdrivers and plier teeth. If the tool continues to shed flakes from a deep pit after normal surface corrosion is gone, stop; hidden damage may extend beyond what looks discolored. If only faint staining remains on a sound surface, that is a better result than grinding away useful steel to chase the last mark.
Step 6: Remove residue and dry immediately
Follow the remover label for whether the surface needs wiping, water rinsing, or neutralization. For vinegar-treated suitable bare steel, rinse thoroughly and dry at once with clean cloths, focusing on holes and joints where water hides. Leaving a damp tool on the bench can cause flash rust before the restoration is even finished.
Warm, dry indoor air can help evaporate residual moisture; avoid ovens, open flames, and high heat that could damage handles, temper, or coatings. If liquid entered a closed mechanism, do not assume the outside being dry means the inside is safe. Manufacturer guidance or professional disassembly may be needed before the tool goes back into service.
Step 7: Lubricate, store, and recheck the tool
Put a thin protective coating of light machine oil or an approved rust inhibitor on appropriate steel surfaces, and lubricate hinges according to the tool maker’s directions. Wipe off excess so the handle stays secure and oily film does not contaminate wood, paint, or flooring during the next project. Cutting edges and gripping faces should remain clean and functional rather than slick.
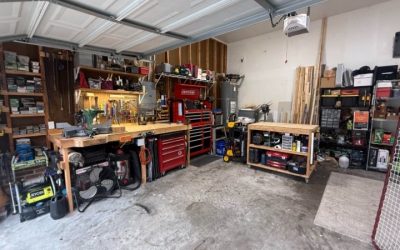
Move the cleaned tool to a dry drawer or chest, separated from damp rags and wet concrete. An organized toolbox with moisture control can reduce future corrosion, especially in unheated garages with seasonal condensation. Reinspect the formerly rusty spot after several days: new orange specks suggest residual moisture or insufficient protection rather than a need for stronger chemicals.
Products That Help
For broad flat surfaces, a fine nylon abrasive pad is usually more controllable than a powered wire wheel. A small brass brush helps around stamped markings on suitable bare steel, while a labeled chelating rust remover may be preferable to acid for parts where preserving the underlying surface matters. Always check the product’s compatibility list; no remover is safe for every alloy, coating, and adhesive.
A basic garage tool chest with closed drawers keeps cleaned tools off a damp floor. Light oil, a few reusable cloths, and a separate tray for maintenance are more useful for ongoing care than buying the strongest rust treatment available. Tool storage choices should address garage humidity and tool weight, not just neat appearance.
Common Mistakes to Avoid
Do not soak a complete ratchet, precision instrument, or battery-powered tool because a video shows a rusty wrench submerged in vinegar. Avoid coarse sandpaper on hardened cutting geometry and aggressive buffing on chrome or black oxide finishes. Also avoid leaving dissolved rust and chemical residue in pivots; the tool can feel smooth today and seize later.
The final mistake is skipping the protective finish. A bright surface just cleaned with water can oxidize rapidly in a humid workshop. The prevention step should be part of the same session as cleaning, not a separate project scheduled for next weekend.
Frequently Asked Questions
These answers cover the situations that commonly change whether rust removal is safe and worthwhile.
Can vinegar permanently damage steel tools?
Yes. Acid can etch a metal surface, attack certain finishes, and encourage corrosion if residues or water remain. A short, monitored treatment on suitable bare steel is different from leaving a plated ratchet or precision tool submerged overnight. Use the gentlest workable method and dry thoroughly.
Should I use a wire wheel on a rusty wrench?
Usually not as a first step. Powered wire wheels can remove plating, round edges, throw sharp wires, and damage stamped markings. A hand brush lets you assess corrosion after each pass. If powered abrasion is necessary for an expendable bare-steel part, use the machine’s guard and the manufacturer’s required protective equipment.
Is a rusty screwdriver safe to keep using?
Minor surface staining on an otherwise sound handle and shaft may be cosmetic. Replace the screwdriver if its tip is rounded or chipped, the shank is deeply pitted, or the handle is cracked. An insulated screwdriver used for electrical work should meet its original insulation condition and rating; rust removal cannot restore damaged electrical protection.
How should I dispose of used rust remover?
Follow the exact product label and local household hazardous waste rules. Never mix leftover solutions with other cleaners or assume everything marketed as rust remover may be poured down a drain. Keep the liquid in a labeled, compatible container until you have confirmed the proper disposal route.
Final Thoughts
The important part of how to remove rust from tools is deciding what not to restore: sound steel with surface corrosion is a reasonable DIY project, while deeply pitted working surfaces and damaged insulation are replacement decisions. A once-a-season inspection of the tool chest can catch new rust before it becomes a long repair, especially after wet-weather garage projects.