An attic access panel can interrupt otherwise continuous ceiling insulation, and a loose perimeter can let conditioned air escape into an unconditioned attic. This guide to how to insulate attic hatch panels focuses on a removable ceiling hatch with safe access from below. For a sound, dry panel, applying a compressible perimeter gasket and firmly attached insulation is a manageable DIY job; a damaged hatch or hazardous attic requires a different approach.
Quick Answer: Measure the opening, create a stable gasket landing surface, install weatherstripping, attach suitable insulation to the attic-facing side, and close the panel so the seal compresses evenly. Confirm that the hatch still opens freely and that neither attic ventilation nor equipment clearance is affected. Pull-down stairs typically need a separate insulated cover above the folding assembly.
As an Amazon Associate we earn from qualifying purchases.
By DIY Ideas 4 Home Editorial Team
Before You Start: Tools, Materials and Safety
ENERGY STAR’s Sealing the Attic Hatch or Door guidance identifies two complementary jobs: weatherstrip the opening to restrict air movement and attach fiberglass or rigid-foam insulation to the hatch. One does not replace the other. Work from a stable position and inspect the surroundings before you buy materials; what appears to be a simple loose lid can sit below unsafe wiring, damp framing, or insulation that should not be touched.
| Tool or Material | Size or Spec | Why You Need It | Substitute |
|---|---|---|---|
| Tape measure and pencil | Measure hatch and clear opening | Mark panel, perimeter and foam dimensions | Ruler and paper sketch |
| Straightedge and utility knife | Compatible with chosen foam board | Cut rigid insulation to fit the panel | Suitable fine-tooth hand saw |
| Compressible adhesive weatherstrip | Match actual gasket landing and closing gap | Seal the panel perimeter without permanently bonding it | Manufacturer-compatible gasket |
| Rigid foam board or fiberglass | Thickness selected for space and required R-value | Add thermal resistance above the hatch | Purpose-made insulated access cover |
| Compatible adhesive or mechanical retainers | Approved for insulation and panel material | Prevent insulation falling off when lid opens | Approved retention straps |
| Wood stops and latches if needed | Stops sized for opening; adjustable closure | Provide flat gasket seat and repeatable compression | Existing sound ledge and secure fastening |
| Stable ladder, light and protective gear | Appropriate reach, gloves and eye protection | Inspect and work without stepping on ceiling drywall | Qualified installer if access is unsafe |
Understand the Two Different Barriers
The lid itself should have a continuous thermal layer, while a gasket needs a continuous, firm contact path around the frame. The U.S. Department of Energy’s Standard Work Specifications for Single-Family Home Energy Upgrades call for attic access hatches to have noncompressible insulation at the R-value of the adjacent insulated assembly, with an air-sealed frame and securely attached insulation. The full target therefore depends on what surrounds the opening and on applicable building requirements, rather than a universal sheet thickness.
For comparison, ENERGY STAR Certified Homes guidance on attic entrances specifies a durable cover of at least R-10 with a gasket for qualifying ceiling access panels and drop-down stairs. That is a specific program’s checklist criterion, not a claim that R-10 is sufficient for every existing attic. The same guidance makes clear that a gasketed, removable cover is expected, rather than an access opening sealed permanently with caulk.
Inspect the Attic for Stop-Work Hazards
ENERGY STAR’s Attic Air Sealing Project asks homeowners to seek qualified help for damp insulation, rotted framing, vents that terminate into the attic, poor ventilation, or knob-and-tube wiring. The U.S. Environmental Protection Agency warns that pebble-like vermiculite insulation should be assumed potentially asbestos-contaminated and left undisturbed. If you see it around the hatch, do not scoop it back, cut through it, vacuum it, or start drilling in the affected area; arrange an appropriate professional evaluation instead.
Use a sound ladder on level flooring and have another adult steady access when appropriate. ENERGY STAR’s Tips for Working in the Attic warns against putting weight on ceiling drywall or exposed insulation; only proper structural supports can bear your weight. Keep clear of exposed wiring, fixtures and the attic hatch opening, and do not lean into the attic when you lack a safe platform. Excess heat and roofing nails create additional hazards even on an apparently routine visit.
Determine Which Access Type You Have
A lift-out plywood or drywall access hatch can often be improved by adding an underside gasket seat and insulation on the attic-facing surface. A hinged attic door needs sufficient swing clearance and a positive catch; a pull-down stair opening normally needs an insulated enclosure above the collapsed ladder. ENERGY STAR explicitly treats pull-down stairs and attic doors as openings to weatherstrip and insulate, but an ordinary foam slab attached to a folding stair section may interfere with operation.
Check whether the frame currently provides a level ledge all the way around the lid. If the hatch balances on narrow decorative trim, ENERGY STAR describes adding stops about 2-1/2 inches wide to create a gasket-bearing surface and a place for latches. Do not copy that size blindly where your framing or trim cannot support it. A sagging lid, damaged stop, or obstructed opening needs repair before insulation can be fitted reliably.
How to Insulate an Attic Hatch Step by Step
For a simple lift-out panel, complete the fit and seal before fastening insulation. The sequence below follows the logic of ENERGY STAR’s hatch guidance: make the panel seat predictably, establish a resilient air seal, then add a thermal layer that remains attached during repeated access. Take photographs as you work so you can spot changes to the gasket after the lid has been opened several times.
Step 1: Measure the Hatch and Clearance
With the ladder positioned securely, measure the lid itself, the clear framed opening, and the length of each supporting ledge. Write down the panel’s thickness, how it is lifted, and any obstructions on the attic side. A cover that fits the panel but catches on a joist or mechanical component will not seat correctly; verify the closing path before cutting rigid foam. Photograph all four corners and note where the existing lid currently touches the frame.
Set the panel on a protected, flat work surface only if it is light enough to remove without risk. If its sides are uneven, mark which edge faces the room and which side receives insulation. Look for loose screws, splintered wood, bowed drywall, or a cracked perimeter. These defects should be repaired first, because a gasket cannot create consistent contact against a moving or warped support.
Step 2: Create a Firm Perimeter Seat
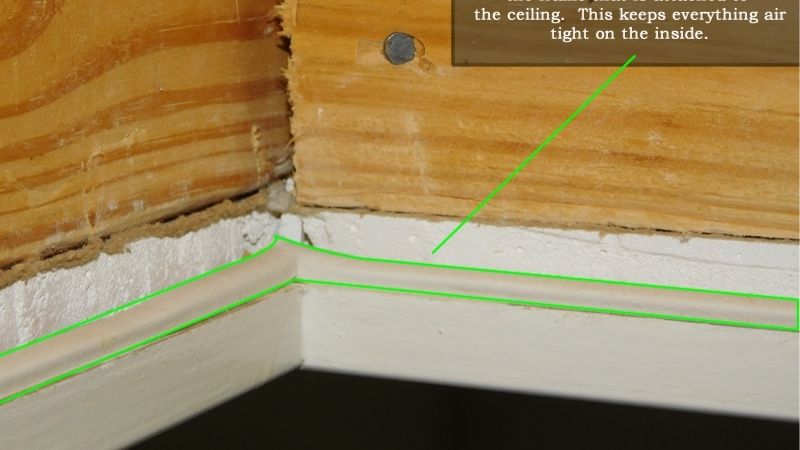
Remove loose dust from the frame without disturbing attic insulation. If the hatch already closes against a broad, level wood ledge, keep that surface and correct obvious loose fasteners. If the panel touches only a narrow molding, add correctly anchored stops where the underlying construction permits. ENERGY STAR’s hatch instructions use a wood stop approximately 2-1/2 inches wide to hold the gasket and, where appropriate, hook-and-eye fasteners. Leave the opening operable for future inspections.
Lay the lid in place temporarily with no new gasket and check whether it rocks between opposite corners. A stable seat should support it without forcing the panel to bend. If one stop sits proud, adjust the support before continuing; thick weatherstrip is not a substitute for a straight frame. Also check the path for loose-fill insulation that might spill through the gap when the hatch is lifted, as the Department of Energy recommends a durable protective barrier around attic openings.
Step 3: Select and Apply the Gasket
Choose adhesive weatherstrip that can compress under the weight or latch pressure of the hatch while still leaving enough material to form a seal. Frost King’s product table lists R338H rubber-foam weatherseal as 3/8 inch wide, 3/16 inch thick, and 10 feet long; it is an example for a small, consistent contact gap, not a universal size. For a larger uneven opening, determine the proper gasket profile rather than stacking tape until the lid refuses to close.
Clean and dry the ledge following the gasket maker’s instructions. Press the strip onto the frame where the hatch actually touches it, carry the seal around corners without large gaps, and trim the ends to meet. Before removing the panel again, lower it gently and inspect the entire perimeter. A strip that bunches at corners, lifts off dusty paint, or misses a recessed edge must be repositioned before insulation adds weight to the lid.
Step 4: Cut Insulation for Full Hatch Coverage
Mark the size of the hatch on a piece of rigid insulation using your actual measurements rather than a nominal opening size. ENERGY STAR says fiberglass or rigid foam board can be cut to the same size as the attic hatch and attached to its back. Avoid projections that strike joists, prevent the lid from lifting out, or pry open the gasket. If you use more than one insulation layer, plan an attachment that secures each layer and leaves the edges supported during removal.
Owens Corning’s FOAMULAR 150 rigid-foam product sheet lists approximately R-5 per inch, but that stated thermal resistance does not by itself define the correct thickness for your hatch. Compare insulation options with the R-value of the adjoining ceiling assembly and local requirements. Exposed foam plastic can be subject to fire-protection rules, so check product instructions and the local building authority before leaving foam board exposed in an attic access assembly.
Step 5: Attach Insulation Without Damaging the Lid
Dry-fit the cut insulation on the attic-facing side, then use an adhesive specifically permitted by the insulation and hatch manufacturers or suitable mechanical retention. Avoid solvent-based adhesives that can attack foam, and do not drive screws through to the visible ceiling side. The Department of Energy’s Standard Work Specifications require the insulation to remain permanently attached and in contact with the hatch air barrier. A loose board that drops when the panel is lifted is a safety problem and no longer insulates the opening consistently.
Allow any adhesive to cure for the period stated on its label before reinstalling the lid. If the panel feels substantially heavier, reassess whether the hatch material, hardware and lifting method are adequate. A hatch that now needs to be forced into place should not be used as-is. In an awkward overhead location, a lightweight approved cover or a professional-built insulated lid may be preferable to fastening heavy layers to a thin or crumbling panel.
Step 6: Set the Lid and Compress the Seal
Lower the finished hatch gently onto the gasket and check whether all four sides make contact. ENERGY STAR recommends positioning hook-and-eye fasteners so weatherstripping is slightly compressed when the hooks are latched. If the lid needs a latch, install compatible hardware into sound framing and adjust it until the seal contacts evenly; do not use excessive pressure that bows the panel or pulls the stops loose. A lift-out panel should remain removable without tools that could damage surrounding trim.
Look for daylight through the perimeter in a dark attic, if you can check safely, and inspect for visible gaps from below. A thin sheet of paper pinched between hatch and gasket at several positions should show similar resistance when pulled gently. Treat this as a local fit check, not a measured airtightness rating. Correct loose corners and uneven stops before concluding that a larger quantity of insulation will solve the problem.
Step 7: Test Operation and Record the Finished Fit
Open and close the hatch again to verify that insulation is secure, fasteners operate properly, and weatherstripping returns to shape. Make sure nearby attic soffit ventilation, plumbing vents, flues, wiring, and HVAC components remain unobstructed. ENERGY STAR’s About Attic Ventilation guidance specifically warns not to cover soffit vents with added insulation. Hatch improvements are intended to separate living space from the attic, not to seal the attic’s purposeful ventilation openings.
Take a final photograph of the sealed perimeter and note the foam type, stated R-value, and gasket product used. Check the fit after the first few attic visits because the hatch may be set down at a different angle or the gasket may shift. Persistent condensation, ice dams, or drafts throughout the house call for a broader building-envelope assessment; a neatly insulated hatch is one localized repair, not evidence that other air leaks have disappeared.
Products That Help
For a flat lift-out hatch, Owens Corning FOAMULAR 150 rigid foam is one material option when its installation and fire-protection requirements are satisfied; the manufacturer’s FOAMULAR 150 product sheet lists R-5 per inch and identifies the board as a rigid insulation product. Pair insulation with a correctly sized, compressible gasket rather than expecting rigid board to seal a moving edge. Frost King R338H rubber-foam weatherseal offers a manufacturer-listed 3/8-inch width and 3/16-inch thickness in a 10-foot roll, which may suit a narrow, flat contact surface after you measure the gap.
For a folding-stair opening, Owens Corning’s Attic Stairway Insulator is a different product: its manufacturer data sheet lists an R-10 rating and says the cover fits access openings up to 25-1/2 by 54 inches. The sheet is older, so verify current availability, model specifications, and actual stair-clearance compatibility before purchasing. This cover does not substitute for repairing a rotten frame or for sealing a separate lift-out panel with an uneven bearing surface.
Common Mistakes to Avoid
Do not glue or caulk the hatch permanently shut, conceal a required access path, or compress an oversized foam strip so hard that the lid warps. Do not attach fiberglass loosely where it can fall when the panel opens. Keep insulation off unapproved recessed fixtures and away from flues, and do not block attic vents. ENERGY STAR’s attic ventilation guide specifies at least 3 inches of clearance around non-IC-rated recessed can lights when adding attic insulation, subject to the fixture and applicable installation requirements.
Do not assume that reflective foil alone provides the same rated resistance as a thicker insulation assembly, or that one R-value fits every climate. Another common error is insulating a hatch while ignoring water stains or wet framing directly above it. If moisture has damaged the hatch or the attic, identify the source first; a tighter lid should not conceal continuing roof leakage, unsafe wiring, or a vent exhausting moist indoor air into the attic.
Frequently Asked Questions
A properly finished hatch has to perform through repeated opening and closing, not just look insulated on installation day. The questions below address choices that often remain after the main seal and insulation are in place.
How Much Insulation Should Go on an Attic Hatch?
The appropriate amount depends on the adjacent ceiling insulation and the design of the access assembly. The Department of Energy’s Standard Work Specifications call for hatch insulation matching the adjoining assembly’s R-value, while ENERGY STAR Certified Homes criteria specify at least R-10 for qualifying ceiling access covers. Treat the latter as a program-specific minimum, not a replacement for your existing attic’s insulation design or local building requirements.
Should You Use Spray Foam Around an Attic Hatch?
Not across the joint that must open. The moving perimeter needs a compressible gasket; expanding foam could adhere the hatch shut or interfere with operation. A construction professional may use an approved sealant for a stationary gap between framing and finished ceiling, but only after checking electrical, fire and combustion clearances. ENERGY STAR’s attic-hatch guidance specifically calls for weatherstripping on the access lid’s contact surface.
Can You Insulate a Pull-Down Attic Ladder?
Yes, but the safe assembly is usually an insulated enclosure or compatible cover above the folded stairs, with a gasket around the access rim. ENERGY STAR describes prefabricated attic stair covers as an option, and the Owens Corning Attic Stairway Insulator data sheet lists a cover suitable for access points up to 25-1/2 by 54 inches. Verify that the cover clears your ladder hardware and can be replaced after entering the attic.
Will Weatherstripping Alone Stop Heat Loss?
Weatherstripping reduces airflow through the lid perimeter when it compresses against a sound frame, but it does not give a thin panel much resistance to heat conduction. Conversely, a thick rigid-foam panel may still leak air if it rocks on its stops. ENERGY STAR’s instructions pair the two measures for that reason. If the attic is conditioned or the insulation sits at the roofline rather than the attic floor, ask an insulation professional where the thermal boundary should actually be.
Final Thoughts
The most important final check is whether the hatch still closes in exactly the same position after someone uses the attic. Mark its orientation, retain photos of the gasket, and verify that the insulation does not catch on framing during the next access. If you are planning how to insulate attic hatch openings in a house with unusual roofline insulation or a pull-down ladder, confirm the thermal boundary and access design first; a removable, reliably gasketed assembly is more useful than an impressive R-value attached to a lid that no longer seats properly.