A draft you can feel near a window may be a loose sash seal, while the biggest opening may be hidden around an attic hatch or basement penetration. This guide to how to check home air leaks uses a room-by-room inspection, a paper test, and simple visual clues to separate likely air movement from ordinary cold surfaces. Most accessible checks can be completed in an afternoon; attic work and tests around fuel-burning appliances need more caution.
Quick Answer: Close exterior openings, examine window and door edges, move a thin tissue near suspect seams, and record where it reacts. Check attic and basement connections visually without disturbing hazardous materials. If symptoms remain widespread or the house has natural-draft combustion equipment, ask a qualified energy assessor to locate and measure leakage safely.
As an Amazon Associate we earn from qualifying purchases.
By DIY Ideas 4 Home Editorial Team
Before You Start: Tools, Materials and Safety
The U.S. Department of Energy’s Consumer Guide to Home Energy Assessments recommends a walk-through of junctions, door and window trim, attic hatches, wiring holes, and service penetrations. Begin with locations you can see from a room, not an attempt to dismantle the building. Test during a noticeable indoor-outdoor temperature difference or breezy weather if possible, but expect wind and household fans to change the strength and direction of a draft.
| Tool or Material | Size or Spec | Why You Need It | Substitute |
|---|---|---|---|
| Thin tissue or lightweight paper | One dry strip | Shows movement at a suspected crack | A loose thread held by hand |
| Plain writing paper | Sheet that fits the sash or door seal | Checks pressure of a closed seal | Thin receipt paper |
| Flashlight | Handheld beam | Highlights trim gaps and penetrations | Phone flashlight |
| Phone camera and notebook | Photos of each test position | Creates a prioritized leak map | Paper sketch of rooms |
| Optional thermal imager | Compatible phone or standalone unit | Shows suspicious temperature patterns | Visual and paper tests |
Know What Counts as an Air Leak
Infiltration means outdoor air entering through an unintended opening in the building enclosure. A cold glass pane, an HVAC supply register, or a planned ventilation opening is not automatically a leak. The Department of Energy distinguishes finding leakage from measuring whole-house leakage: a tissue can point to an opening, while a calibrated blower-door fan and pressure gauge quantify airflow across the building enclosure.
Give each observation a location and a test result. A small movement at an exterior door threshold is useful evidence when it repeats under similar conditions; one cold spot on drywall is weaker evidence because insulation gaps and thermal bridges can look similar. Avoid ranking air leaks by how cold a single surface feels. The goal is a map of confirmed or suspected pathways that a repairer can recheck.
Check Safety Boundaries Before Testing
Do not tape over bathroom exhausts, kitchen hood outlets, dryer terminations, fresh-air inlets, combustion-air openings, or a furnace or water-heater vent. ENERGY STAR’s Attic Air Sealing Project warns that inappropriate sealing can worsen indoor pollutant buildup and backdraft combustion gases. If the home has an atmospherically vented gas appliance, do not deliberately depressurize rooms with every exhaust fan to hunt for leaks without a qualified combustion-safety assessment.
Use tissue rather than a flame around electrical fittings, attic insulation, curtains, and suspected fuel leaks. Leave electrical covers, junction boxes, flues, and gas connections alone. ENERGY STAR also advises against disturbing vermiculite attic insulation before an approved asbestos evaluation. If attic framing is wet or moldy, or old knob-and-tube wiring is visible, stop at a safe observation point and consult a professional rather than crawling deeper.
How to Check Home Air Leaks Step by Step
Move from easy-to-repeat room tests to harder-to-reach locations. Record whether the HVAC is running, whether exhaust fans are on, and which side of the house is windy. These conditions explain why a leak seems strong on one visit and barely noticeable on another. Complete the entire inspection before purchasing large quantities of sealing supplies, because detecting a draft and choosing the correct repair are separate jobs.
Step 1: Make a Room-by-Room Draft Map
Walk the conditioned rooms and mark the exterior walls, access hatches, recessed lighting, doors, and areas where pipes or cables appear to pass outdoors. The Department of Energy’s Consumer Guide to Home Energy Assessments specifically lists outlets, switch plates, baseboards, wall-mounted air conditioners, and electrical or gas service entries as common places to inspect. Begin with each complaint room, but include the basement and attic access routes where safe.
Give each spot a simple label such as living-room north sash or utility-room pipe entry. Note whether you can see daylight, feel moving air, or only notice a cool surface. Also record the weather, since a windward wall can experience a different pressure than a sheltered wall. By the end of this step you should have a repeatable route and a few clear candidates, not a guess about the entire house.
Step 2: Feel and Observe Door Perimeters
Close and latch an exterior door as you normally would, then move a narrow tissue strip along its vertical jambs, top seal, and threshold. Watch for movement toward or away from the seam rather than rubbing the paper against the surface. A door that has dropped on its hinges may leak at the upper corner even when the bottom sweep looks intact. Compare opposite corners instead of assuming the whole gasket needs replacement.
Next try the paper-pull method: shut the door on a thin piece of writing paper at different points along the gasket and gently pull. The Department of Energy’s home-assessment guide describes a similar method for doors and windows; paper slipping out readily suggests weak contact at that location. Do not force a locked door or damage weatherstripping. Mark each loose area on the map and photograph the latch-side alignment before changing the hardware.
Step 3: Test Window Sashes and Trim
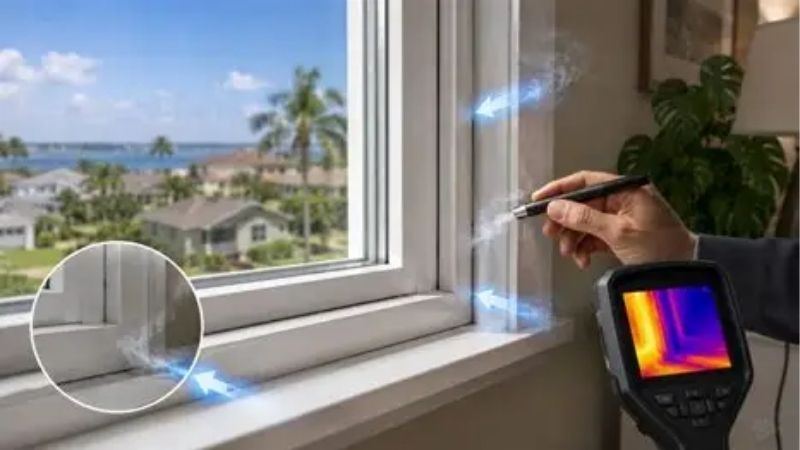
Lock an operable window and repeat the tissue check along the sash meeting rail, lower sill, and both vertical edges. ENERGY STAR’s Applying Plastic Over Windows guidance recommends using paper trapped in the closed sash to identify a seal that could be tighter. The same source describes observing incense smoke movement, but a tissue is preferable where indoor-air irritants, children, curtains, or alarms make smoke undesirable.
Separate a moving sash leak from a perimeter gap where the trim meets the wall. A paper test evaluates closing pressure; it cannot show whether hidden gaps exist behind the casing. Look for peeling caulk, daylight, staining, or accumulated dust near trim corners. Note whether a visible gap is at a movable joint that must remain operable, since filling it with permanent caulk would block the window.
Step 4: Inspect Outlets and Service Openings
With the room in normal operating condition, hold the tissue near the outer edge of switch and outlet cover plates on exterior walls. Do not insert paper, metal probes, or fingers into slots, and do not remove a cover to perform this test. A moving tissue can indicate air traveling through the wall cavity rather than a failure of the outlet itself. Compare with another exterior-wall location under similar fan and wind conditions.
Look around cable entries, wall-mounted air conditioners, pipe sleeves, and visible wall-to-floor joints. The Department of Energy names service entrances and baseboards among common leak locations in its home-energy assessment checklist. Photograph gaps without pushing anything into electrical or gas penetrations. If the finding involves damaged wiring, a warm outlet, a gas fitting, or an inaccessible electrical box, refer it to the proper licensed trade.
Step 5: Look for Attic Hatch and Ceiling Clues
From the living space, inspect the hatch edge with the door closed and look for dirty streaks, gaps, warped trim, or a missing compression seal. ENERGY STAR’s Sealing the Attic Hatch or Door guidance explains that a hatch can need both weatherstripping at its perimeter and insulation on the back. A tissue can identify a draft at the edge; it cannot tell you whether the panel meets the insulation target for your climate.
If safe attic access is available, look toward plumbing and wire penetrations and places where partitions reach the attic floor. ENERGY STAR’s Attic Air Sealing Project identifies darkened insulation as evidence of air filtering through it; damp spots or frost can also point toward moisture moving with indoor air. Stay on supported framing or approved walkways, avoid hot flues and fixtures, and do not disturb suspicious insulation. Record findings for the attic-hatch insulation or attic-sealing project rather than attempting them during this inspection.
Step 6: Examine Basement and Rim Joist Gaps
At an accessible basement wall, check the band of framing above the foundation, the sill-plate line, and places where plumbing or wiring penetrates toward the outdoors. ENERGY STAR’s Sealing Air Leaks: Basement describes the rim joist, sill plate, and service holes as common leakage locations. Outside air entering low in the house can be pulled upward by warm air escaping through higher openings, which explains a draft that remains even after a window sash has been tightened.
Use your flashlight to inspect for visible separations, discolored insulation, daylight, or damaged perimeter seals at basement windows. Do not confuse planned crawlspace ventilation with accidental leakage, and avoid disturbing damp material or unknown insulation. A suspected gap where concrete meets wood belongs on the map with a photo and approximate length, but moisture control and any required drainage should be assessed before permanent sealing.
Step 7: Compare Thermal Patterns Carefully
Thermal cameras display surface temperature differences, not air movement directly. The Department of Energy’s Consumer Guide to Home Energy Assessments describes thermography and blower-door testing as complementary techniques: temperature patterns can show suspicious locations, while controlled pressure helps reveal true pathways. A cold stripe on an outside corner may be a thermal bridge instead of infiltration, and direct sun or nearby heating equipment can distort the comparison.
If you use a phone camera attachment, scan the same window or wall from a consistent distance and note the indoor conditions. Flir’s Flir One product specifications list an 80-by-60 native thermal image, while its super-resolution output is software-enhanced; neither figure measures air leakage. A standalone Klein Tools TI250 imager is another way to locate hot and cold surface spots, but its readings still need a corroborating draft test. Keep images as clues, not as an airtightness score.
Step 8: Recheck Suspects and Decide on an Audit
Return to your strongest suspected gaps and repeat the same paper or tissue check with doors and windows in their original positions. If a loose latch, misaligned door, or missing weatherstrip is obvious, a small, reversible correction may be reasonable; otherwise keep the finding marked as suspected. After any minor repair, repeat the check and photograph the new result under similar conditions. A test that changes with wind direction is not necessarily wrong, but it needs context.
Ask a qualified home energy assessor about a blower-door test when drafts are widespread, attic bypasses are inaccessible, or repeated DIY observations contradict one another. The Department of Energy explains that a calibrated blower door uses a fan, frame, and manometer to measure airflow across the house envelope; a fan without measurement equipment may locate openings but cannot quantify overall leakage. Discuss combustion appliances, ventilation, moisture, and any earlier sealing work before booking the assessment.
Products That Help
The Flir One thermal camera can help document surface-temperature patterns near window casings and attic accesses when there is a useful indoor-outdoor temperature difference. Flir’s product specification page lists 80-by-60 native resolution and phone variants with different connectors. Select a version compatible with your specific phone, and remember that a thermal image alone does not confirm a draft or measure airflow. If you only need to investigate one room, start with free tissue and paper checks before buying imaging equipment.
Once a moving-air gap is confirmed, a targeted weatherseal or film kit can be more appropriate than a thermal camera. Frost King’s R734H Rubber Foam Weatherseal product table identifies a 3/4-inch-wide, 7/16-inch-thick, 10-foot black roll; match the actual compressed door gap before choosing such a thick seal. Frost King’s V73/3H Indoor Shrink Window Kit instead contains three sheets sized 42 by 62 inches for standard window frames. It treats a drafty window area, not missing attic insulation, and should not cover an opening needed for ventilation or emergency escape.
Common Mistakes to Avoid
Do not interpret a tissue moving near a supply register as evidence of outdoor infiltration. Do not caulk operable sash joints shut, block combustion-air pathways, or assume a thermostat setback solves a hidden envelope leak. ENERGY STAR’s basement sealing guidance discusses caulk for gaps about 1/4 inch or smaller and spray foam for some larger gaps up to about 3 inches, but those are materials for correctly identified, suitable locations, not instructions to fill every opening you find.
Likewise, a dramatic thermal image is not proof that window replacement is necessary. Confirm the path first, then identify which repair is proportionate: latch adjustment, appropriate weatherstripping, a targeted professional seal, or investigation of insulation and moisture. Keep the draft map after the repairs so a future contractor can distinguish work already completed from problems that still need testing.
Frequently Asked Questions
The first inspection usually answers where air might be moving, but not how much it costs or which parts of the building should be left open. These are the next questions to resolve before any sealing project begins.
Can You Detect Air Leaks Without a Thermal Camera?
Yes. The Department of Energy’s Consumer Guide to Home Energy Assessments describes visual checks, a flashlight and a paper-in-the-seal test as homeowner methods. Tissue movement at a gap gives another visual clue. These methods are useful for finding accessible openings, but they do not measure whole-house leakage. A calibrated blower-door test is better suited to comparing the building’s overall airtightness.
Is a Cold Window Always an Air Leak?
No. Glass can feel cold because heat is passing through it even when the window closes tightly. Drafts are more likely when air moves at the sash seam, latch side, or trim-to-wall connection. Use the paper-pull and tissue checks to narrow down the source. If the surface is cold but the seal holds, window thermal performance and insulation may matter more than weatherstripping.
Should You Turn on Every Exhaust Fan to Find Drafts?
Not when fuel-burning appliances might backdraft or the ventilation system is not understood. The Department of Energy includes an exhaust-fan depressurization method in its consumer guide, but ENERGY STAR also warns that changes in house pressure can affect combustion-gas venting. Households with natural-draft furnaces, fireplaces, or water heaters should ask an assessor about safe testing conditions instead of improvising a stronger pressure difference.
How Do You Know Whether a Repair Worked?
Repeat the original check at the same location with similar window position, fan operation, and weather. If a sheet of paper now resists pulling and the tissue no longer reacts under comparable conditions, the local seal probably improved. That does not establish a particular energy saving or confirm that hidden attic leaks are gone. A post-work blower-door measurement is the more rigorous option for whole-house results.
Final Thoughts
A useful inspection ends with a short, prioritized map rather than a bag of caulk. Note whether each finding was visual, confirmed by moving paper, or merely a suspicious temperature pattern. If the strongest clues are at attic-to-house or basement-to-house junctions, a qualified assessment may uncover more than replacing visible window weatherstripping. Keep those records when you revisit how to check home air leaks after repairs; repeated observations are more valuable than an unsupported estimate of savings.