The fastest way to lower a winter heating bill is to stop paying for heat you do not need and prevent the heat you buy from escaping. A practical plan for how to reduce heating bills starts with your thermostat schedule, a clean heating-system filter, and a quick review of drafts. Most first-round checks take an afternoon and require little equipment; attic work, duct repairs, and equipment upgrades may need a contractor.
Quick Answer: Compare recent heating usage, schedule a modest temperature setback while asleep or away, check the furnace or heat-pump filter, seal obvious drafts, and get quotes for insulation or duct problems that remain. Start with measures you can reverse easily. Give each change time to appear in the utility data before paying for new equipment.
As an Amazon Associate we earn from qualifying purchases.
By DIY Ideas 4 Home Editorial Team
Before You Start: Tools, Materials and Safety
Reducing a bill is a sequence of decisions, not a shopping list. ENERGY STAR’s Heat and Cool Efficiently guidance says nearly half of home energy consumption goes toward heating and cooling, making the operating schedule and building shell reasonable places to begin. Gather the items below, then separate inexpensive adjustments from projects that need estimates and professional safety checks.
| Tool or Material | Size or Spec | Why You Need It | Substitute |
|---|---|---|---|
| Recent utility statements | Same billing periods in different years | Compare fuel use separately from price changes | Utility online account |
| Thermostat schedule | Existing heat-mode control | Match heating hours to household occupancy | Manual daily adjustment |
| HVAC filter label | Exact size and system-approved rating | Buy the right replacement without restricting airflow | Photograph existing filter specifications |
| Weatherstripping or window film | Measure the opening before purchase | Reduce noticeable drafts at selected gaps | Existing adjustable seals |
| Inspection notes and room thermometer | Room-by-room observations | Identify persistent comfort problems | Paper log and thermostat display |
Read the Bill Before Buying Anything
First find the amount of natural gas, fuel oil, or electricity used, rather than starting with the dollar total. A bill can increase because the rate, fixed charges, weather, or usage changed. If your provider reports monthly therms or kilowatt-hours, compare those units with the same season last year. Note unusual vacancies, newly occupied rooms, and any heating-system repair that could make the two periods different.
For a home with electric heat, separate household-wide electricity consumption from heating as much as your utility’s tools allow. Avoid calling the difference a heating saving unless other major loads stayed similar. A programmable thermostat may report runtime, but runtime alone is not a standardized measure of fuel usage. A monthly record is enough to tell whether you need an operational adjustment or a closer system inspection.
Keep Heat, Combustion, and Electricity Safe
Never seal furnace combustion-air openings, required fresh-air vents, or gas appliance flues to make a room feel less drafty. ENERGY STAR’s Duct Sealing and Benefits of Duct Sealing guidance warns that poor air pressure relationships around combustion appliances can contribute to backdrafting. If you notice a gas odor, leave the building and contact your gas utility or emergency services from outside. Do not inspect gas fittings yourself.
Only remove an HVAC filter through the access door intended for routine owner service, with the equipment switched off according to its manual. Do not open an electrical cabinet, disturb refrigerant lines, or operate a furnace with panels removed. If you use portable electric heaters, follow their clearance and direct-wall-outlet requirements rather than treating extension cords or power strips as a heating strategy. Address carbon-monoxide alarm problems independently of cost cutting.
How to Reduce Heating Bills Step by Step
Work from reversible adjustments to diagnostic work and then capital upgrades. The savings estimates below belong to the specific measures and household types described by their sources; they are not percentages you can add together. Record the change date after each step so that a colder week is not mistaken for a failed improvement.
Step 1: Set a Heating Schedule You Can Maintain
Use your current occupied setpoint as a starting point, then lower it while everyone is asleep or out for a sustained period. The Department of Energy’s Home Upgrades guidance says a setback of 7 to 10 degrees F for 8 hours a day can save as much as 10 percent a year on heating and cooling in suitable circumstances. That is a potential result, not a guaranteed reduction for an individual winter bill.
Begin with a comfortable change and note whether anyone is actually home during the scheduled setback. A rented apartment with an always-on manual thermostat can still benefit from a consistent routine; an expensive thermostat is unnecessary if someone already makes the adjustments reliably. If you have a heat pump with electric auxiliary heat, do not copy a conventional furnace’s deep setback schedule without checking the heat-pump control instructions. Abrupt recovery can engage more costly backup resistance heat.
Step 2: Check the Heating Filter and Airflow
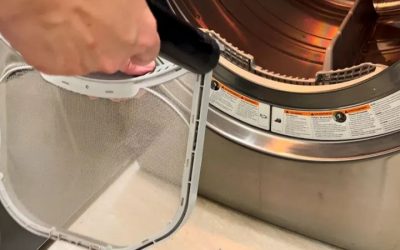
Find the filter access location and read the label for dimensions and approved filter type. ENERGY STAR’s Heat and Cool Efficiently guidance recommends inspecting the filter monthly during heavy use and replacing a disposable filter when dirty; it gives three months as a general minimum replacement interval for many common systems. Manufacturer guidance and the condition of your particular filter take priority, especially for thicker media filters rated for longer service.
Replace a dirty filter with the size and airflow rating specified for the furnace or air handler. Then confirm that supply registers and return grilles are not covered by rugs, furniture, or stacked boxes. Do not close every register in an unused bedroom as a shortcut: the Department of Energy’s Home Energy IQ guidance cautions that closing vents can strain a forced-air system. If certain rooms remain unusually cold, use the separate heating-vent balancing guide rather than repeatedly blocking airflow.
Step 3: Keep Sunlight and Window Coverings Working
During sunny winter hours, open coverings on windows that receive useful direct sunlight, especially south-facing glass in much of the northern United States. Close curtains or shades when the sun has moved away and at night if the window feels cold. The Department of Energy’s Home Energy Checklist describes this as a basic way to gain daytime solar warmth and reduce discomfort from cold glazing after dark.
Keep curtains from covering active baseboard heaters or other equipment with manufacturer-required clearances. A thick curtain cannot fix failed window seals, but it may reduce the feeling of cold radiation near glass. For a room with drafty windows, note whether the problem is air movement around the frame or cold glass itself. The remedies differ, and the dedicated drafty-window guide provides the installation steps for films and seals.
Step 4: Fix Obvious Drafts Without Sealing Vents
Walk through exterior doors and windows on a cold day and note loose weatherstripping, daylight under a door, or a visibly damaged seal. The Department of Energy’s Energy Saver guide identifies caulking and weatherstripping as practical ways to limit unwanted air exchange. Choose weatherstripping for movable contacts and caulk for suitable stationary gaps; use an approved product for the actual substrate and fire conditions.
Do not rely on a smoke test near an open flame, gas appliance, or exposed wiring. If the leak source is unclear, document the location and follow the site’s dedicated home-air-leak detection guide for a more systematic inspection. Exterior doors with a worn lower seal may need an appropriately sized sweep rather than a rolled towel. Never block a designed makeup-air opening or disable ventilation to chase a lower number on the bill.
Step 5: Inspect Attic Insulation and the Hatch
Look for a poorly insulated attic access, uneven insulation coverage, or obvious openings around the top of the home’s conditioned space, but inspect only if the entry is safe and the structure supports access. ENERGY STAR’s Why Seal and Insulate and its methodology page estimate an average 15 percent reduction in heating and cooling costs from a package of air sealing plus insulation upgrades in typical existing U.S. homes. That model-based average does not apply to a single attic hatch or individual tube of caulk.
Begin with visible gaps near the hatch and a review of insulation depth, then compare the home with local climate-zone recommendations. ENERGY STAR’s Rule Your Attic resources separate attic air sealing from adding insulation because gaps can undermine the effectiveness of insulation. The attic-hatch insulation guide covers that small project separately. Ask a specialist about damp insulation, suspected asbestos, knob-and-tube wiring, recessed-light clearances, or other conditions that make ordinary DIY work unsafe.
Step 6: Have Leaky Ducts Assessed
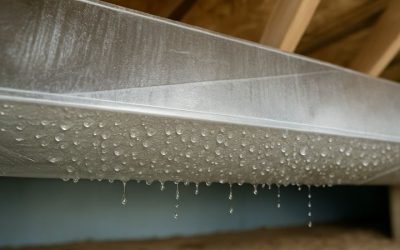
If you have a forced-air heating system, ask whether ducts pass through an unheated attic, crawl space, or garage. ENERGY STAR’s Duct Sealing guidance reports that about 20 to 30 percent of the air moving through duct systems in a typical house may be lost to leaks, holes, and poor connections. That is a duct-air loss estimate, not a promise to cut the heating bill by that percentage.
For visible gaps in accessible ducts, ENERGY STAR recommends appropriate duct mastic or metal tape rather than ordinary cloth duct tape. A contractor can assess hard-to-reach connections, insulation, return leaks, and pressure effects on combustion equipment. Ask for findings and recommended repairs before authorizing a blanket replacement. If your heating runs normally but one room lacks airflow, the reason may be distribution rather than the furnace itself.
Step 7: Schedule Service Before Replacing Equipment
A heating system that cycles abnormally, makes new noises, or struggles to maintain its setpoint deserves inspection before the thermostat setting is pushed higher. ENERGY STAR’s Heat and Cool Efficiently page recommends annual professional HVAC tune-ups. Its maintenance checklist includes checking system controls and, for combustion equipment, the burner and venting conditions. A trained technician can distinguish an efficiency problem from a safety issue or a normal operating pattern.
Describe the symptom precisely when requesting service: the rooms affected, outside conditions, current filter, and whether the bill changed in actual energy units. Ask what measurements support a proposed repair. If the system is near replacement age, request a load calculation and several correctly scoped proposals rather than choosing equipment solely by its advertised efficiency. Insulation and ductwork improvements can change how much heating capacity a house actually needs.
Step 8: Recheck Costs Before a Major Upgrade
After low-cost fixes, compare heating usage across periods with broadly similar outdoor conditions. Look at the utility rate, any time-of-use pricing, your heating fuel, and whether the household schedule changed. Ask the utility about an energy audit or locally available incentives before ordering major work; ENERGY STAR’s attic guidance notes that utility programs may offer support for assessments and insulation projects. Availability and eligibility depend on location and program rules.
For a full-system replacement, consider the existing fuel and distribution system before assuming that a particular technology will save money. The Department of Energy explains in its Heat Pump Systems guide that a heat pump moves heat rather than generating it through electric resistance. Actual operating cost still depends on installation, local climate, electricity and fuel rates, backup heat use, and home heat loss. Compare complete written proposals and expected utility costs, not an isolated efficiency badge.
Products That Help
The ecobee Smart Thermostat Enhanced is one specific schedule-control option for compatible low-voltage systems. Ecobee’s Smart Thermostat Enhanced product page describes 24VAC power, a Power Extender Kit for many systems without a C wire, and heat-pump compatibility with important staging limits. The manufacturer’s thermostat compatibility guide also lists exceptions such as dual-transformer arrangements and some systems with more auxiliary-heat stages. Confirm terminal compatibility before purchase, and do not assume that buying a smart thermostat produces a fixed percentage saving.
For draft-prone standard-size windows, Frost King’s Indoor Shrink Window Kit V73/3H offers three 42-inch-by-62-inch clear sheets according to the company’s Indoor Shrink Window Kits specification table. Check whether film is appropriate for the window frame, rental agreement, and desired ventilation. Frost King’s V70 kit is a smaller basement-window alternative with one 30-inch-by-20-inch sheet, which illustrates why matching dimensions matters more than buying the largest multipack. Neither product replaces insulation repairs elsewhere in the home.
Frequently Asked Questions
Household schedules and heating equipment change which measures pay off first. These answers address four common decisions that arise once the first thermostat and maintenance checks are underway.
Is It Cheaper to Leave the Heat on All Day?
Usually not for a conventional system when the home is genuinely unoccupied for a long period. The Department of Energy’s thermostat guidance explains that a lower indoor temperature slows heat loss to a colder outdoors, so a sustained setback can reduce demand. However, heat pumps that trigger auxiliary resistance heat during recovery can behave differently. Follow the controls designed for your equipment instead of treating one schedule as universal.
Will Closing Unused Room Vents Save Money?
Not reliably. Closing too many supply registers can increase duct pressure or reduce required airflow in a forced-air system. The Department of Energy’s Home Energy IQ quiz specifically warns against treating closed vents as a simple efficiency measure. Keep returns clear, check the manufacturer’s guidance, and have persistent room imbalance assessed instead of shutting rooms off by guesswork.
Are Space Heaters Cheaper Than Central Heat?
Sometimes, but only when the space heater allows a meaningful reduction in whole-home heating and the electricity cost supports that choice. A portable electric resistance heater converts purchased electricity into local warmth; it does not create free heat. Compare local energy rates, safe operating hours, and the area kept comfortable. A separate guide on space-heater electricity consumption is the right place for a detailed cost comparison.
Do New Windows Have to Be the First Upgrade?
No. ENERGY STAR’s home improvement guidance places air sealing and insulation among the critical first steps before evaluating costlier replacements. An otherwise functional window may benefit from repairs or a temporary film kit, while a failed insulated-glass unit may need a different solution. Have the source of discomfort identified before paying for new windows across the entire house.
Final Thoughts
The strongest next action is to match the planned upgrade to evidence in your own home. If the bill rose while heating fuel usage stayed nearly unchanged, check tariff and billing changes before spending money on insulation or equipment. If energy consumption has risen, work through the eight steps and schedule a qualified energy assessment where symptoms persist. That order makes how to reduce heating bills a manageable home-maintenance project rather than a series of speculative purchases.