The safest way to learn how to balance heating vents is to restore free airflow first, then adjust accessible manual dampers in small increments. This method is for a house with a central forced-air furnace or ducted heat pump, not hot-water radiators. Allow roughly an hour for the initial walk-through, followed by a day of observation. The hands-on work is usually straightforward, but unexplained weak airflow, loud ducts, or inaccessible controls call for an HVAC technician.
Quick Answer: Open supply outlets, keep return grilles unobstructed, inspect the filter, and compare room temperatures under similar conditions. Adjust only identified manual supply controls conservatively, recording each change; do not shut multiple vents to force air elsewhere. Recheck comfort after the system has operated normally.
As an Amazon Associate we earn from qualifying purchases.
By DIY Ideas 4 Home Editorial Team
Before You Start: Tools, Materials and Safety
Supply registers deliver heated air into occupied rooms; return grilles take household air back to the central unit. Both sides matter. The U.S. Department of Energy’s Building Science Education guide on duct terminal sizing explains that correctly sized supply and return grilles are part of effective air distribution. Nothing you do at a register will repair an undersized duct or a disconnected branch.
| Tool or Material | Size or Spec | Why You Need It | Substitute |
|---|---|---|---|
| Indoor thermometer | Readable in degrees Fahrenheit | Compare occupied rooms at the same time | Portable room sensor with a visible display |
| Notebook or phone notes | Room, time, setting, and reading | Track one adjustment at a time | Printed room sketch |
| Flashlight | Handheld light | Identify louvers and labels without dismantling ducts | Phone flashlight |
| Vacuum with brush | Soft brush attachment | Clean accessible register faces | Soft dry brush |
| Replacement HVAC filter | Exact system-approved size and type | Restore airflow if existing filter is dirty | Clean reusable filter per its instructions |
Tell Supply Registers From Return Grilles
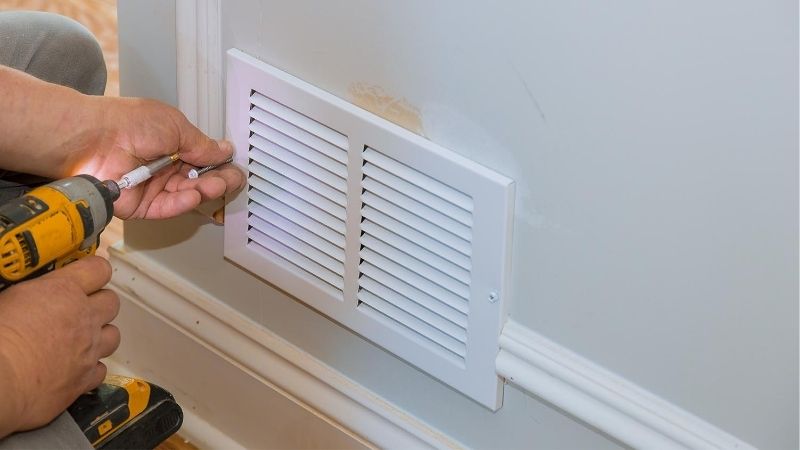
With the heating blower operating, a supply opening pushes air into a room; a return pulls air toward its grille. Adjustable vanes are common on supplies, while returns may use fixed slats. The Department of Energy’s duct-terminal guidance notes that directional louvers belong at supply outlets, not as a way to throttle returns. Identify which opening serves which role before changing any hardware.
A large hallway grille may be a central return even if the bedrooms have no obvious return of their own. Closing a bedroom door can make the return-air path harder, so record whether the door was open during your first temperature reading. The goal is to improve circulation through the entire loop, not simply to make one vent blow more forcefully.
Keep Controls and Equipment Safe
Leave return grilles fully clear, and never use furniture or magnetic covers to seal them. Avoid touching electrical controls, motorized zoning dampers, gas connections, or components inside the air handler. If a damper is behind finished walls, requires climbing into unsafe attic space, or is not plainly identifiable as a manual control, leave it alone and ask a qualified contractor.
Start with all supply registers open rather than making dramatic changes. ENERGY STAR’s duct-sealing guidance reports that roughly 20 to 30 percent of air moving through ducts in a typical house can be lost through holes and poorly connected sections. Increasing pressure against a leaky duct system is no substitute for getting those leaks diagnosed and sealed.
Recognize Problems That Need More Than Balancing
Stop if you hear new whistling, see ice at the indoor cooling coil, smell burning, or find that the blower runs unusually long while several rooms receive weak airflow. A noticeable problem throughout the house suggests a filter, equipment, or main-duct issue rather than one misadjusted outlet. Do not keep narrowing registers in an attempt to overcome these symptoms.
For a recently installed or altered system, the contractor may need to compare measured cubic feet per minute, or CFM, with the home’s duct design. The ENERGY STAR HVAC Quality Installation Guidebook uses room-by-room design airflow tolerances for commissioning; a homeowner’s hand-at-the-vent check cannot establish those values. Record symptoms and request measured air balancing when the basic checks fail.
How to Balance Heating Vents Step by Step
Work while the central system is heating normally, with windows closed and thermostat settings held steady. Keep a written baseline so you can undo an adjustment if it creates a new problem. A fall or winter check is useful because the heating cycle gives you repeatable observations, but do not expect every sunlit, shaded, or upstairs room to become identical in temperature.
Step 1: Record a Room-by-Room Baseline
Place the same thermometer, or comparably placed room sensors, away from windows, direct sun, and supply air streams. Note each room’s temperature and the thermostat setting while the system is running. If possible, revisit the readings at a similar time of day before judging the result. Rooms with widely different solar exposure should not be compared from a single midday snapshot.
For example, a distant bedroom that is consistently cooler during several heating cycles gives you a more useful clue than a one-time low reading just after its window was opened. Write down which spaces receive too much heat, which feel under-supplied, and whether closing the door changes the pattern. Your record, not a guessed ideal register position, will guide later adjustments.
Step 2: Open Every Supply and Clear Every Return
Set accessible supply-register louvers to an open position, remove rugs from floor outlets, and move large furnishings away from grilles. Inspect ceiling and wall outlets for curtains that redirect the stream back against a surface. Do not close off a guest room to send its heat into another bedroom; restricting several branches may raise duct pressure without producing the change you want.
With the blower on, hold a lightweight tissue near each opening to check that air is moving in the expected direction. This is a presence-of-flow check, not an accurate CFM measurement. If one outlet has almost no movement while others work, mark its location and check for a visible control or obstruction before proceeding. A permanently weak branch merits inspection.
Step 3: Check the Filter Before Adjusting Dampers
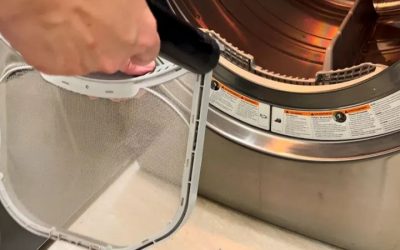
Use the equipment instructions to locate the central filter, turn the system off as directed, and inspect it without bypassing it. ENERGY STAR’s heating and cooling guidance recommends checking filters every month during heavy-use periods and generally replacing disposable filters at least every three months, sooner when visibly dirty. Your system’s filter instructions and operating conditions may call for a different interval.
Use the size and filtration level supported by the equipment. A filter that fits the slot but creates excessive airflow resistance can complicate this process. After replacing or cleaning the filter, resume normal operation and compare rooms again; that single maintenance step may restore airflow to remote runs without any damper change. Avoid buying a higher-rated filter solely on the assumption that a higher number must improve heating.
Step 4: Check the Return-Air Path With Doors Open
Observe an uncomfortable room once with its door open and again under its usual closed-door condition. If airflow or comfort improves noticeably with the door open, the room may lack a sufficient route back to the central return. Supply adjustments alone cannot solve that bottleneck. Do not cut new transfer openings or alter fire-rated doors as a do-it-yourself experiment.
The Department of Energy’s Building America research on room return paths treats the door position and return layout as design variables that affect comfort. If the difference is repeatable, tell the technician which door changes the behavior. A properly designed transfer grille or jumper duct may be considered, but it requires attention to sound transfer, privacy, and building requirements.
Step 5: Adjust an Identified Manual Damper Carefully
Some ducted homes have visible hand-operated balancing dampers on individual supply branches near a trunk duct. These are different from motorized zone controls. If a manual damper is safely accessible and clearly belongs to an over-heated room, mark its original position before making a modest adjustment. Never force a stiff handle, remove duct panels, or interfere with an unlabelled part.
Change one branch at a time, then let the system complete normal heating cycles before comparing the rooms. Open the under-supplied branch if an accessible damper was accidentally left partly shut; avoid choking the already-weak run. Where no separate manual dampers exist, make only gentle adjustments to an over-delivering supply register and leave the remaining outlets open. Reopen it if airflow noise increases.
Step 6: Aim the Air Stream Into the Room
A louver’s direction and a damper’s opening are not interchangeable. Move adjustable supply blades to guide heated air into occupied space without blowing directly at a person or into drapery. For sidewall registers, an appropriately sized deflector may redirect air that otherwise rises along a wall or gets trapped beneath a nearby surface. This can improve where warmth is felt without claiming more heat output.
Frost King’s Heat & Air Deflector product information identifies the HD9 as a large sidewall option that expands to fit openings up to 16 inches wide. The company’s installation sheet calls for a metal register when attaching magnetic versions. Measure the actual register first. A plastic deflector can redirect a stream; it cannot repair a collapsed flex duct, create more blower capacity, or replace a proper balancing damper.
Step 7: Recheck Comfort and Save the Settings
Compare your temperature notes under similar outdoor conditions after a normal day of operation. Look for steadier comfort in the rooms that were previously under-supplied, not just a stronger sensation at one register. If an adjustment helps one room but leaves a different room colder, return to the recorded baseline and reverse the most recent change. A steady improvement is more meaningful than a quick burst of warmer air.
Once the settings are helpful, label only the manual positions you actually changed and keep the log for the next seasonal service visit. Cooling season may expose a different distribution problem because heat gains, insulation, and occupant preferences change. Avoid automatically reversing every damper simply because the season changes; observe room conditions first and have a technician verify any system-wide seasonal balance plan.
Products That Help
The AcuRite 00613 Indoor Temperature and Humidity Monitor is a convenient way to compare room conditions without mistaking surface temperature for room-air temperature. AcuRite’s product specifications give an indoor range of 32 to 122 degrees Fahrenheit and temperature accuracy within 2 degrees Fahrenheit. Use readings as a comfort trend rather than treating a small difference between two inexpensive sensors as precise duct-performance evidence.
The Frost King HD9 Heat and Air Deflector suits a suitable metal sidewall register when the issue is the direction of the outlet stream rather than poor duct volume. Frost King’s HD9 specifications identify a width extending to 16 inches, so measure before purchasing. If your room receives very weak airflow, spend money on a professional duct and filter check before adding accessories that cannot fix the underlying restriction.
Common Mistakes to Avoid
Do not treat a return grille as a supply outlet, use vent covers to close off unused rooms, or make multiple adjustments without documenting them. Another common mistake is evaluating airflow with every bedroom door open when the doors are usually shut at night. Test the house in the configuration you actually use, while keeping the airflow pathway free of obstructions.
Equal air movement at every register is also the wrong target. Larger rooms, solar exposure, insulation, duct length, and design heating loads differ. The Air Conditioning Contractors of America’s guidance on duct balancing describes comparing actual delivered airflow against design CFM, not simply matching the feel of the air stream from vent to vent. If your measurements do not improve comfort, ask for a room-by-room airflow report.
Frequently Asked Questions
Register adjustments can help small comfort differences, but they cannot correct every duct or building-envelope defect. These answers cover situations that tend to come up after the first round of measurements.
Should Upstairs Vents Be More Open in Winter?
Not automatically. Heat rises within rooms and stairwells, but the correct supply setting also depends on the home’s duct design, thermostat location, and actual heating load. Keep the existing system balanced according to measured comfort rather than assuming that every two-story home needs the same winter damper positions. Document changes before seeking a seasonal recommendation.
Can Closing One Vent Damage My Furnace?
One modest change to a supply register is not the same as closing many registers, but there is no universal safe number or percentage of outlets to block. The effect depends on blower operation, available return air, and duct resistance. If a new adjustment causes whistling, short cycling, or reduced airflow elsewhere, restore the original setting and request a professional check.
Is a Vent Booster Fan a Substitute for Balancing?
No. A register-mounted booster may help an otherwise functioning branch move air toward a particular room, but it cannot seal leaky ducts or correct a poor return-air path. The extra fan also changes the system’s local pressure behavior, so ask an HVAC contractor whether the accessory suits your arrangement before depending on it. Start with filter condition and duct measurements.
Does Balancing Vents Lower Heating Bills?
Possibly, if the changes correct delivery problems that made the equipment run longer, but savings are not guaranteed by changing register positions alone. ENERGY STAR’s duct-sealing information identifies leakage and disconnected ducts as major causes of wasted conditioned air. If your main goal is energy savings rather than room comfort, our guide to reducing heating bills covers insulation and thermostat decisions separately.
Final Thoughts
Learning how to balance heating vents gives you a practical way to test whether small, reversible changes improve comfort, but it also tells you when to stop experimenting. Before buying another register accessory, review your notes for a repeatable door-position problem, a consistently weak branch, or new airflow noise; those clues are more useful to an HVAC technician than an unmeasured request to turn up the blower. Keep your original positions recorded, and ask for a measured supply-and-return assessment if the changes do not hold.