A blocked exhaust duct can trap heat and moisture in a clothes dryer, lengthen cycles, and add fire risk. Learning how to clean dryer vent ductwork starts with safely unplugging the machine, removing lint from the accessible pipe, and checking the outdoor outlet. For a simple, reachable wall vent, allow a generous work session rather than rushing; complicated long runs are better handled by a dryer-vent specialist.
Quick Answer: Clean the lint screen, disconnect electrical power, detach the accessible exhaust transition, and remove lint with a purpose-made brush and vacuum. Clear the exterior hood, reconnect undamaged metal ductwork, and check that the outside flap opens during a short empty run. Stop if moving the appliance would strain a gas connector or the duct cannot be reached safely.
As an Amazon Associate we earn from qualifying purchases.
By DIY Ideas 4 Home Editorial Team
Before You Start: Tools, Materials and Safety
The U.S. Fire Administration’s Appliance and Electrical Fire Safety guidance identifies failure to clean as the leading contributing ignition factor in residential dryer fires during 2018 to 2020. The NFPA Clothes Dryer Safety tip sheet calls for clearing the vent pipe annually, or sooner if drying times increase. Cleaning is therefore regular safety maintenance, not merely a way to make towels dry faster.
| Tool or Material | Size or Spec | Why You Need It | Substitute |
|---|---|---|---|
| Dryer-duct cleaning brush | Flexible system rated for the accessible duct route | Loosens lint inside metal exhaust runs | Hand brush for short reachable sections |
| Vacuum with hose | Crevice nozzle or compatible narrow attachment | Collects dislodged lint without spreading it | Shop vacuum with suitable nozzle |
| Screwdriver or nut driver | Matches existing vent clamp | Releases and secures a removable transition duct | Hand-operated clamp release if fitted |
| Work gloves and eye protection | Protection from sheet-metal edges and dust | Reduces cut and debris exposure | Equivalent suitable PPE |
| Manufacturer installation instructions | Exact dryer model and exhaust configuration | Identifies permitted duct materials and access points | Manufacturer support documentation |
Disconnect Power and Respect Gas Connections
Disconnect the plug before moving a conventional electric dryer or opening its exhaust connection. Whirlpool’s How to Clean a Dryer Vent instructions begin with unplugging the machine and recommend using two people to move it. Pull the appliance gently and watch the power cord, water line for a steam feature, and existing duct. Do not force a heavy stacked unit or slide it into a narrow space where you cannot see the connections.
For a gas dryer, turn off the appliance and use the shutoff valve only if you can identify and safely access it according to the manufacturer’s instructions. Do not loosen, disconnect, cap, or reposition the gas supply line as a DIY shortcut; if the dryer cannot be moved without stressing it, arrange a qualified gas-appliance technician. If you smell gas, leave the building without operating electrical switches and contact the gas utility or emergency service from outside.
Identify the Duct and Its Outdoor Exit
Trace the exhaust from the dryer’s rear connection to the exterior wall cap or accessible duct route. GE Appliances’ Dryer Installation Information for Exhaust Ducting says rigid metal is preferred and warns that plastic ductwork is not approved for safe installation. The same guidance permits certain listed metal transition materials only under model-specific limitations. Inspect the dryer’s installation instructions instead of assuming any flexible hose sold at a hardware store is acceptable.
Look for a crushed connector behind the machine, a loose joint, a sagging or detached pipe, or an outdoor flap held closed by lint, paint, snow, or nesting material. The NFPA safety sheet explicitly tells homeowners to check that the outdoor exhaust flap opens while the dryer operates. A roof outlet, concealed duct in a multi-story home, or building-shared route is a different job from a short wall exit; map what you can see but do not infer an unseen path is clear.
Know When to Stop and Hire a Cleaner
Stop before entering an attic without a stable walking surface, accessing a roof, removing a dryer cabinet, or attempting to dislodge a brush that becomes stuck in a hidden bend. A long exhaust route with multiple elbows can collect lint beyond the reach of an ordinary vacuum. If you find damaged duct seams, a crushed section, water inside the exhaust pipe, evidence of nesting, or suspected combustible material around hot surfaces, cleaning alone may not resolve the underlying hazard.
Do not run a dryer with its exhaust intentionally disconnected as a home test. Hot, moist discharge and lint do not belong in a laundry room or enclosed building cavity. GE’s dryer installation instructions require exhausting to the outdoors, and manufacturer-approved repairs should come before returning a visibly damaged exhaust system to service. Document the location and symptoms so a specialist can scope the route and replace unsuitable material if required.
How to Clean a Dryer Vent Step by Step
The seven steps below apply to a conventional vented dryer with an accessible rear transition and exterior outlet. The safe sequence is to work with the dryer off, collect lint rather than pushing it deeper, and confirm the completed connection before a test cycle. Whirlpool’s manufacturer procedure covers interior cleaning, exterior clearing, reconnection, and a short empty run; adapt its order to the dryer and vent you actually have.
Step 1: Remove Lint from the Screen and Slot
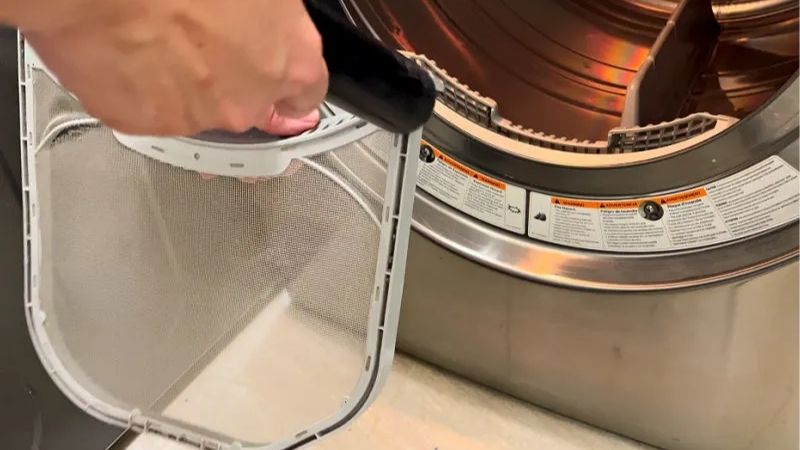
With the dryer off and unplugged, pull out the removable lint screen and peel away the lint mat. Hold the screen to the light to look for visible buildup and inspect its frame for cracks. Gently vacuum reachable lint from the screen recess with a crevice attachment, keeping the nozzle out of internal components and following the dryer manual. The slot can hold lint even when the mesh surface appears clean.
ENERGY STAR’s Clothes Dryers guidance says to clean the screen after every load and notes that dryer-sheet residue can reduce airflow. It describes washing or brushing the screen as part of regular care when film accumulates. Clean and dry a washable screen only as directed by its maker, then reinstall it securely before using the dryer. This first task does not replace cleaning the exhaust pipe behind the appliance.
Step 2: Move the Dryer and Expose the Transition
Use another adult to move the dryer just far enough for safe access, not farther than its connections allow. Whirlpool’s dryer-vent cleaning instructions illustrate moving a machine about one foot from the wall when conditions permit. That distance is an example, not a requirement; the needed clearance depends on the location of the outlet and how the dryer was installed. If a built-in, stacked, or gas-connected dryer resists movement, stop instead of tugging harder.
Find the removable clamp or approved joint at the dryer exhaust collar. Before loosening it, photograph the existing routing so you can put back an intact connector without kinking it. A crushed connection should be replaced using the materials specified in the installation manual, not simply squeezed back into a narrow opening. Keep loose screws and clamps in a container away from the open duct.
Step 3: Detach and Vacuum the Accessible Duct
Release the connector from the dryer only after confirming power is disconnected and gas fittings will not be disturbed. Vacuum lint around the dryer outlet and the exposed mouth of the transition duct. Lift out reachable accumulations rather than packing them farther inside. Inspect the connector for holes, sharp bends, loosened seams or signs of excess heat. If it is torn or unsuitable for dryer exhaust, set it aside for proper replacement rather than reinstalling a damaged piece.
GE Appliances’ Dryer: How to Clean Exhaust / Vent Duct guidance gives an uncomplicated sequence: unplug the appliance, separate the exhaust duct from the dryer, vacuum the duct, and reconnect. A vacuum hose can help with loose deposits close to the opening, but its short reach is not proof that the full duct is clear. Never insert a rigid household drain snake or sharp object that could puncture thin metal or lodge inside an elbow.
Step 4: Brush the Exhaust Run in Short Sections
Use a brush designed for dryer-vent ducting, choosing its length and flexibility based on the known route and the tool instructions. Feed the brush carefully into the accessible metal duct, collecting loosened lint at the open end. Stop if it catches at an elbow instead of forcing it through. With a drill-powered kit, confirm the attachment and rotation instructions first; an incorrect direction or loose rod joint can leave parts inside the duct.
Keep the tool under control and periodically withdraw it to clear the collected lint. Avoid high-speed spinning, aggressive pressure, or using improvised blowers to shoot lint into unknown cavities. If the known duct route extends beyond the tool’s rated reach, or you cannot establish where lint exits, a longer kit does not automatically make DIY work safe. Ask a professional to inspect the run and clear it with equipment appropriate to its bends and length.
Step 5: Clear the Outdoor Hood and Flap
From a safe ground-level position, locate the outdoor termination and remove visible lint at the hood without breaking the flap or screen assembly. Gently vacuum or brush deposits at the reachable opening. Check for a bird nest, insect material, ice or damaged flap; do not reach into concealed spaces to extract an obstruction you cannot see. Roof-mounted outlets and exits that require awkward ladder work belong to a qualified service provider.
GE Appliances’ Dryer: How to Clean Exhaust / Vent Duct instruction specifically checks that hood flaps move freely and that birds, rodents or insects are not nesting in the duct. Also look for a mesh screen that may have been incorrectly added at an exhaust termination and tends to trap lint. Any alteration must follow the dryer and vent manufacturer’s instructions and local requirements; do not remove a built-in safety component on a guess.
Step 6: Reconnect the Vent Without Kinks
Seat the undamaged transition firmly on the exhaust collar and secure it using the clamp or connection method called for in the installation guide. Make sure no screw tip projects into the airflow path if the instructions prohibit such fasteners. Arrange the transition in a smooth, supported route and gently return the dryer to position while watching for crushing. An apparently neat installation is not acceptable if the hose folds sharply behind the cabinet.
GE’s Dryer Installation Information for Exhaust Ducting stresses that vent type and permitted run length depend on model-specific instructions. Never substitute plastic flex tubing, vent the machine into the attic, or use cloth tape as a permanent method of covering a leaking exhaust joint. If the old connector lacks the listed markings required by the dryer, obtain an approved metal replacement or ask a qualified installer to match the parts before the machine is used.
Step 7: Check Outside Airflow During a Short Run
Once every connection is secure and the dryer is back in its operating position, restore power. Whirlpool’s How to Clean a Dryer Vent instructions recommend a short empty cycle, described as about 10 to 15 minutes, after cleaning. Watch the exterior exhaust from a safe location for a flap that opens and a sustained flow of warm, moist air. Gas dryers may produce a different exhaust feel than electric models; rely on the manufacturer’s normal operating instructions rather than a hand-made temperature standard.
Check the connection area for unusual vibration, lint escape, burning odor, or a loose duct, and stop operation if any of those appear. A flap that barely moves, strong heat buildup, an air-flow warning on the control panel, or persistently slow drying after cleaning deserves further inspection. The objective is not to claim an exact percentage improvement from a DIY brushing session; it is to confirm that the exhaust path is secure and not visibly restricted.
Products That Help
The Everbilt Dryer Vent Lint Removal Kit, model BPCKHD, provides a 10-foot duct brush, a 36-inch lint-trap brush, and a vacuum adapter according to its Home Depot product page; it is useful when you need to reach both the screen recess and a relatively accessible duct. The Gardus LintEater Rotary Dryer Vent Cleaning System, model RLE202, is listed by Home Depot as a cordless-drill-compatible rotary cleaner. Consider it for a known unobstructed metal duct only when its tool instructions match your route and you can retrieve the brush safely.
The Everbilt 12 ft. Extendable Drill-Powered Duct Lint Brush Dryer Vent Cleaning Kit, model DVBRUSHK/10RHD, is a longer rotary option identified by Home Depot’s product listing. Compare the actual duct path with the kit’s usable reach and instructions before buying. As of October 2026, the retailer listed about $21 for BPCKHD, $30 for RLE202, and $31 for DVBRUSHK/10RHD; store prices and inventory can change. None of these kits replaces an inspection of torn connectors, inaccessible elbows, or unsafe gas connections.
Common Mistakes to Avoid
Cleaning only the lint screen while leaving a packed wall duct untouched is the most common scope mistake. The reverse also happens: owners brush the long pipe but ignore a clogged slot, a crushed transition, or a flap held partly shut. The NFPA Clothes Dryer Safety guidance covers the lint filter, the vent pipe, and the exterior outlet together because airflow depends on the entire route. Make the last visual check at the outside hood rather than assuming the job ended behind the machine.
Another mistake is treating a powered brush as a substitute for judging risk. Forcing rods around unknown bends, using a leaf blower to clear an occupied duct, damaging thin foil-like connectors, or accessing a roof without fall protection can turn maintenance into a repair job. If the exhaust becomes harder to pass through after brushing, stop; a disconnected rod or shifted lint plug could block the duct. A specialist can inspect the obstruction instead of continuing blind attempts.
Frequently Asked Questions
Cleaning frequency, dryer type and outlet accessibility change the safest approach. The questions below address when ordinary maintenance is enough and when a vent system needs a different level of attention.
How Often Should a Dryer Vent Be Cleaned?
At least once a year is a widely used maintenance baseline. The NFPA Clothes Dryer Safety tip sheet recommends removing lint from the vent pipe annually and sooner if drying times increase. Households with frequent laundry loads, pets or long vent runs may need more regular checks, but the interval should be based on actual lint buildup, the duct configuration and the manufacturer’s instructions, not a universal shorter schedule.
Can I Clean a Roof-Exit Dryer Vent Myself?
Usually the safer choice is a professional, especially if you must climb or work near the roof edge. An accessible interior portion can still be inspected with the appliance disconnected, but it is difficult to verify that the roof hood, flapper and entire run are clear from the laundry room alone. Tell the vent service where the outlet is and whether it has multiple turns so they can bring suitable access equipment.
Does a Ventless Heat-Pump Dryer Need This Cleaning?
No external exhaust-duct brushing applies to a truly ventless model because it does not vent its drying air through an outdoor dryer duct. It still needs regular maintenance of its lint screens, filters, condenser or heat-exchanger access points as described in its own manual. Do not assume every newer dryer is ventless; confirm the model and look for a physical exhaust connection before choosing a cleaning procedure.
Will Cleaning the Duct Fix Slow Drying Every Time?
No. Removing lint can help when exhaust restriction is the reason clothes stay damp, but overloaded drums, moisture-sensor issues, insufficient washer spin, heating faults and poorly selected cycles can also extend drying times. GE’s dryer vent guidance links partial duct clogs with longer cycles but does not say every slow dryer has a vent problem. If airflow appears normal after cleaning and loads still take unusually long, use the machine’s diagnostic guidance or request appliance service.
Final Thoughts
Keep a record of the date, the outdoor outlet location and any unusual lint, damaged connector or blocked flap you found. That simple maintenance history gives the next homeowner or service technician a starting point, particularly when the duct disappears inside finished walls. After you clean the dryer vent, watch the next ordinary laundry loads for recurring slow drying and inspect the termination again if symptoms return. If you have a gas connection that cannot be moved safely, a high roof exit, or a duct of uncertain condition, choose a qualified dryer-vent cleaner instead of forcing a DIY fix.