Key takeaways
- Conical roller: The basic tool for pointed cones. A wooden roller is comfortable to hold, while a metal roller is durable but becomes hot if left near the plate.
- Seam guide or locking notch: Helps hold the wafer closed during the first few seconds of cooling.
- Small bowl mold: Useful for waffle bowls, especially with a 7-inch plate.
- Heatproof gloves: Helpful for beginners, although thin gloves provide better dexterity than bulky oven mitts.
- Cooling rack: Keeps the finished cone crisp by allowing steam to escape rather than collecting underneath.
The best waffle cone maker for ice cream cones is an electric model with a 6–7-inch round plate, adjustable browning, a fast preheat, and a separate cone roller; for most home kitchens, that combination is more useful than a higher-wattage machine with no temperature control.
Our top picks
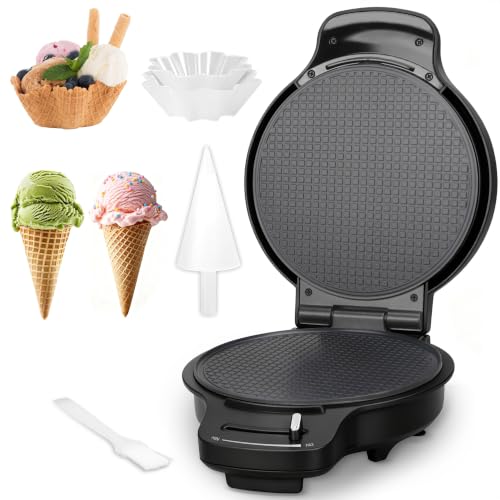

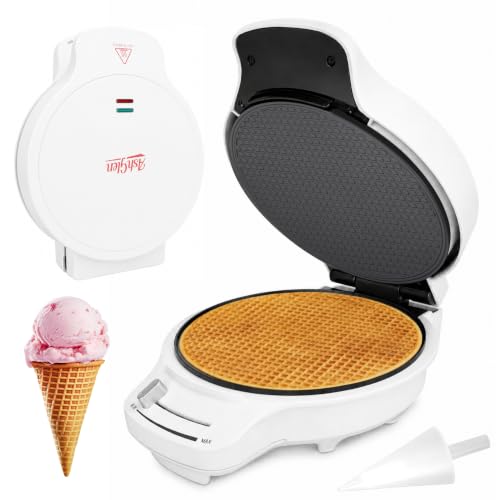
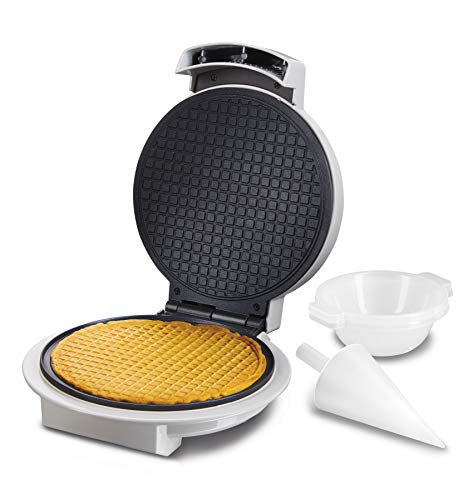
As an Amazon Associate we earn from qualifying purchases at no extra cost to you. Ratings are shown as listed on Amazon.
Quick picks by cooking situation
| What matters most | Best choice | Why it fits | Typical price |
|---|---|---|---|
| Small apartment or limited storage | Compact 5–6-inch electric maker | Usually under 10 inches wide and easier to store upright | $35–$70 |
| Frequent family use | 6–7-inch adjustable-temperature maker | More consistent batches and enough cone size for generous scoops | $60–$120 |
| Very crisp, thin cones | Heavy cast-plate electric model | Holds heat well and spreads batter evenly | $80–$160 |
| Occasional use with minimal countertop clutter | Stovetop cast-iron or aluminum cone maker | No electrical base to store, but it requires closer attention | $30–$90 |
| Large cones or dessert bowls | 7-inch or larger plate | Provides more surface area for wide cones and edible bowls | $70–$150 |
What separates a good cone maker from a frustrating one?
A waffle cone is thin, so small differences in heat and timing have a large effect. Underbaked batter remains soft and tears while rolling. Overbaked batter becomes brittle before you can shape it. The most useful machine is therefore not automatically the one with the highest wattage. Look for even plate heating, a browning dial or several heat levels, and a lid that closes evenly without leaving a thick center.
Plate size
Most home waffle-cone makers use plates between 5 and 7 inches across. A 5-inch plate makes a small cone suited to one modest scoop and is usually the easiest size for a compact kitchen. A 6-inch plate is the practical middle ground: it produces a cone large enough for one or two scoops without requiring an oversized appliance. A 7-inch plate gives you more flexibility for large cones, taco-shaped shells, and edible dessert bowls, but the appliance may occupy 12–14 inches of counter width when the lid is open.
Measure more than the closed machine. Leave at least 3 inches of clearance beside the appliance so the lid can open without hitting a backsplash or cabinet, and allow approximately 14–18 inches of vertical space above the counter, depending on the hinge design. If your upper cabinets are low, operate the maker near the edge of an island rather than underneath them.
Temperature control and browning
A single on/off setting can work, but it gives you less control over different recipes. Sugar-heavy batter browns quickly; recipes containing more butter or egg may need longer cooking. Adjustable models let you begin at a medium setting, then increase or decrease heat after the first cone.
Choose a model with at least five heat positions or a clearly marked browning dial. A ready light is useful, but it does not tell you whether the center of the plate has reached the same temperature as the edges. Machines with cast or thick metal plates generally recover heat better after batter is added. Lightweight plates heat quickly but can create paler centers or darker edges when used continuously.
Head-to-head: electric versus stovetop cone makers
| Feature | Electric maker | Stovetop maker |
|---|---|---|
| Temperature control | Dial or preset levels; easier to repeat | Controlled by the burner and pan position |
| Cooking time | Usually 60–120 seconds per cone after preheating | Often 90–180 seconds per cone, depending on the stove |
| Plate consistency | Generally more uniform across the round plate | May have hotter areas over the burner |
| Storage | Requires room for a 3–6 lb appliance and cord | Often stores like a skillet, but can be heavier |
| Cleanup | Usually wipe-clean plates; never immerse the electrical base | May require more scrubbing if batter reaches the edges |
| Best for | Families, beginners, and repeatable batches | Occasional bakers and kitchens with very little appliance storage |
For most people, an electric model is the safer recommendation because it reduces the number of variables. A stovetop maker can produce excellent cones, but you must regulate burner strength, turn or reposition the tool when necessary, and work quickly while the wafer is hot.
Cooking speed: what the numbers really mean
Manufacturers often emphasize wattage, but wattage alone does not determine speed. A 750-watt machine with thick plates may cook more evenly than a 1,200-watt model with thin plates. For home use, expect roughly 4–6 minutes for preheating and 1–2 minutes for each cone. The first cone may take longer while you adjust the heat and batter quantity.
For a batch of 12 cones, a realistic session is about 25–35 minutes, including rolling. The rolling step is the bottleneck: each wafer must be shaped while hot, usually within 10–20 seconds. A second cone roller or a small heatproof bowl can help if two people are working together, but buying a faster maker will not eliminate the need to shape each cone immediately.
Cone-shaping tools worth having
- Conical roller: The basic tool for pointed cones. A wooden roller is comfortable to hold, while a metal roller is durable but becomes hot if left near the plate.
- Seam guide or locking notch: Helps hold the wafer closed during the first few seconds of cooling.
- Small bowl mold: Useful for waffle bowls, especially with a 7-inch plate.
- Heatproof gloves: Helpful for beginners, although thin gloves provide better dexterity than bulky oven mitts.
- Cooling rack: Keeps the finished cone crisp by allowing steam to escape rather than collecting underneath.
Some machines include a roller, but included accessories vary in size. Check that the roller is long enough for the plate diameter and that its point is narrow enough for the cone size you want. A wide roller produces a short, open cone that may not support a tall scoop as well.
Storage, moving, and durability realities
A typical countertop electric cone maker is approximately 9–14 inches wide, 8–12 inches deep, and 3–6 pounds. That is manageable in a cabinet, but the lid may not lock securely on every model. Store it flat if the hinge feels loose, or upright only when the manufacturer specifically permits vertical storage. Keep the cone roller with the appliance; losing it makes the machine much less convenient.
When moving the appliance, hold it by the base rather than the lid. Hinges, latch tabs, and nonstick plate coatings usually experience more wear than the heating element. Do not stack heavy cookware on top of it, and avoid metal spatulas that can scratch the cooking surface. If you rent or have limited outlets, check that the cord reaches the counter without using an extension cord near a hot appliance.
Cleanup and material trade-offs
| Plate or body feature | Advantage | Trade-off |
|---|---|---|
| Nonstick coated plates | Easy release and quick wipe-down | Can scratch or peel if abused with metal tools |
| Cast aluminum plates | Good heat retention with moderate weight | May have a coating that requires gentle cleaning |
| Cast iron plates | Excellent heat stability and long service life | Heavy, slower to heat, and may need seasoning |
| Removable plates | More convenient for thorough cleaning | Can add seams, extra parts, and a less rigid hinge feel |
For routine cleanup, unplug the maker, let it cool, and wipe crumbs away with a dry or lightly damp cloth. If sugar has hardened on the plate, soften it with a warm damp cloth rather than scraping. Avoid pouring water into the hinge or submerging the electrical body. A model with deep grooves may need a soft brush to remove baked-on batter, so a smooth shallow pattern is easier for frequent use.
How to choose your final model
Choose a 5–6-inch adjustable electric maker if you live in a small apartment, make cones only a few times per year, or want the simplest learning curve. Choose a 6–7-inch model with heavier plates if you regularly serve several people and want consistent color from cone to cone. Select a stovetop tool if storage space matters more than speed and you are comfortable managing heat manually.
Before buying, confirm the plate diameter, closed and open dimensions, wattage, heat settings, included roller, cord length, warranty terms, and cleaning instructions. The best waffle cone maker for ice cream cones is the one whose plate size matches your portions and whose temperature control gives you enough time to roll each wafer before it hardens.