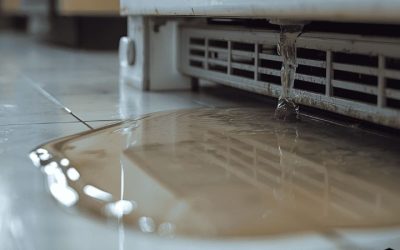
A puddle beside a brewer does not necessarily mean the machine has a broken internal hose. If you are wondering why is my coffee maker leaking, begin with the location of the first wet spot. An overfilled reservoir, misaligned carafe, or overflowing brew basket can send water across the counter and make it look as though the base has failed. A reservoir that drips while detached, however, points to a different problem.
Quick Answer: Unplug the brewer, let it cool, dry the outside, and inspect the tank, filter basket, and carafe before assuming an internal leak. Check removable parts without energizing the machine. If liquid appears to come from the power cord area, electrical controls, or a sealed base, stop using it and request service or replacement.
As an Amazon Associate we earn from qualifying purchases.
By DIY Ideas 4 Home Editorial Team
Why Your Coffee Maker Is Leaking: Common Causes
The direction of the liquid matters more than the size of the puddle. Hamilton Beach’s published coffee-maker troubleshooting guides distinguish reservoir overfill, brew-basket overflow, and spills around the carafe as separate conditions. Keurig’s support guidance likewise recommends checking its removable cold-water tank before treating water under a brewer as an internal leak. Use the location map below to narrow the cause without removing electrical panels.
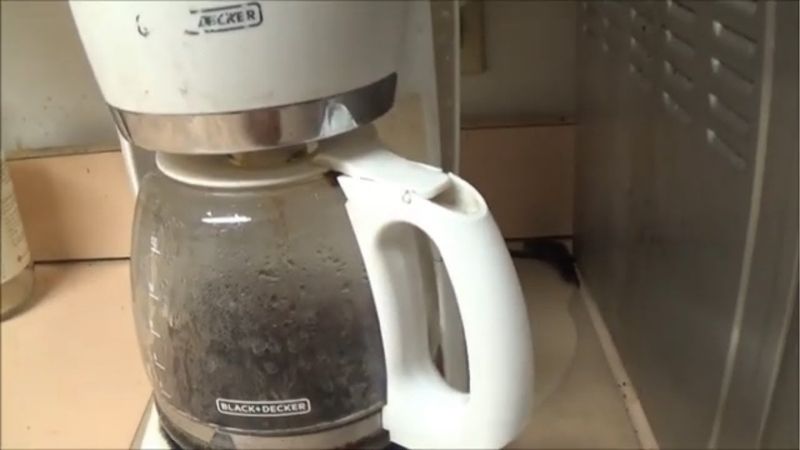
| Symptom or Sign | Likely Cause | First Check | DIY or Pro |
|---|---|---|---|
| Clear water behind or beside the unit | Water above the fill line, spilled while filling, or tank not seated | Dry exterior; inspect the maximum line and tank position | DIY if parts are sound |
| Water collects under a removable tank when idle | Reservoir outlet, seal, or tank damage | Inspect detached reservoir over a sink | Replacement part or support |
| Coffee runs over the top of the filter basket | Fine grounds, too much coffee, collapsed filter, or restricted flow | Examine grounds and paper filter after cooling | DIY if no electrical wetting |
| Coffee lands on warming plate instead of carafe | Carafe misalignment, wrong lid, or drip-stop issue | Seat correct carafe beneath outlet | DIY part check, then support |
| Liquid appears from sealed underside or near controls | Possible internal tubing, tank joint, or electrical-area leak | Disconnect power; do not open the base | Service or replace |
Reservoir Overfill or Poor Tank Seating
A wet counter behind the brewer can simply be excess water escaping a designed overflow opening. In its coffee-maker FAQ, Hamilton Beach explains that some models have a rear drain opening to prevent reservoir overfill. That water can follow the housing downward and accumulate beneath the appliance, hiding the actual source.
Fill only to your model’s marked maximum, not to a capacity borrowed from a different machine. For example, Hamilton Beach’s Use and Care guide 840285400 specifies a 14-fluid-ounce maximum for the single-serve model covered by that manual, while its guide 840362203 specifies 50 fluid ounces for a different brewer. The different limits are a reason to trust the markings on your own reservoir.
Reservoir Valve, Seal, or Cracked Tank
A detachable water tank may have an outlet valve that closes when the tank is lifted. If the valve is dirty, a seal is damaged, or the plastic has cracked, water may drip through its underside even when the brewer itself is dry. A tank that has not locked into its intended position may also feed water outside the inlet.
Keurig’s July 2021 support article, “My Brewer Appears to be Leaking from the Bottom,” advises removing the cold-water reservoir, looking for water in the well underneath, and holding the filled tank over a sink to check for leakage. Follow that diagnostic only for a tank designed to be removed, keeping the powered brewer dry and disconnected.
Filter Basket Overflow or Slow Drainage
Brown liquid running from the brew-basket rim usually points upstream of the carafe, not to a cracked base. Coffee that is ground unusually fine can restrict drainage; a crowded basket or folded paper filter can worsen the backup. A stopped or misaligned outlet can produce a similar-looking spill.
The Hamilton Beach two-way brewer troubleshooting guide 840231300 names excessive grounds, overly fine or decaffeinated grounds, cleaning needs, and badly positioned paper filters among possible causes of basket overflow. For a particular single-serve model, Hamilton Beach manual 840350800 limits its ground-coffee basket to 3 tablespoons. That is a model-specific limit, not a universal recipe for every drip brewer.
Carafe Position or Drip-Stop Trouble
Some drip brewers use the carafe lid or rim to open a spring-loaded drip-stop beneath the basket. A carafe that sits forward, has a mismatched replacement lid, or is removed mid-brew may leave coffee collecting on the hot plate instead of in the pot. Dried oils around the external mechanism can interfere with its movement.
Hamilton Beach’s two-way brewer guide 840231300 states that coffee can leak onto the base when the carafe is away from the warming plate for more than 20 seconds during brewing. This timing belongs to that design; do not assume every maker has the same pause window. Also inspect the glass for hairline cracks and confirm that a replacement carafe is listed for the exact model.
Pod Path Problems or a Possible Internal Leak
Single-serve brewers add a pod holder and piercing-needle path. Grounds trapped in that path may slow delivery, while an incorrectly installed pod holder or other removable component can redirect liquid. Keurig’s cleaning support page explains how its removable pod-holder funnel and needles are cleaned, but warns that piercing needles are sharp.
If water still emerges from the sealed underside after the tank and external path have been ruled out, the fault may be inside. It could involve tubing, an internal seal, or another component, but a puddle cannot identify the failed part. Keurig’s bottom-leak article directs owners to customer support once a reservoir leak has been excluded; that is safer than opening a powered-appliance enclosure.
How to Fix a Leaking Coffee Maker Step by Step
Work from external, removable parts toward a decision about professional service. A cold-water inspection needs no electrical power; a leak near electrical controls rules out a home test brew. Your user manual takes priority over the general process, especially for fixed-reservoir brewers, units with steam pressure, and built-in machines.
Step 1: Unplug, Cool, and Dry the Work Area
Switch the brewer off, unplug it with dry hands if the plug and outlet are dry, and wait until the heating plate and carafe are cool. If water has reached the receptacle or plug, do not touch the wet connection; isolate power safely at the breaker and seek qualified assistance. Never immerse the base or let liquid run into buttons and vents.
Lift away the carafe, paper filter, loose grounds, and other removable accessories. Dry the countertop, sides, and area beneath the brewer with absorbent towels. This separates old spilled coffee from newly appearing moisture without requiring you to turn the unit on.
Step 2: Check the Water Fill Line and Tank Seal
Look for a visible maximum-fill mark, an overflow channel, a twisted gasket, or water trapped around the reservoir rim. Empty any excess into the sink. For a removable tank, check whether it sits fully and evenly in its mounting position and whether the sealing surfaces have debris.
If your model allows detaching the tank, test it above the sink as Keurig recommends: inspect its underside for a drip while it is separate from the unplugged brewer. Replace a cracked tank or damaged model-specific valve assembly rather than gluing the vessel or forcing the seal into place. If the tank looks sound but cannot seat normally, stop and check the manufacturer’s fit instructions.
Step 3: Restore Normal Flow Through the Basket
Once the basket is cool, discard the used filter and grounds. Check whether paper has folded across the outlet and whether coffee residue is caught around the accessible drip-stop. Wash only those removable pieces that the maker’s instructions identify as washable, then rinse and reinstall them fully.
Use a filter of the specified shape and an automatic-drip grind if the machine calls for it. Avoid packing grounds down. Hamilton Beach’s coffee-maker FAQ says excessive coffee, overly fine grounds, and an incompletely seated basket or carafe can all cause overflow. If the basket itself is warped or its molded outlet is broken, replacing the correct part may be more reliable than repeated adjustments.
Step 4: Inspect the Carafe and Pod Holder
Set the original carafe squarely under the brew outlet and check that the lid moves the drip-stop as the manual describes. Examine the rim, handle attachment, and glass for cracks without using a damaged pot for another hot brew. A similarly sized carafe may not have the right lid height or shape to activate the brewer’s valve.
For single-serve models, remove the pod holder only by the instructions for your exact brewer. Keurig’s cleaning guidance describes detaching and replacing the pod-holder funnel and completing two water-only brew cycles after approved needle cleaning. Those cycles are maintenance instructions for a safe, functioning unit; do not attempt them while an unexplained base leak persists.
Step 5: Descale Only When Restricted Flow Fits
Mineral scale may reduce water flow and contribute to overflow or poor brewing, but it does not repair cracked plastic or defective seals. Consider descaling after the reservoir, carafe, and basket checks, and only if the machine’s manual permits the method. Use the manufacturer’s specific instructions for the machine, including its rinse sequence.
For compatible drip coffee makers, Urnex’s Dezcal product instructions specify dissolving one 28-gram packet in 32 fluid ounces of lukewarm water, running the solution through the machine, then brewing three fresh-water tanks to rinse. This is the product’s own procedure, not permission to use it in every brewer. Never add random cleaners or mix descaler with bleach, and do not descale a unit already leaking into its electrical base.
Products That Help
The Hamilton Beach Coffee Maker Replacement Brew Basket 990117900 is a model-specific replacement listed among accessories for the 49980Z two-way coffee maker on Hamilton Beach’s product page. It is relevant when the basket is physically damaged, not when grounds simply need a coarser grind. The Mr. Coffee 12-Cup Replacement Glass Carafe PLD12-RB, listed by Lowe’s under that exact model number, may address a cracked or mismatched pot on compatible Mr. Coffee brewers. Check the manufacturer’s model list before buying; 12-cup capacity alone does not guarantee a fit.
Urnex Dezcal Descaling Powder 15-DZP-UCP03 comes in a three-packet product format, according to Urnex’s product page. It may help restore a restricted water path on machines that permit that descaler. None of these accessories can make an internal electrical leak safe, so do not treat a purchase as a substitute for locating where the water originates.
When to Call a Pro
Stop and contact the maker, an authorized repair service, or a qualified appliance technician if you see water seeping from a sealed housing, near a cord entry, or through a control panel. The same applies to burning smells, tripped breakers, damaged wiring, repeated unexplained puddles, or a tank connection that cannot be repaired with an approved replacement part. Do not remove the base cover, bypass interlocks, or work around live wiring to find a hidden leak.
Record the exact model and serial number, when the leak occurs, and where the first wet spot appears. A photo of the dry unit and any visible damage can help support staff identify compatible external parts. If the brewer is under warranty, ask about service before taking it apart; unauthorized disassembly may complicate warranty support and add electrical risk.
Frequently Asked Questions
A visible drip can leave the bigger question unanswered: is the equipment still safe to use? These distinctions help you decide what to do after basic inspection without making unsupported claims about the internals of a particular machine.
Can I Use a Coffee Maker After Water Reaches Its Outlet?
No. Do not reconnect the brewer if the wall outlet, plug, or cord connection became wet. Drying the visible counter does not establish that the electrical connection is safe. Have the affected outlet and appliance evaluated as appropriate, and disconnect the circuit at the breaker instead of handling wet electrical parts.
Can a Removable Water Tank Go in the Dishwasher?
Not necessarily. Keurig’s cleaning guidance says its water reservoir and lid should not be placed in the dishwasher, and recommends thorough rinsing instead. Other manufacturers may specify different cleaning methods. Check your model’s instructions before exposing a plastic tank or valve seal to dishwasher heat.
Should I Pour Vinegar Through a Brewer That Is Leaking?
Not until you know what is leaking and the manual permits vinegar. Vinegar may be part of an approved mineral-removal routine, but it will not fix a cracked reservoir, wrong carafe, or loose electrical-area fitting. If water is seeping through the base, leave the machine unplugged and seek service rather than running a cleaning cycle.
Is It Worth Replacing a Part or Buying Another Brewer?
Replace an external basket, carafe, or removable water tank when the original manufacturer offers a compatible part and the remaining machine is safe and serviceable. Replacing the brewer is often the more practical choice when repair requires inaccessible internal tubing or electrical components, particularly outside warranty. Compare the manufacturer’s repair quote with a new unit before committing.
Final Thoughts
If you are still asking why is my coffee maker leaking after the visible tank, basket, and carafe checks, write down whether the liquid appeared while idle or only while brewing; that single observation helps support staff narrow the next step. Purchase a replacement part only after matching the full model number, and leave any brewer with unexplained moisture under its electrical housing unplugged until it has been professionally assessed.