Old coffee oils can make a fresh pot taste stale even when the water still flows normally. Learning how to clean a coffee maker starts with washing the parts that touch brewed coffee, then checking whether mineral deposits inside the water path need separate treatment. Most household drip brewers are manageable to clean, but the correct descaling liquid and cycle depend on the model.
Quick Answer: Unplug and cool the machine, discard the grounds, wash the removable basket and carafe, and wipe accessible surfaces. If the owner’s manual permits descaling, run its specified cleaning cycle, then flush with fresh water until no cleaner or odor remains. Never pour a cleaning mixture into an unfamiliar machine without checking its instructions first.
As an Amazon Associate we earn from qualifying purchases.
By DIY Ideas 4 Home Editorial Team
Before You Start: Tools, Materials and Safety
Cleaning and descaling solve different problems. Dish soap removes loose residue and coffee oils from washable surfaces, while a model-approved descaler dissolves mineral buildup inside the water circuit. Hamilton Beach’s coffee maker FAQ recommends routine cleaning at least monthly, or weekly where water is hard; that is the brand’s guidance, not a fixed schedule for every brewer.
| Tool or Material | Size or Spec | Why You Need It | Substitute |
|---|---|---|---|
| Soft sponge or cloth | Nonabrasive, clean | Wipes carafe, housing, and reachable surfaces without scratching | Soft dishcloth |
| Dish soap | Mild liquid detergent | Removes grounds and coffee residue from washable parts | Manufacturer-approved dishwashing method |
| Fresh water | Enough for the prescribed rinse cycles | Flushes loosened residue and cleaning solution | Potable filtered water |
| Approved descaler | Formula specified for your brewer | Removes mineral deposits from internal water channels | White vinegar only if your manual expressly permits it |
| Measuring vessel | Marks appropriate to the cleaner directions | Prevents overly strong mixtures or overfilling | Graduated pitcher |
Check the Model Before Choosing a Cleaner
Find the model label on the bottom or back, with the machine unplugged and its water tank emptied before you move it. Look up that exact owner’s manual, because a traditional carafe brewer, a thermal-carafe machine, and a pod brewer may use completely different buttons and cleaning fluids. If the machine has an internal filter, note whether it must be removed before descaling.
Do not treat a vinegar instruction written for one brand as permission to use vinegar in another. Some manuals specify a proprietary descaler, some provide vinegar directions, and others have an automated Clean function. Record the sequence you find, including any pause and fresh-water flush, before you start. Following the actual manual is more useful than choosing a universal recipe.
Protect the Electrical Base and Glass Carafe
Pull the plug before taking off parts, and let the warming plate, liquid, and glass cool fully. Hamilton Beach’s coffee maker care guidance explicitly warns against immersing the power cord, plug, or machine body. Keep liquids out of buttons, sockets, and vents. A damp cloth is suitable for the external housing; a sink full of water is not.
A cracked carafe, damaged power cord, loose electrical connector, or evidence of scorching changes the job from cleaning to repair or replacement. Do not operate the appliance to check whether the damage has disappeared. Avoid steel wool on coatings, heating plates, and glass; a soft sponge is less likely to leave scratches that hold residue.
Know When Descaling Is Necessary
White deposits around the reservoir outlet, noticeably slower water movement, or a descaling indicator suggest mineral buildup. Brown staining and a rancid coffee smell, by contrast, often point to oils on the basket, lid, or carafe. A descaler will not replace ordinary washing, and dish soap alone may not remove scale from inaccessible tubing.
The OXO Brew 9-Cup Coffee Maker instruction booklet, IB-8710100-00, lists a brew taking longer than 8 minutes as a possible sign of mineral obstruction, but it also advises checking its silicone water bridge. That threshold belongs to that OXO model, not every coffee maker. If you see liquid beneath the housing instead of in the carafe, stop using the machine and investigate the leak separately.
How to Clean a Drip Coffee Maker Step by Step
Set aside enough time to wash, run the manufacturer’s cleaning program, and let the machine finish its rinse cycles. An ordinary surface wash is much quicker than a full descale, and some brewers intentionally pause during the latter. Start with the unplugged, cooled machine. Reconnect it only when the procedure specifically calls for running a cleaning or brew cycle.
Step 1: Empty and Inspect the Brewer
Lift out the used paper filter or empty the permanent basket and discard the grounds. Pour away leftover coffee and stale reservoir water, then check that no grounds are stuck beneath the basket, along the lid hinge, or around the carafe opening. These areas are easier to clean before dried residue hardens. Do not tip the powered base over a sink to drain it.
Look at the carafe spout, basket seating area, and water intake for signs of cracks or damaged seals. A loose basket may cause overflow on the next brew even when the machine is spotless. If you discover a leak near electrical components, leave the appliance unplugged rather than pouring more water through it for a test.
Step 2: Wash the Carafe, Lid, and Basket
Wash washable components in warm water with mild dish soap and a soft sponge. Pay particular attention to the underside of the lid, the inside of the spout, and any mesh in a reusable filter. Rinse until water runs clear and there is no slippery soap film. Let each part drain so you can tell whether brown residue remains trapped at a seam.
Check the manufacturer’s dishwasher instructions instead of assuming that a glass carafe or plastic basket is dishwasher-safe. Hamilton Beach’s FAQ allows top-rack dishwashing for certain removable parts but warns against the high-heat SANI setting. Thermal carafes and parts with seals may have different requirements. Hand-washing is the safer default when a part’s cleaning method is unclear.
Step 3: Wipe the Housing and Accessible Openings
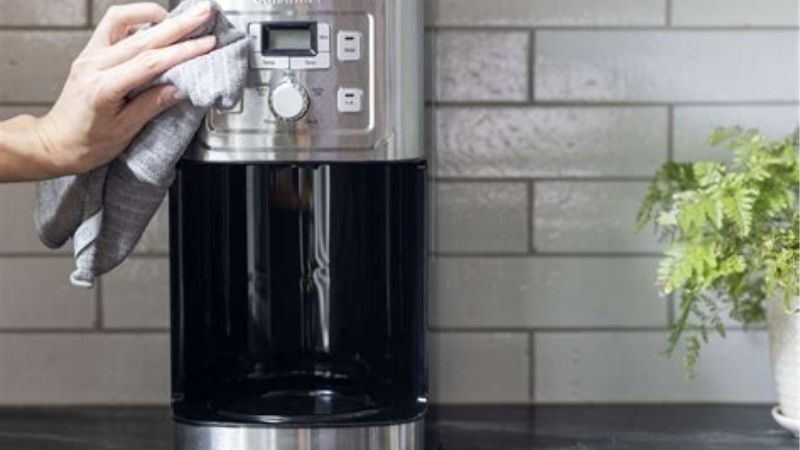
With the plug still out, wipe the exterior, warming plate, lid underside, and visible water-fill area with a barely damp cloth. Use a soft brush only on accessible, removable pieces where the manual permits it. Do not poke into a spray tube or force a tool past a water outlet. The goal here is to remove surface deposits, not open the heater or disturb internal tubing.
A removable water tank may be washed separately if its manual allows it. Do not flood a fixed reservoir or introduce dish detergent into the brewing circuit unless the product instructions expressly call for that cleaner. If a stubborn dark film remains on the carafe, use a cleaning product intended for coffee-contact surfaces, following its dilution and rinse directions.
Step 4: Choose an Approved Descaling Method
Read the descaling section before mixing anything. For one Hamilton Beach automatic-drip procedure, the company’s FAQ specifies 1 pint of plain white vinegar or coffee maker descaler, an initial 30-second run, and a 30-minute pause before completing the brew. This is a concrete example of why the right process matters: another brewer may prescribe a different solution, volume, or pause.
If your manual prohibits vinegar, do not substitute it just because it is convenient. Use the manufacturer’s named product or an expressly compatible cleaner. Keep the water level below the reservoir’s maximum marking, and never combine vinegar, descaler, bleach, or other household chemicals. Do not use the coffee filter or brewed grounds during the cleaning run unless the brand’s instructions specifically require a filter.
Step 5: Run the Specified Cleaning Cycle
Reassemble the parts needed for a water-only brew, place the empty carafe correctly, and plug the unit in. Add the prepared cleaner according to its instructions. If your machine has a Clean button or a dedicated descaling mode, activate that feature using the model’s control sequence. Do not skip built-in pauses or shut down an automated process simply because the pump goes quiet.
Follow the exact order of the maker’s instructions, especially on pod brewers. Keurig’s K-Express Use and Care Guide, for example, describes a dedicated process taking approximately 20 minutes, with a 14-oz or larger ceramic mug under the dispenser. Its control sequence is not the method for other Keurig models, much less for a standard drip brewer. Discard every drop produced during descaling.
Step 6: Rinse Until No Cleaner Remains
Empty and rinse the carafe and removable reservoir, if present. Refill with fresh potable water and run the number of plain-water cycles stated in the manual or cleaning product directions. Urnex’s instructions for Dezcal Descaling Powder call for a 28-gram packet dissolved in 32 oz of water, followed by a fresh-water brew and two additional full-tank water brews. These measurements apply to that product, not to a homemade vinegar mixture.
Keep the grounds out during all flushes. Check for remaining descaler smell, discoloration, or a soapy feel in the carafe, and perform more plain-water rinses if the instructions allow and residue remains. A brewer that still dispenses visibly dirty water may need another approved cleaning pass; if flow stops, unplug it and consult its troubleshooting guide rather than repeatedly forcing cycles through a blocked machine.
Step 7: Dry, Reassemble, and Check a Brew
Let the washed components dry fully, return the filter and basket to their proper positions, and confirm that the carafe sits squarely under the drip outlet. Check that the reservoir cap closes and the basket opens and shuts without binding. Make a plain-water test brew if the manufacturer’s instructions call for a final check. The machine should transfer water without backing up around the basket or leaking from the base.
Discard that test water. Once the rinse water is clear and the machine works normally, brew fresh coffee and judge whether the stale taste has gone. If an electrical smell develops, the housing becomes unusually hot, or water escapes near the cord, stop using it and contact the manufacturer. A successful descale does not make a damaged machine safe.
Products That Help
Urnex Biocaf Coffee Equipment Cleaning Powder, product 19-FCCP12-3PK, comes in three single-use packets formulated to remove coffee oils. Urnex’s product page specifies one 9-gram packet per 32 oz of water for a drip-brewer cleaning cycle. It is useful when oily residue and stale flavor persist, provided your machine permits a brew-through cleaner. Urnex Dezcal Descaling Powder, product 15-DZP-UCP03, also comes in three packets but targets mineral scale instead; confirm compatibility before buying either one.
For a compatible Keurig pod brewer, Keurig Descaling Solution is the brand-specific option named in the company’s care guides. The Keurig K-Elite maintenance guidance suggests descaling every 3 to 6 months, depending on buildup and water conditions. Buy this for a supported Keurig rather than assuming it is the preferred solution for a separate drip machine. Check current product labeling and your brewer’s model instructions before placing an order.
Common Mistakes That Leave Residue Behind
Cleaning only the carafe leaves oils in the brew basket and shower area. Running vinegar without checking the manual can damage components or leave a persistent odor, while stopping rinses early can contaminate the next cup with cleaning solution. Neglecting a reusable filter’s mesh is another reason a pot tastes old even when the glass looks clean.
Do not confuse fresh water with an unlimited cleaning agent: repeated water-only brewing can rinse leftover solution, but it does not necessarily dissolve a thick scale deposit. If the manual specifies a cleaning indicator reset or a complete program, do not assume that simply disconnecting power clears the maintenance requirement. Use the right procedure before buying replacement parts.
Frequently Asked Questions
Water filters, maintenance lights, and long periods of storage can complicate a routine cleaning. These questions matter after the visible residue is gone, because a freshly washed machine may still need a model-specific step before it is ready for daily brewing.
Can I Descale With a Charcoal Filter Installed?
Only if the owner’s manual explicitly allows it. Many brewers have a removable cartridge that should come out before descaling, so the cleaning liquid does not unnecessarily pass through a filter meant for drinking water. Check the filter holder for correct seating when reinstalling it, and replace the cartridge if it has reached the maker’s stated service limit.
A water filter can improve the incoming water, but it is not a substitute for washing the coffee-contact parts or maintaining the internal water path. If your brewer has no filter, there is no need to buy a generic cartridge that the machine was not designed to accept.
Why Is the Descale Light Still On After Cleaning?
The light may remain on because the full model-specific program was not completed. Keurig’s K-Express Use and Care Guide states that its descaling procedure must run to completion for the Descale indicator to turn off. A plain-water brew or power reset is not equivalent to completing that sequence. Consult the instructions for your exact control panel rather than copying another model’s button combination.
If the light returns quickly, inspect the water supply and look for continued slow dispensing. Repeated warnings can mean deposits remain or the brewer needs service. Do not keep running aggressive solutions beyond the manufacturer’s directions in an attempt to silence an indicator.
How Should I Clean a Brewer After Long Storage?
Begin by inspecting the cord, tank, filter basket, and carafe for physical damage and visible contamination. Discard anything left in the reservoir, then wash approved detachable components and let them dry. Check the manufacturer’s storage-return directions before using the heating system. A stale smell may come from residual water or oils that dried onto the basket, so address each area separately.
If the machine was stored in a freezing area or appears to have insect debris or mold inside inaccessible passages, do not assume a quick rinse makes it safe. Seek the manufacturer’s advice about inspection or replacement, especially if the internal tank cannot be opened or cleaned as instructed.
Why Does a Clean Coffee Maker Still Brew Slowly?
Slow brewing is not proof that another round of descaler is needed. Start with accessible flow restrictions: an incorrectly fitted basket, a blocked reusable filter, or components installed out of position. The OXO 9-Cup brewer manual specifically asks users to check the silicone water bridge when troubleshooting a long brew cycle, alongside possible mineral buildup.
If the water path is clear but the pump still struggles, follow the appliance’s diagnostic instructions or contact support. Do not dismantle a sealed heater or insert wire into internal tubes. A repair that requires electrical access is outside an ordinary kitchen cleaning job.
Final Thoughts
After learning how to clean a coffee maker, keep a record of the cleaner and program that actually match your appliance rather than repeating a generic internet recipe. Set a reminder based on your water hardness, brew frequency, and the manufacturer’s interval; in a shared kitchen, more frequent basket washing may matter more than aggressive descaling. Before buying a cleaner, check your model’s compatibility list and label the last maintenance date so the next cycle is easier to do correctly.