Most over-the-range microwaves have a removable metal mesh grease screen beneath the appliance. To learn how to clean microwave filter screens, first check whether yours is washable metal or a replace-only charcoal cartridge. A greasy metal filter usually needs a soak in warm, soapy water, gentle brushing, a full rinse, and complete drying before reinstallation. This is a practical home-maintenance task for most owners, provided the unit is cool and the filter releases without force.
Quick Answer: Turn off and disconnect power, slide out the underside grease screen according to the manual, soak it for at least 10 minutes, wash and rinse, then dry and refit it. Do not wash a charcoal odor filter: locate the part number and replace it instead. Stop if removing a cover would expose wiring or require opening the microwave cabinet.
As an Amazon Associate we earn from qualifying purchases.
By DIY Ideas 4 Home Editorial Team
Before You Start: Tools, Materials and Safety
The most important preparation is knowing which piece is in your hand. Whirlpool’s over-the-range microwave filter guidance places washable grease screens underneath the oven and charcoal odor filters behind a vent grille on many recirculating models. Samsung’s 2026 microwave care guidance recommends cleaning grease screens monthly, while charcoal media needs periodic replacement. Confirm your exact layout in the owner’s manual rather than assuming all grills and tabs release the same way.
| Tool or Material | Size or Spec | Why You Need It | Substitute |
|---|---|---|---|
| Sink or basin | Wide enough for the metal screen to lie flat | Lets soapy water reach the mesh without folding it | Clean dishpan |
| Dish soap | Mild liquid detergent | Breaks down normal cooking grease | Other cleaner approved by your manual |
| Nonabrasive brush | Soft or medium nylon bristles | Reaches mesh without crushing it | Soft kitchen sponge |
| Absorbent towel | Clean and lint-free | Catches water during drying | Drying rack and air time |
| Owner’s manual | Matching microwave model number | Confirms latch direction and cleaning restrictions | Manufacturer’s model-specific support page |
Know What Can Be Washed
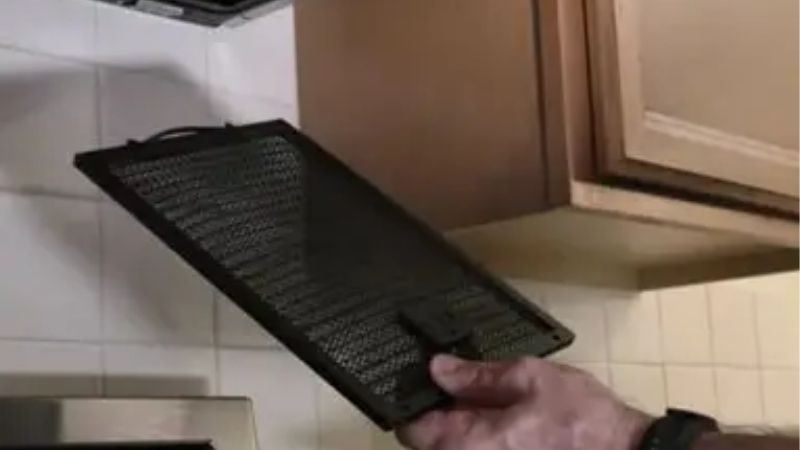
A grease filter looks like a framed sheet of metal mesh, often aluminum, located above the cooktop on the microwave’s underside. It catches grease-laden droplets before they reach the fan path. On a recirculating installation, a second filter containing charcoal helps reduce odors before air returns to the room. The GE Appliances support article titled Over-the-Range Microwave – Charcoal Filter Replacement explains that charcoal filters are model-specific and are not meant for washing.
Some microwave configurations vent outdoors and may not use a charcoal filter. Others have a charcoal access door instead of a removable front grille. Look at the model label, usually accessible around the oven doorway, and check the manufacturer’s diagram. A dirty screen is not automatically a reason to buy a new microwave or even a replacement grease screen; bent mesh, torn framing, missing retaining tabs, or a screen that no longer stays in place are more relevant replacement signs.
Make the Work Area Safe
Let the cooktop and microwave cool completely, switch off the vent fan and cooktop lights, and unplug the microwave if its plug is safely accessible. If it is not, follow the manufacturer’s instructions for disconnecting power at the circuit breaker. GE Appliances specifically instructs users to disconnect power before accessing charcoal-filter grilles. Never remove the microwave’s outer case or investigate internal wiring: microwave high-voltage components can remain hazardous even after unplugging.
Keep water and cleaning spray away from the control panel, fan opening, lamp sockets, and any exposed electrical components. Do not spray liquid upward into the underside of the unit. If you smell burning, see damaged wiring, find a cracked appliance housing, or encounter a filter assembly attached to an electrical part, leave it alone and arrange qualified service. This guide covers removable maintenance parts only, not disassembly or electrical repair.
How to Clean a Microwave Filter Step by Step
For a washable grease screen, the reliable sequence is to remove it without bending, loosen the grease, clean the mesh gently, and reinstall only when dry. Whirlpool’s published filter-cleaning instructions give a 10-minute minimum soak and permit some extra baking soda for stubborn buildup. The following seven steps are for the accessible metal screen on an over-the-range microwave, not an internal air filter or a charcoal cartridge.
Step 1: Identify the Filter and Vent Setup
Locate the filter on the underside of the microwave, usually toward the cooktop-facing intake. There may be one screen or several, depending on the appliance. Before touching a latch, take a quick photo of the installed orientation: it will help you remember which edge hooks into its slot. Match the unit’s exact model number to the grease-filter section in its manual, especially if you do not see an obvious retaining tab.
Check whether the appliance recirculates air into the kitchen or exhausts outdoors. If a second charcoal element sits behind a separate upper grille, plan to replace that element only when the instructions say it is due. Washing the underside grease screen is a different job from servicing the vent grille; keeping them separate prevents an otherwise straightforward cleaning job from turning into unnecessary disassembly.
Step 2: Release the Metal Screen Carefully
With power off, support the filter with one hand. On many Whirlpool models, the screen slides away from a retaining tab and then drops out; to reinstall, the opposite edge goes into its channel first. Your machine may have a pull ring, a spring clip, or a different sliding direction. Use the release method shown in the owner’s manual rather than prying at the frame with a screwdriver.
If the panel resists, stop and look for a second clip or accumulated grease at the edge. Pulling hard can warp thin metal and create a gap when the filter returns to the intake. Place the screen flat in a basin and inspect it under good light. A small amount of greasy discoloration is normal; broken mesh strands or a frame that will not hold its shape signal a part that should be replaced instead of scrubbed repeatedly.
Step 3: Soak in Warm, Soapy Water
Fill a sink or dishpan with comfortably warm water and a modest amount of mild dish detergent. Lower the metal filter flat into the water, making sure the greasy side is wetted. Whirlpool’s How to Clean and Replace Microwave Filters guide recommends soaking for at least 10 minutes and suggests about one-quarter cup of baking soda when the screen is exceptionally dirty. Treat that optional addition as the brand’s procedure, not a requirement for every manufacturer.
A filter coated in thick cooking oil may need more time for the film to soften; check it periodically instead of forcing a sharp tool through the mesh. Avoid concentrated caustic oven cleaner, bleach, ammonia, or aggressive degreasers unless your specific manual expressly permits them. The LG LMV1680 owner’s manual, for example, calls for mild detergent and specifically warns against ammonia and dishwasher cleaning because its aluminum can darken.
Step 4: Brush Both Sides Gently
Use a soft nylon dish brush or nonabrasive sponge to sweep along the filter’s weave. Work from the middle toward the perimeter, turning the screen over to clean the reverse face. Concentrate on greasy corners and the lip of the metal frame where residue can collect. Gentle passes protect the structure better than pressing down until the mesh bows or dragging a metal scraper across it.
For sticky patches that remain after the first pass, return the screen to the suds and try another soak rather than bending the grid with extra pressure. Examine the joints between the mesh and its frame for caught residue, but do not pick out layers of the filter itself. You are trying to clear oil from open mesh passages, not polish the metal until every stain disappears. Clean airflow openings matter more than cosmetic color.
Step 5: Rinse Until No Soap Remains
Hold the filter over the sink and flush both faces with clean water, allowing the rinse to pass through the mesh. Continue until the runoff is free of suds and loose grease. Rinse the frame as well; leftover detergent can attract more residue and cause streaking under the microwave. If the water still carries sticky film, revisit the gentle scrub rather than hiding it with a stronger chemical.
Check the filter against a light source once rinsed. Most openings should appear clear, with the weave still evenly supported. A darkened aluminum finish is not the same thing as a clogged screen: Whirlpool notes that some grease filters are dishwasher-compatible, while LG warns that its specified model’s aluminum can darken in a dishwasher. This variation is why hand washing is the safer default when the manual is unavailable.
Step 6: Dry the Screen Completely
Shake off water gently over the sink without twisting the filter, then set it on a clean towel or drying rack. Blot the frame and let trapped moisture drain from the layered mesh. Recheck the edges where droplets can remain between folded sections. Whirlpool’s cleaning guide says the screen should be completely dry before you slide it back into place; avoid rushing this step simply because the exposed opening looks inconvenient.
Do not put a wet screen back above hot burners, attempt to accelerate drying with the microwave oven, or turn the exhaust fan on with a missing filter. The time needed will depend on the mesh construction and room conditions, so use dryness rather than a universal number of minutes as your finish line. If the filter smells stale after drying despite thorough washing, inspect for damage and confirm whether another charcoal filter is overdue for replacement.
Step 7: Reinstall and Check the Fit
Follow your photo and the manufacturer’s instructions to guide the clean screen into the first channel, swing the opposite edge upward, and engage its tab or latch. Tug very lightly on the frame to confirm that it cannot fall onto the cooktop. The mesh should sit flush, with no loose corner hanging into the intake. If the locking edge refuses to engage, remove the screen and inspect its direction rather than pushing it into place.
Restore power only after everything is dry and secured. Run the hood fan briefly while cooking is not underway to check for a rattle, loose panel, or unusual noise. Cleaning can remove a restriction caused by grease, but it will not fix an obstructed outdoor duct, failed blower, or incorrectly installed vent damper. If the fan still pulls poorly or makes an abnormal noise, stop and have the ventilation path assessed rather than operating the system without a grease screen.
Products That Help
The OXO Good Grips Dish Brush with Scraper, model 21691, has nylon bristles and a nonslip handle according to OXO’s product page; use the bristles gently on washable mesh, not its hard scraper edge. If the frame or weave is damaged, LG’s genuine 5230W1A012E grease filter is a concrete replacement example for select LMH2235ST and LMHM2237 models listed by LG, but it is not a universal-size filter.
For a recirculating unit with spent odor media, GE Appliances WB02X35687 is a genuine charcoal filter sold through GE’s parts site. Buy it only after the GE model-compatibility check confirms that precise part number. These two replacement parts address different filter jobs; neither substitutes for the other’s purpose, and a correctly cleaned intact grease screen does not automatically need replacing.
Common Mistakes to Avoid
Do not immerse charcoal filter media, run a metal grease screen through a dishwasher without checking the manual, or pull a grille off merely because it resembles one in a video for another model. Whirlpool’s Product Help says many grease screens can go into the dishwasher but specifically directs owners to confirm permission in the owner’s manual. A filter-clean indicator is also not proof that both filter types are washable; it is often a maintenance reminder that follows a programmed interval.
Keep the surrounding hood bottom clean with a damp cloth after the screen is removed, but wipe outward rather than pushing residue into the blower housing. Do not mix cleaning chemicals or spray solvent into ventilation slots. In kitchens with frequent frying, inspect the mesh between scheduled washings because buildup can happen sooner than the calendar suggests. Filter maintenance improves the chance that the fan can move air as designed, but it does not eliminate all cooking smoke, odors, or moisture.
Frequently Asked Questions
These questions address the edge cases that often cause confusion after the screen has been cleaned, especially differing filter schedules, access arrangements, and replacement decisions.
How Often Should a Microwave Grease Filter Be Cleaned?
Monthly is a useful starting point for many over-the-range models. Whirlpool Product Help recommends monthly cleaning, and Samsung’s 2026 microwave-care page gives the same interval. Cooktop-heavy households may need to inspect the screen more often, particularly if frying produces visible oil deposits. Follow a filter-status reminder or a different service interval if your exact manual calls for it.
Can I Clean the Filter in the Dishwasher?
Sometimes, but only when your manufacturer’s instructions approve it. Whirlpool says most of its grease screens can be dishwasher-cleaned while advising owners to check the manual first. In contrast, the LG LMV1680 manual directs owners not to put its aluminum screen in a dishwasher. If you do not know the model-specific rule, choose a gentle hand wash and avoid risking a darkened or distorted frame.
Does a Countertop Microwave Have the Same Filter?
Usually not. The common washable grease screen discussed here belongs to an over-the-range microwave with a built-in cooktop exhaust fan. A basic countertop microwave typically has ventilation openings rather than a user-removable range-hood grease screen. Some specialty units differ, so consult the owner’s manual rather than attempting to pry open a countertop unit’s case or vents for a filter you may not have.
When Should I Replace the Charcoal Filter Instead?
Replace it when the model’s maintenance schedule calls for replacement or when cooking odors persist and the charcoal element shows heavy buildup. Whirlpool gives about six months for many over-the-range charcoal filters; Samsung states roughly six to twelve months depending on model and use. GE Appliances emphasizes selecting the filter by exact model and part number. Do not try washing, baking, or vacuuming a disposable charcoal cartridge back into service.
Final Thoughts
Knowing how to clean microwave filter screens saves an intact grease filter from premature replacement, but it also prevents the wrong repair: scrubbing charcoal media or buying a filter that happens to look the same size. Once your washed screen is dry and firmly seated, record the microwave’s model number and both filter part numbers in your kitchen maintenance notes. Then check the next monthly grease-screen condition and order only the correctly matched replacement part if the charcoal element or metal frame actually needs it.