Learning how to defrost a freezer starts with one important distinction: a manual-defrost chest freezer needs occasional ice removal, but a frost-free model normally handles this automatically. Plan to empty the freezer, disconnect power, manage meltwater, and let ice soften without sharp tools or electrical heaters. The job may take several hours, depending on frost thickness and room conditions. Protecting the food you remove is just as important as protecting the appliance.
Quick Answer: Put frozen food in another working freezer or an ice-packed cooler, unplug the appliance, and direct defrost water into towels or a drain pan. Let the ice melt naturally, wipe the interior dry, reconnect power, and wait until the cabinet is suitably cold before putting food back. USDA guidance calls for freezer storage at 0 degrees F or below.
As an Amazon Associate we earn from qualifying purchases.
By DIY Ideas 4 Home Editorial Team
Before You Start: Tools, Materials and Safety
Manual defrosting is mainly a water-management and food-temperature job. GE Appliances recommends clearing a manual-defrost chest freezer when the frost reaches roughly 1/4 to 1/2 inch; those measurements are guidance for that freezer type, not a rule for every frost-free refrigerator. Find your model number and read its owner’s manual before starting, particularly if the cabinet has a drain plug or a removable interior liner.
| Tool or Material | Size or Spec | Why You Need It | Substitute |
|---|---|---|---|
| Insulated cooler or spare freezer | Capacity to hold the food without crushing it | Protects food while the cabinet warms | Borrow space in another working freezer |
| Ice packs and a food thermometer | Enough packs for the load; suitable thermometer for cold foods | Helps monitor food temperature | Bagged ice in leakproof containers |
| Towels and shallow pan | Absorbent cloths; pan fits under drain | Catches meltwater before it reaches flooring | Sponge and bucket |
| Soft sponge and mild detergent | Nonabrasive and approved by owner’s manual | Cleans interior after ice has melted | Soft cloth with warm water |
| Plastic or wooden scraper | Rounded edge, if manual allows one | Lifts only ice already loosened | Wait for more melting |
| Freezer thermometer | Reads around 0 degrees F | Shows when the cabinet is back to storage temperature | Existing built-in reading if reliable |
Check Whether the Freezer Defrosts Itself
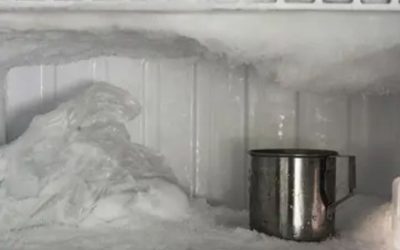
A standalone manual-defrost chest freezer commonly accumulates frost on its walls and lid. By contrast, an automatic-defrost upright or the freezer section of a modern refrigerator is intended to clear frost through its own cycle. Do not turn routine manual defrosting into a regular maintenance habit for a frost-free appliance. A sudden wall of ice in a frost-free unit may point to a door left ajar, blocked airflow, or a defrost-system fault.
Look for wording such as manual defrost, frost-free, or automatic defrost on the appliance label and in the owner’s manual. If a frost-free freezer has repeatedly iced over and will not hold temperature, preserving the food and arranging diagnosis matter more than repeatedly melting the visible ice.
Make a Food Storage Plan Before Disconnecting Power
USDA Food Safety and Inspection Service guidance identifies 0 degrees F or lower as the intended freezer storage temperature, while 40 degrees F or below is the refrigerated-food threshold. Move food to a working freezer when possible; for a short job, use a cooler packed with sufficient ice or frozen gel packs and monitor the contents. Put raw meat and poultry in leakproof containers so thawing juices cannot drip onto ready-to-eat food.
The USDA’s figures of about 48 hours for a full freezer and 24 hours for a half-full freezer apply to a power outage with the door kept shut. They do not describe food removed into a cooler or a defrosting cabinet left open. If you cannot keep perishables cold through an uncertain job, postpone the project or arrange alternate freezer space first.
Keep Electricity, Hot Water and Sharp Tools Separate
Disconnect the freezer at its plug or approved disconnect before the first towel gets wet. Keep power cords and outlets away from puddles, and avoid pulling an appliance across a wet floor. Whirlpool’s freezer-defrost instructions specifically warn against using hair dryers, space heaters, knives, or ice picks to accelerate the process. Hot electrical equipment near meltwater creates a hazard, while a pointed tool can puncture hidden cooling components.
Some manufacturer instructions allow a carefully placed bowl of hot water to provide gentle steam, but that is model-dependent and the bowl must remain stable on a surface that can tolerate its heat. Follow the owner’s manual rather than pouring boiling water directly onto plastic walls or coils. When in doubt, choose passive melting and a soft sponge.
How to Defrost a Freezer Step by Step
The sequence below applies to a typical manual-defrost freezer. Drain fittings, temperature controls and restart instructions differ by model, so the manufacturer’s owner’s manual takes priority where it differs. Work in an order that keeps food cold, prevents floor damage and avoids rushing the last stubborn patches of frost.
Step 1: Schedule the Job and Prepare Cold Storage
Choose a time when you can stay nearby and empty your cooler or spare freezer in advance. Arrange ice packs and measure the available space before moving packages. Check the condition of vulnerable foods first, including seafood, raw poultry and leftovers. Leave items tightly packed in their original wrapping unless a leaking bag needs a second sealed container.
Whirlpool’s product-help instructions for certain freezers suggest moving the temperature control to its coldest setting about 6 hours before a planned defrost. That is a model-specific preparation step, not permission to store food at room temperature afterward. If your manual does not require pre-chilling, follow its instructions instead. The step is complete when safe cold storage and water-collection materials are ready.
Step 2: Unplug the Freezer and Remove Its Contents
Switch the temperature control off if directed, disconnect the electrical supply, then transfer the food without delay. An upright model may have shelves or drawers that can be taken out for cleaning. A chest model may have baskets that lift free. Avoid wrenching frozen-on components; they can crack when forced. Keep track of the parts and where they belong, especially clips and drain caps.
Do not place food on the kitchen counter while waiting for the frost to melt. USDA food-safety guidance warns that perishable food left above 40 degrees F for more than 2 hours may need to be discarded. The relevant question is the food’s actual condition and temperature, not simply how long the freezer has been unplugged. Move to the next step only after the cabinet is empty and disconnected.
Step 3: Direct Meltwater Into a Pan or Towels
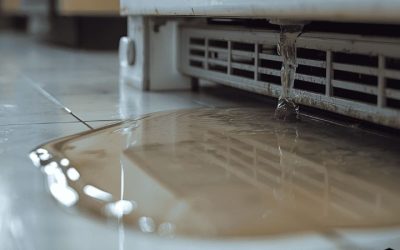
Spread towels across the floor immediately in front of the cabinet, paying particular attention to seams in hardwood or laminate. Check for a drainage outlet near the lower front edge. Some chest freezers include an interior drain stopper and exterior fitting; Whirlpool and GE describe drain arrangements that vary by model. Open only the drain pieces identified in your manual and place a shallow pan or compatible hose beneath the outlet.
A small pan can fill while the upper frost is still melting, so look at it frequently and keep a second container ready. If there is no drain system, wring out towels and sponge pooled water from the bottom as needed. Never route defrost water toward an outlet, power strip, or the freezer’s motor compartment. This step is working when the meltwater has a controlled path and the floor stays dry.
Step 4: Let the Frost Melt Without Forcing It
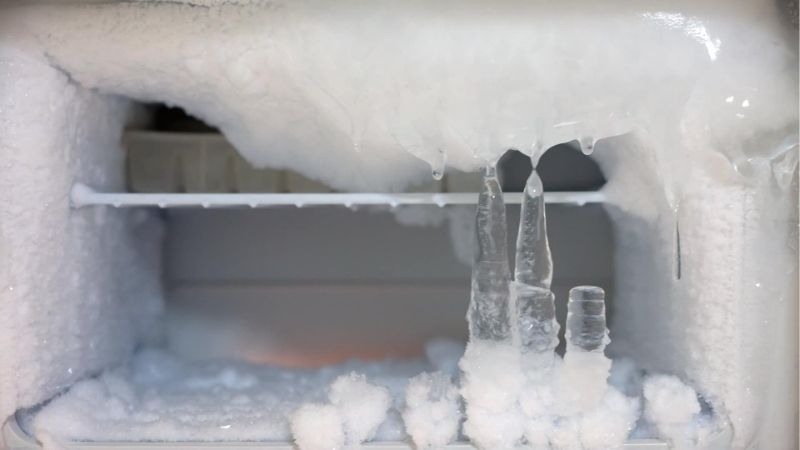
Leave the lid or door open and allow room-temperature air to soften the frost. GE Appliances permits removing large pieces only after they become loose, and Whirlpool describes a plastic or wooden spatula used gently on softened ice. If a block resists, wait rather than prying. A small puncture can permanently damage the cooling circuit, potentially making replacement more economical than repair.
Where the owner’s manual permits it, a stable bowl of hot water placed inside the unplugged cabinet may speed melting through steam. Use a heat-tolerant container, protect delicate surfaces from direct contact, and change the water carefully when it cools. Do not put an electric fan inside the wet cabinet or spray hot water behind interior panels. A gradual melt is preferable to a quick method that damages a liner.
Step 5: Remove Water and Clean the Interior
Once the frost has fallen away, sponge water from corners, shelving supports and the gasket channel. Remove loose ice by hand rather than breaking it off with a metal tool. Use a soft cloth with mild detergent or an approved cleaning mixture from your manual. Whirlpool’s defrost directions call for a clean sponge or soft cloth, mild detergent and a final rinse before drying; GE provides model-specific cleaning instructions as well.
Do not mix bleach with vinegar, ammonia or other cleaners. Keep abrasive pads away from plastic liners and door seals, since scratches can hold dirt or degrade a seal. Examine the door gasket for crumbs, tears or areas pulled away from the cabinet. Clean along the folds, then dry every accessible surface so water does not immediately turn into new frost.
Step 6: Refit the Drain, Reconnect and Cool Down
Return baskets and shelving only after the interior is dry. Reinstall any internal drain stopper and external cap exactly as directed by the manual. An overlooked cap can cause the next defrost or normal use to leak onto the floor. Check that the power cord is dry and undamaged, then reconnect the freezer and set its temperature according to the manufacturer’s guidance.
Place an appliance thermometer where it can be read without rearranging a full load. USDA guidance recommends keeping the freezer at 0 degrees F or lower. Cabinet cooling time varies with room conditions, size and how long it was unplugged; do not invent a fixed wait based on a different model’s manual. Wait for an appropriate reading before loading food that needs frozen storage, or keep it in another functioning freezer meanwhile.
Step 7: Return Safe Food and Watch for New Frost
Check the cooler’s contents before restocking. USDA says food that still contains ice crystals or remains at 40 degrees F or below can generally be refrozen, though texture may suffer. Perishable items held above 40 degrees F for more than 2 hours should be discarded, and food exposed to raw meat juices needs careful assessment. Do not taste questionable food to decide whether it is safe.
Put only safe, adequately chilled packages back, leaving the door able to close without pressure from a basket or oversized box. Inspect the gasket contact all around the edge. Whirlpool identifies frequent openings, a poor seal and obstructed airflow as possible contributors to frost. If a manual-defrost freezer develops unusually thick ice again soon, investigate those causes rather than repeating an unnecessarily long cleanup.
Products That Help
The Coleman Chiller 28-Quart Cooler With Wheels offers a portable insulated container for a modest food load during defrosting; its 28-quart capacity is specified on Coleman’s product page. It needs appropriate ice packs and temperature monitoring, and larger food inventories may require a second cooler or a spare freezer. Check the current retailer price and make sure your packages fit before buying.
The Taylor 5924 Fridge/Freezer Thermometer has a 3-inch dial that hangs or stands inside an appliance, according to Taylor’s product page. It helps you confirm that the restarted freezer has returned to its target instead of relying only on the control-knob position. A cooler holding perishable food still needs its own suitable temperature measurement when food safety is in doubt.
Common Mistakes That Cause New Problems
Four shortcuts can turn a routine cleanup into a repair: leaving food warm while waiting for stubborn ice, stabbing the liner with a screwdriver, running a hair dryer beside water, and reconnecting before replacing drain plugs. Another frequent error is packing an upright so tightly that it blocks air vents or prevents the gasket from meeting the cabinet evenly.
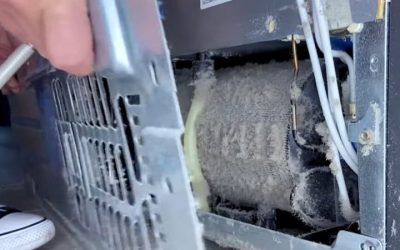
Cleaning visible frost does not fix a failing automatic-defrost heater, torn gasket or misaligned door. If a frost-free cabinet repeatedly builds a solid wall of ice, runs continuously or cannot regain its prescribed temperature, keep food in alternate cold storage and consult qualified appliance service rather than opening electrical panels yourself.
Frequently Asked Questions
These answers cover the timing and food-handling situations that most often change how a defrosting job should be planned.
How Often Should a Manual-Defrost Freezer Be Defrosted?
Use actual frost buildup and the owner’s manual rather than a universal calendar reminder. GE Appliances recommends defrosting its manual-defrost chest freezers at about 1/4 to 1/2 inch of frost accumulation. Humidity, door-opening frequency and gasket condition change how quickly that thickness develops. A frost-free model should not need the same recurring manual process.
How Long Does a Freezer Take to Defrost?
There is no reliable single time for every freezer. An almost empty cabinet with thin frost will usually need less melting time than a densely iced chest unit, and room temperature affects the process. GE’s instructions for a different manual-defrost refrigerator compartment mention a minimum 2-hour open-door period for average frost, illustrating why time estimates from one model should not be applied to another. Allow extra time for drying and cooling after restart.
Can I Use a Hair Dryer or Knife to Remove Ice Faster?
No. Whirlpool’s “How to Defrost the Freezer” guidance says not to use a hair dryer, electric heater, knife or ice pick. Heat and water create avoidable electrical and material-damage risks, and a sharp point may pierce refrigerant tubing hidden close to the liner. A gentle plastic or wooden scraper is appropriate only if your manual allows it and the frost is already loose.
Is Partly Thawed Food Safe to Put Back?
Often, but judge each package by temperature and condition. USDA FSIS advises that food with remaining ice crystals or a reading of 40 degrees F or below can be refrozen. For perishable meat, poultry, seafood, eggs and cooked leftovers, being above 40 degrees F for more than 2 hours is grounds for discarding them. A smell check cannot establish safety, so use a food thermometer and USDA’s food-specific chart when uncertain.
Final Thoughts
Defrosting a manual freezer should leave you with a dry interior, a correctly fitted drain and a cabinet that can return to 0 degrees F or lower before food is restocked. Set up safe cold storage first, let ice loosen without force, and check the gasket while the freezer is empty. If you need to purchase supplies, compare the Coleman Chiller 28-Quart Cooler With Wheels with your food volume and check the current price of the Taylor 5924 thermometer. For a frost-free freezer that repeatedly ices over, arrange a diagnosis instead of scheduling another manual defrost.