A solid sheet of ice across a driveway calls for more than scattering salt and waiting. To learn how to remove ice from driveway surfaces, begin by clearing loose snow, choosing a suitable scraper, and treating only the ice that remains. The safest method depends on whether the driveway is concrete, asphalt, gravel, or decorative pavers, as well as the pavement temperature and nearby landscaping.
Quick Answer: Push away snow, break the ice’s bond with a carefully selected deicer if the surface permits it, then scrape up loosened pieces and spread sand where traction is still poor. Avoid boiling water, forceful chopping, and heavy salt applications. If the ice is too thick or the slope too hazardous to stand on, hire a snow-and-ice removal service.
As an Amazon Associate we earn from qualifying purchases.
By DIY Ideas 4 Home Editorial Team
Before You Start: Tools, Materials and Safety
Start with the driveway material and the safest walking route rather than with the deicer bag. Ice removal can damage the surface beneath it, and a small amount of ice melt applied correctly may be more useful than a blanket of granules. The Minnesota Pollution Control Agency’s 2025 smart-salting guidance recommends shoveling and scraping first to reduce the need for chemicals.
| Tool or Material | Size or Spec | Why You Need It | Alternative |
|---|---|---|---|
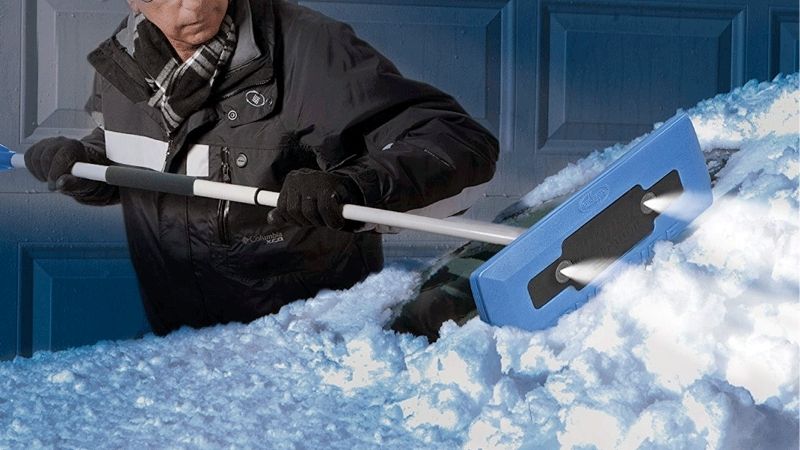
| Snow shovel or pusher | Blade appropriate to driveway width | Removes loose snow that insulates the ice | Stiff outdoor push broom for light powder |
| Ice scraper | Wide, flat blade; long handle | Lifts softened ice without repeated overhead strikes | Plastic scraper for delicate surfaces |
| Traction material | Clean sand, stored dry | Improves grip when melting is slow or unsuitable | Commercial traction grit approved for the surface |
| Appropriate deicer | Label matched to pavement and temperature | Helps release firmly bonded ice | Mechanical removal only if salts are unsuitable |
| Winter safety gear | Traction footwear, insulated gloves, eye protection | Reduces slip and chip-related risks | Professional removal if a safe stance is unavailable |
| Push broom | Outdoor stiff-bristle head | Sweeps slush and leftover granules | Manual brush for smaller patches |
Identify the Pavement and Protect Its Finish
For ordinary asphalt, a shovel and careful flat-blade scraping usually provide the first line of attack. For a sound, older concrete driveway, mechanical clearing is also useful, but avoid gouging joints or striking the surface with a pointed steel tool. On stamped, sealed, painted, or coated pavement, check the finish manufacturer’s instructions and favor nonmetal edges. Pavers need particular caution around joints and loose blocks.
Newly placed concrete deserves extra restraint. The University of Maryland Extension’s 2024 article, Melting Ice Safely, notes that sodium and calcium chloride can be especially damaging to fresh concrete. Deicing chemicals and repeated freeze-thaw exposure can contribute to scaling. If the driveway is new, visibly spalling, cracked, or under a surface warranty, confirm the contractor’s restrictions before using chemicals.
Work Safely on Cold, Slippery Ground
Establish a stable path from the house before crossing the driveway. Wear boots with winter traction and work from a cleared edge rather than standing in the middle of an ice sheet. Keep children and pets away while chopping or scattering chemicals; flying chips and concentrated granules are not harmless. Avoid working beneath a roof where snow or ice could drop onto you.
The CDC’s winter-storm safety guidance warns that strenuous work in cold weather increases stress on the heart. Push manageable snow loads instead of lifting heavy slabs, pause frequently, and stop if you feel chest pain, unusual breathlessness, dizziness, or weakness. Anyone advised to avoid cold-weather exertion should delegate the work. Chemical melting cannot make a steep driveway immediately safe to walk or drive on.
Know What Salt Can and Cannot Do
Ordinary rock salt is sodium chloride. It lowers the freezing point of water but becomes substantially slower as pavement temperature drops. Minnesota’s Smart Salting materials use roughly 15 degrees Fahrenheit as a practical warning point for regular salt; lower temperatures often call for grit or a different surface-approved treatment. Read the actual product’s operating range rather than assuming every bag works down to its marketing claim.
Sand is different: it adds friction but does not melt ice. Do not mistake a gritty surface for one with a reliable bond between your footwear or tires and the pavement. The US Environmental Protection Agency describes salt runoff as a source of water pollution and corrosion, so adding extra product is not a free insurance policy. Ice-melt packaging that says pet-safe or eco-friendly does not remove the need to follow its safety instructions.
How to Remove Ice From a Driveway Step by Step
This sequence works best when you can first make a safe foothold along one side. It combines mechanical clearing with targeted treatment rather than trying to dissolve the entire ice layer. The time required varies with thickness, pavement temperature, shade, drainage, and the deicer chosen; no fixed waiting period fits every driveway.
Step 1: Clear Loose Snow First
Use a snow shovel or pusher to move the top layer of fresh or powdery snow off the area you need to use. Begin at the garage or a safe entrance and work toward a place where you can deposit the snow without blocking the drainage route. On an uphill driveway, keep your footing on the section already cleared, and never push snow toward a busy street or across a public sidewalk.
Do this even when a hard ice layer is already present: snow shields the frozen surface from scraping and dilutes or buries ice-melt granules. If powder keeps blowing back over the driveway, clear access to steps and the driver’s path first rather than repeatedly cleaning the entire paved area. Inspect the exposed surface so you can distinguish transparent glaze from thick, rough sheets.
Step 2: Establish a Traction Route
Before working across the ice, put a small amount of clean sand on the entry route where your boots need grip. Walk slowly with short steps and keep your hands free for balance. This temporary traction path does not mean the driveway is ready for vehicle use, particularly on a steep approach. Park vehicles away from the work area if they can be moved without crossing an unsafe patch.
Mark the locations of drains, edging, decorative joints, and any visible cracks. Choose a smaller high-priority zone if the whole driveway cannot be handled safely. Clearing the garage approach, pedestrian route, and tire contact areas may improve access while leaving a dangerous untouched patch clearly off limits until it is treated.
Step 3: Choose a Deicer for the Actual Surface
Read the ingredients, stated working temperature, surface warnings, and application rate on the package. Use only a product permitted by the driveway installer or coating manufacturer. A conventional rock-salt treatment may be adequate in relatively mild conditions, but is a poor choice when the pavement is much colder than about 15 degrees Fahrenheit. Other deicers can work at lower temperatures, yet that does not mean they are safe on new concrete, every sealer, or around sensitive plants.
The University of Maryland Extension compares sodium, calcium, magnesium, and potassium chloride products in its Melting Ice Safely reference. Their performance and surface effects differ. Do not substitute lawn fertilizer, pool chemicals, or an unmarked bucket of crystals for a labeled ice melt. If you cannot establish chemical compatibility, move to sand and gentle scraping while waiting for better conditions or professional advice.
Step 4: Apply Only Where Ice Remains
Lightly distribute the chosen material over bonded ice and along the access path. Avoid thick piles and bare areas that have already been cleared. Minneapolis’s Salt Best Practices guidance, updated in 2025, suggests leaving approximately 3 inches between salt granules as a practical visual reminder not to oversalt. This is guidance for efficient scattering, not an exact dosage for every product, surface, or storm; the label’s rate takes precedence.
A hand spreader can help place material without tossing it into flower beds or storm drains. Concentrate on ice that a flat blade cannot yet lift. Do not shake the deicer directly beside open water, wells, or pet play areas. If the product gets on your gloves or clothing, follow the handling and cleanup directions on the package. Never combine chemicals to invent a stronger mixture.
Step 5: Let the Bond Loosen, Then Scrape
Wait according to the deicer instructions and current temperature. Watch for a wet boundary forming between the ice and pavement rather than assuming all the ice must liquefy. Test a small edge with a broad, flat scraper. When the blade slips under a sheet without excessive force, lift the loosened pieces and move them away from the traveled path. Keep the blade low and controlled.
Do not repeatedly drive a sharp metal chisel down into decorative concrete or paver joints. A thick sheet is better addressed in several passes than with one violent strike. If the edge still feels welded to the surface, stop and allow more time or seek a safer method for that material. A shovel can move liberated chunks without the repeated bending required to collect each by hand.
Step 6: Push Slush Away From Drainage Paths
After the ice has broken loose, sweep or shovel the watery slush out of areas where people walk and cars stop. Keep runoff moving away from the home, garage threshold, and low spots. If water accumulates at the end of the driveway and refreezes overnight, the next morning’s hazard may be worse despite today’s clearing. Do not block a storm drain with a mound of ice or push contaminated slush into a landscaped bed.
Look for places where downspouts discharge across the driveway and where plowed snow has formed a curbside ridge. The American Concrete Institute’s 2019 publication on chloride-based deicers notes that concentrated salt solutions and poor drainage at concrete joints can contribute to damage. Removing pooled water and preventing repeated icing reduces the need for chemical follow-up, although existing cracks or drainage faults may need repair.
Step 7: Recheck Traction and Clean Up Granules
Walk the cleared route carefully after scraping and identify shaded areas that still feel slick. Add a modest amount of dry sand to those specific spots if another freeze is imminent. Sand can improve friction, but it is not a substitute for opening a safe traffic lane when ice is thick. For a driveway with a steep grade, treat the entire vehicle travel path as unsafe until you have dependable traction.
Once the pavement is dry, sweep up leftover salt or sand so it does not get tracked indoors or washed into nearby soil and drains. Minnesota’s 2025 smart-salting recommendations specifically advise recovering unused material. Store reusable dry granules in a labeled, moisture-resistant container away from children and pets. Rinse or wipe tools according to their manufacturer’s recommendations and inspect scrapers for damage before storing them.
Products That Help
For snow covering the ice, the Suncast SC3250 is an 18-inch Steel Core ergonomic combination shovel and pusher, with a manufacturer-listed 52-inch overall length. Its wider blade can remove loose snow before any chemical treatment. For bonded ice on a sound, suitably durable surface, the Bully Tools 92200 All Steel Ice / Sidewalk Scraper is a separate tool with a 58-inch handle assembly and a listed 5-pound weight. Use its steel edge cautiously, not on a fragile sealer, chipped paver, or surface whose manufacturer prohibits metal scrapers.
For small, targeted chemical applications, the Chapin 8705A is a 3-liter hand-crank ice melt and salt spreader with a thumb-controlled gate. It is more appropriate for distributing small compatible granules than for removing an ice sheet itself. Check the current listing for deicer compatibility, available replacement parts, and price before buying; owning a spreader does not justify using salt where mechanical clearing alone will suffice.
Common Mistakes to Avoid
Pouring boiling water onto a frozen driveway can add runoff that refreezes into an even slicker layer, and sudden thermal changes are an unnecessary risk for some finished surfaces. Heavy hammering can chip concrete and dislodge pavers. Applying a large pile of salt in one place wastes material while leaving the surrounding surface slippery. Using an unlabeled mix makes temperature performance and environmental effects impossible to judge.
Do not ignore the source of recurring ice. Snowmelt from a roof drain, a low area near the garage, or snow packed by vehicle tires can repeatedly form new glaze. Fixing gutter outlets, improving drainage when conditions allow, or removing fresh snow before traffic compacts it may prevent the next ice-removal job. Never park or drive over a patch simply because its surface looks wet; an invisible film can remain frozen.
Frequently Asked Questions
These answers focus on the driveway choices that most affect safety and material damage. Follow local stormwater rules and the specific recommendations for your driveway finish when they are more restrictive.
Can I Remove Driveway Ice Without Salt?
Yes. Remove any loose snow, establish safe footing with sand or appropriate traction grit, and gently pry up ice once it loosens. This works best on smaller areas or thin sheets. Sand does not melt the ice, so continued traction management may be necessary until the weather changes. If the ice cannot be reached safely, leave the area blocked off and arrange professional clearing instead of forcing the scraper.
What Is Safest for a Concrete Driveway?
There is no deicer guaranteed harmless to every concrete surface. Sound older concrete, newly placed slabs, stamped finishes, and pavers all have different restrictions. University of Maryland Extension warns that deicers can contribute to freeze-thaw scaling and singles out new concrete as particularly vulnerable to certain chlorides. Mechanical clearing and temporary sand are usually the conservative starting choices; ask the installer which products the warranty permits.
Will Regular Rock Salt Melt Ice in Extreme Cold?
Its performance declines sharply in colder pavement conditions. Minnesota’s environmental guidance uses about 15 degrees Fahrenheit as a warning threshold for ordinary sodium chloride, while temperature and moisture can change the outcome. In prolonged cold, favor sand for immediate traction and consider only a clearly labeled, surface-compatible low-temperature deicer if needed. A product’s stated lower temperature is not a promise of rapid melting.
How Do I Keep the Driveway From Icing Again?
Clear snow promptly before tires compress it, direct downspouts away from pavement, and remove slush before overnight freezing. Check where meltwater collects at the garage, beside edging, or against the street’s plow ridge. Some surfaces can be treated preventively with a compatible deicer before freezing precipitation, but using more product than the label calls for is unnecessary and increases runoff. Address a recurring drainage problem rather than relying on a heavier salt application each storm.
Final Thoughts
Remove snow first, make a secure walking route, use only a surface-compatible amount of ice melt when needed, and scrape up loosened ice before it refreezes. Choose the Suncast SC3250 for snow clearing, the Bully Tools 92200 for carefully lifting bonded ice on suitable pavement, or the Chapin 8705A when controlled deicer spreading is worthwhile. Check each tool’s current specifications and price, and ask your driveway installer about chemical restrictions if the concrete is new or sealed. If the slope, thickness, or your health makes the job unsafe, a local snow-removal professional is the better next step.