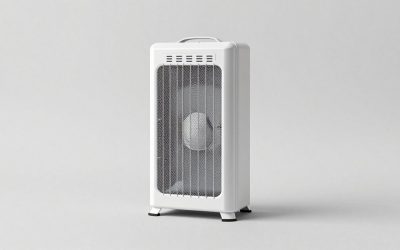
how to bleed a radiator: Not every U.S. radiator is a hot-water unit with a manual bleed key: one-pipe steam radiators use steam air vents, electric oil-filled radiators are sealed, and automatic hydronic vents have distinct manufacturer rules. Do not loosen those devices as though they were a manual water-radiator bleed screw.
Quick Answer: On a hot-water radiator with a manual bleed valve, turn the heating off and let the unit cool. Place a towel and cup below the valve; slowly turn a fitting bleed key counterclockwise until air hisses out. Close the valve as soon as water flows steadily, then confirm the heating-system pressure remains within the range specified by your boiler manufacturer. Do not apply these steps to steam or sealed electric radiators.
Only a hot-water hydronic radiator with an approved manual vent should be bled. Do not loosen steam or sealed electric radiators, and protect against scalding water.
As an Amazon Associate we earn from qualifying purchases.
By DIY Ideas 4 Home Editorial Team
Before You Start: Tools, Materials and Safety
Work only with the surfaces, materials and controls that the exact manual identifies as owner-accessible. Check the expected result at each stage before proceeding.
| Decision point | Owner action | Result to check | Stop or exception |
|---|---|---|---|
| Confirm radiator is hot-water hydronic | Identify a water-filled radiator with a manufacturer-recognized manual bleed valve. | Uneven upper heating or gurgling can fit trapped air. | Never apply this process to steam radiators or sealed electric radiators. |
| Shut heating off and cool | Turn off circulating heat and allow the system to cool following the boiler manual. | A safe-to-touch surface reduces scald risk. | Do not vent a hot pressurized component. |
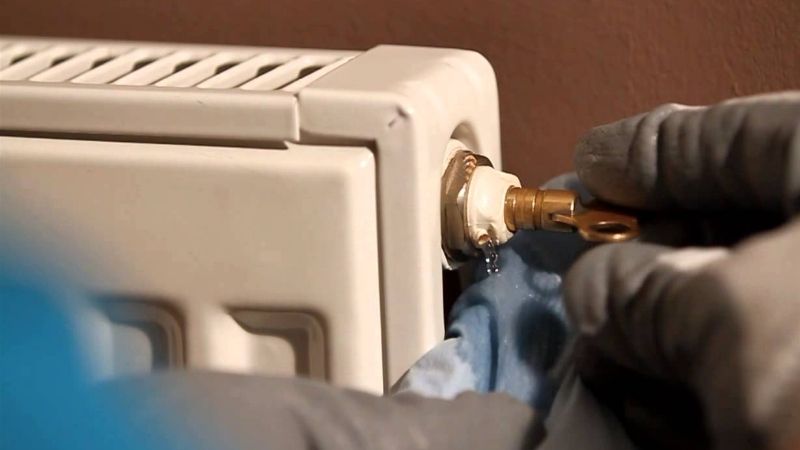
| Release air without removing the screw | Put a cloth and cup below the correct vent; use a matching key to turn the screw slowly only a small amount. | Listen for a hiss; keep hands away from the discharge path. | Never unscrew the valve body or remove the bleed screw. |
| Close at first water and recheck | When water starts to flow, close the vent snugly and wipe away drips. | Restore the system as directed and check radiator heat and model-specific boiler pressure. | Persistent cold spots, leaking valves or low circuit pressure need heating-service assessment. |
Identify hot-water hydronic radiator and MANUAL vent
Viessmann describes bleeding for closed-loop water heating where air in the circuit leaves radiator cold/gurgling.
The procedure for bleeding a radiator applies only to the appropriate hot-water hydronic radiator with a manufacturer-approved manual air vent. A steam radiator, sealed electric oil-filled heater, and vehicle cooling system are not interchangeable with that equipment. Look for the valve type and consult the boiler or radiator instructions before handling anything. A cool upper section on an otherwise warm hydronic radiator can be consistent with trapped air, but poor flow or control issues can produce other temperature patterns. Do not assume that every cold radiator needs an opened valve.
Steam and sealed electric radiators: do not follow
Viessmann pressure checks and water filling depend on system; one boiler pressure number is NOT universal for U.S. hydronics.
Prepare before touching the bleed point. Follow the heating-system manual about whether circulation must be paused and whether a cooling period is required. Keep a suitable small container and cloth ready for the tiny amount of water that might escape, and protect yourself from hot surfaces. Use the correct radiator key or approved tool; improvising with pliers can round off the fitting. If the valve is painted over, badly corroded, inaccessible, or near wiring, stop. A stuck vent is a service problem, not something to force open for the sake of completing a checklist.
Signs of trapped air versus cold return or circulation
Viessmann explains that uneven or top-cold hydronic radiator and gurgling may indicate trapped air; not every cold radiator has this cause.
During the approved procedure, open the manual vent only the small amount specified by the manufacturer, keeping the collection container in position. You may hear air leave before a steady flow of water appears. Do not remove the bleed screw entirely or turn the valve so far that it can no longer be controlled. Close it promptly and gently as instructed when the indicated condition is reached. If water sprays forcefully, there is no controllable valve movement, or a leak continues after closing, stop and seek professional help. Pressurized hot water can cause burns and damage finishes.
How to Interpret the Evidence
Air in a closed-loop hot-water radiator prevents normal water circulation and heat transfer at the affected spot.
A small amount of water can be lost when venting; gauge pressure may change.
Steam/automatic-vent/sealed electric configurations are mechanically different.
How to Do the Task Step by Step
Begin with observable conditions and proceed only through permitted user controls. A safety alarm, damaged part, live connection or inaccessible component ends the do-it-yourself path.
Step 1: confirm radiator is hot-water hydronic
Identify a water-filled radiator with a manufacturer-recognized manual bleed valve. Uneven upper heating or gurgling can fit trapped air.
Never apply this process to steam radiators or sealed electric radiators.
Viessmann UK instructs closing valve when water starts to come out; do not drain radiator unnecessarily.
Bleeding can change system pressure, so follow the boiler manufacturer’s post-service checks instead of inventing a universal pressure value. Some systems have automatic fill or other controls that a resident should not adjust. Confirm that the radiator vent no longer leaks and that heating resumes during an ordinary operating cycle. A radiator that stays cold after air has been released may have a circulation, valve, or boiler issue that is not fixed by repeated bleeding. Do not open additional unknown fittings to make the water move. Note which radiator was serviced and what temperature pattern remains.
Step 2: shut heating off and cool
Turn off circulating heat and allow the system to cool following the boiler manual. A safe-to-touch surface reduces scald risk.
Do not vent a hot pressurized component.
Viessmann UK step 1 instructs turning central heating off and allowing time to cool before venting.
Afterward, check the surrounding floor and wall for moisture and make sure the radiator’s controls are back in their normal state. If you cannot establish that the system is hydronic hot-water equipment, there is no safe reason to attempt the procedure. Homeowners familiar with steam systems should not adapt the same bleed-screw steps to steam vents, which operate differently. The useful result is a controlled release of trapped air from the correct device with no leak or pressure problem, not a guarantee that any cold radiator will become hot.
Step 3: release air without removing the screw
Put a cloth and cup below the correct vent; use a matching key to turn the screw slowly only a small amount. Listen for a hiss; keep hands away from the discharge path.
Never unscrew the valve body or remove the bleed screw.
Viessmann global guide says manual valve usually opens half a turn or less until air hisses; do not remove the screw.
Step 4: close at first water and recheck
When water starts to flow, close the vent snugly and wipe away drips. Restore the system as directed and check radiator heat and model-specific boiler pressure.
Persistent cold spots, leaking valves or low circuit pressure need heating-service assessment.
Caleffi U.S. technical note documents hygroscopic safety caps: tight closure has different behavior from a standard loosened vent cap.
Products That Help
Useful supplies for the specific checks above can include radiator bleed key fitting the actual valve and water collection cup. Confirm the exact size, device compatibility and applicable maintenance instructions first. Equipment and tools do not remove the need to stop for a safety fault.
Frequently Asked Questions
The answers below separate normal operation, owner-accessible checks and conditions that require manufacturer support or professional service.
Do I bleed a radiator with the heat on or off?
Turn heating off as the system manual requires and let the hot-water radiator cool before opening its approved manual vent. Never vent a scalding system.
What if water comes out immediately without air?
Close the vent when water flows. It may mean there was little trapped air; do not drain water to force a hiss.
Can I bleed a radiator without a key?
Use the correctly fitting bleed key or approved tool for the valve. Do not improvise with a tool that damages the vent screw.
How do I know whether my radiator uses steam or hot water?
Confirm the heating system type from equipment documentation. Steam radiators and sealed electric radiators are not suitable for this hot-water bleeding method.
Final Thoughts
Identify a water-filled radiator with a manufacturer-recognized manual bleed valve. Persistent cold spots, leaking valves or low circuit pressure need heating-service assessment.
More from Amazon
Programs that pair well with the guide above. Offers and eligibility are set by Amazon and may change.
A free business account with business pricing and bulk-buying tools for work, shop or home office.
Create a business accountFree shipping on eligible items, Prime Video and more. Eligible new members can start with a free trial.
Start a Prime free trialAudiobooks and podcasts to listen to on the go. Eligible new members can start with a free trial.
Try Audible freeAd-free music streaming. Eligible new subscribers can start with a free trial.
Try Music Unlimited freeAs an Amazon Associate we earn from qualifying purchases.