Key takeaways
- Wiring path first, fixture second: Before you buy anything, figure out how power gets there. Feeding from an existing outlet circuit through the back of the cabinet is easy; running new romex through finished drywall means fishing, patching, and probably a permit. Fixtures with knockout holes and screw-down covers are far friendlier than sealed units when you’re making splices inside the housing.
- CRI and R9 over raw lumens: A bar can be blindingly bright and still make raw chicken look grey. Look for CRI above 90 and an R9 (deep red) figure above 90 as well — that second number is what most cheap LEDs quietly skip, and it’s the one that makes tomatoes, wood grain, and skin tones read correctly.
- Selectable color temperature: Anything with a 2700K–5000K switch saves you from ordering twice. Set warm for a cabinet run in a living space, neutral 3500K–4000K for prep zones. Match it to your ceiling lights or the mismatch will bug you every night.
- Dimmer compatibility: Most of these bars are triac dimmable, which means they play nice with a standard forward-phase LED dimmer — but the low end is where cheap drivers buzz or drop out. Check the manufacturer’s compatibility list against the switch you already own before you close up the wall.
- Length, coverage, and linking: Aim to cover roughly two-thirds of each cabinet’s width, mounted toward the front edge so the light lands on the counter instead of the backsplash. Linkable fixtures let you daisy-chain a long run off a single feed, which is a lot less work than home-running every bar.
What's inside
Every kitchen remodel hits the same wall: the countertop is gorgeous, the cabinets are hung, and then you actually try to chop an onion and realize your own shoulders are throwing shade across the whole work surface. Overhead cans do nothing about it. Stick-on battery pucks solve it for about six weeks until the batteries die and the adhesive gives up in the July heat. Hardwired under cabinet lighting is the fix that stays fixed — real 120V power, no cords snaking down your backsplash, no wall warts stealing an outlet.
The catch is that “hardwired” covers everything from a genuine junction-box install to fixtures that ship with a driver and a pigtail expecting you to bring your own wire. This guide sorts through the bars worth screwing into your cabinets, plus a few recessed trims that pair well with them when you’re rewiring the whole room. I’ve flagged what each one needs from you at install time, what kind of light it actually throws, and where the honest limitations are.
As an Amazon Associate we earn from qualifying purchases.


🛒 Best Price Today on Amazon
Prime members get fast, free shipping on everything above, plus member-only deals. New members get a 30-day free trial — cancel anytime.
How to Choose Hardwired Under Cabinet Lighting (2026)
- Wiring path first, fixture second: Before you buy anything, figure out how power gets there. Feeding from an existing outlet circuit through the back of the cabinet is easy; running new romex through finished drywall means fishing, patching, and probably a permit. Fixtures with knockout holes and screw-down covers are far friendlier than sealed units when you’re making splices inside the housing.
- CRI and R9 over raw lumens: A bar can be blindingly bright and still make raw chicken look grey. Look for CRI above 90 and an R9 (deep red) figure above 90 as well — that second number is what most cheap LEDs quietly skip, and it’s the one that makes tomatoes, wood grain, and skin tones read correctly.
- Selectable color temperature: Anything with a 2700K–5000K switch saves you from ordering twice. Set warm for a cabinet run in a living space, neutral 3500K–4000K for prep zones. Match it to your ceiling lights or the mismatch will bug you every night.
- Dimmer compatibility: Most of these bars are triac dimmable, which means they play nice with a standard forward-phase LED dimmer — but the low end is where cheap drivers buzz or drop out. Check the manufacturer’s compatibility list against the switch you already own before you close up the wall.
- Length, coverage, and linking: Aim to cover roughly two-thirds of each cabinet’s width, mounted toward the front edge so the light lands on the counter instead of the backsplash. Linkable fixtures let you daisy-chain a long run off a single feed, which is a lot less work than home-running every bar.
The Best Hardwired Under Cabinet Lighting of 2026, Reviewed
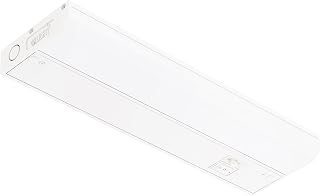
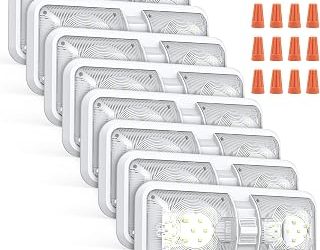
12″ Hardwired Under Cabinet Light, 4-Pack (10W, 666LM)
This is the workhorse pick for a full kitchen: four 12-inch bars, CRI over 92 with R9 above 90, and a five-position color temperature selector on the housing. The slim aluminum body hides well behind a face frame, and the removable end caps make in-fixture splicing straightforward if you’re linking runs.
12″ Hardwired Under Cabinet Light, 2-Pack
Same fixture, smaller order — the right call for a single cabinet bay, a bar top, or a closet where you only need a couple of bars. Buying the 2-pack is also a low-risk way to test color rendering and dimmer behavior before committing to a whole-kitchen order.
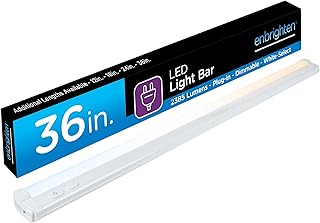
Enbrighten 36″ Plug-In Under Cabinet Light
At 2,385 lumens across 36 inches, this is the brightest option here and the one-touch sync makes matching color temperature across linked fixtures painless. It ships as plug-in, so budget an hour to convert it to a hardwired feed or place it near an existing in-cabinet outlet.
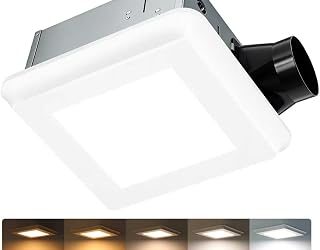
HALO HLBE Slim Canless LED, 4″, 24-Pack
If you’re already opening the ceiling, these ultra-slim canless trims need only a 4-inch hole and a joist-clear cavity — no housing to wrestle. The 24-pack is priced for whole-floor jobs, though it’s fixed at 3000K, so plan your under-cabinet color temperature to match.
HALO LT 5/6″ LED Recessed Trim (750 lm)
The LT trim retrofits into existing 5- and 6-inch cans with a socket adapter, and at 750 lumens with five selectable CCTs it gives you the ambient layer that under-cabinet bars can’t provide. The higher-output LT is worth it over the 600-lumen RL in rooms with 9-foot ceilings or darker cabinetry.
Frequently Asked Questions
Do I need an electrician to install hardwired under cabinet lights?
If you’re splicing into an existing circuit inside a cabinet, this is well within reach for a confident DIYer — kill the breaker, verify with a non-contact tester, use proper connectors, and secure the cable. Running a new circuit from the panel or opening finished walls is where you call a licensed pro and check local permit rules.
Front edge or back wall — where should the bars go?
Mount toward the front edge of the cabinet bottom, about an inch back from the face frame. Pushed to the rear, the beam washes the backsplash and leaves your cutting board in shadow; forward mounting also keeps the diodes out of your sight line when you’re standing at the counter.
Why do my new LED bars flicker or buzz on a dimmer?
Almost always a driver-and-dimmer mismatch. Older incandescent-era dimmers need a minimum load these LEDs never reach, so swap in a modern LED-rated dimmer and check the manufacturer’s compatibility list. Some drivers also have a hard cutoff below 10 percent output, which reads as flicker.
What color temperature works best in a kitchen?
3500K to 4000K is the sweet spot for prep areas — crisp enough to see clearly without the clinical feel of 5000K. Selectable-CCT fixtures let you audition it in your own space at night, which beats guessing from a product photo.
Final Thoughts
For most kitchens, the 12-inch hardwired 4-pack is the straightforward answer: high CRI with strong R9, selectable color temperature, and a housing that cooperates when you’re making splices. Step up to the Enbrighten 36-inch if you want maximum output and simple linking across a long counter run, and add the HALO LT recessed trims if you’re layering in ceiling light while the drywall is already open.