How to Find Wall Studs: Seven Methods That Work
If you’re figuring out how to find wall studs, start with an electronic stud finder or a strong magnet, then confirm the result with more than one clue. Typical residential framing often places studs 16 inches on center, with some walls built at 24 inches on center, but spacing alone does not prove where a stud is. A careful scan and repeated measurements help locate a suitable fastening point without guessing behind the drywall.
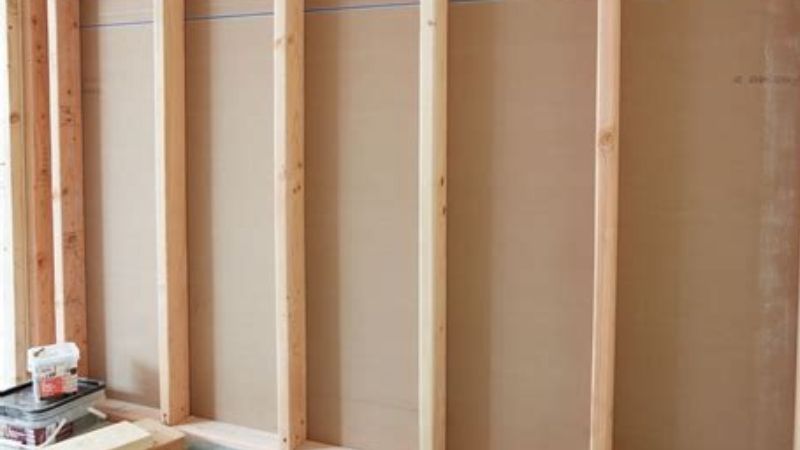
Quick Answer: Scan a dry, flat wall slowly using a properly calibrated stud finder. Mark both edges when your device supports edge detection, identify the midpoint, and scan vertically to confirm the same framing member continues. Use magnets, baseboard fasteners, and nearby framing clues as cross-checks. Before drilling, consider concealed electrical wires, pipes, and other services; a scanner warning feature does not prove a location is safe.
Stud location matters for heavy mirrors, cabinets, bookshelves, handrails, and TV brackets. Some light objects can use drywall-rated anchors, but heavy, safety-critical, or moving loads require suitable structural fastening that follows the mount manufacturer’s instructions. This guide distinguishes finding a stud from proving that a specific fastener will hold the intended load.
As an Amazon Associate we earn from qualifying purchases.
By DIY Ideas 4 Home Editorial Team
Understand Studs Before You Scan
Finding a stud is far easier once you know how wall framing is usually spaced and where studs tend to sit. These basics make every method that follows, from tapping the wall to using a finder, more reliable in your home.
What a wall stud is and why it matters
Studs are usually vertical wood or steel framing members concealed behind wall finishes. In many U.S. homes, dimensional 2-by-4 lumber has an actual face width of about 1.5 inches, while steel studs have different shapes and fastening requirements. Interior partition walls and load-bearing walls may look alike from the surface. You should not assume that finding a stud proves whether a wall is structural or that the stud can support an unlimited load.
Mounting instructions may require anchoring into the center of wood studs with specified lag screws, using approved steel-stud hardware, or attaching to other structural backing. A stud finder can identify a likely location but cannot verify wood condition, fastener embedment, or bracket capacity. When mounting something that can injure a person if it falls, follow the manufacturer’s specifications and get professional help where needed.
Common 16-inch and 24-inch spacing patterns
This Old House describes 16-inch-on-center spacing as common and 24-inch-on-center spacing as another standard layout. “On center” means the distance from the center of one stud to the center of the next, not the open space between them. Corner assemblies, window openings, doors, plumbing walls, and remodels frequently interrupt the pattern.
Start measuring only from a reliably identified stud center. A guess from a room corner can be misleading because drywall thickness, built-up corners, and framing adjustments affect where the first accessible stud begins. If your expected 16-inch mark yields no signal, do not blindly drill at 24 inches; rescan and seek other evidence.
Wood, metal, plaster, and tiled walls behave differently
Magnetic and electronic tools work differently on wood and steel framing. Plaster-and-lath walls can confuse density-based sensors, because the wood laths create a variable background. Tile, thick paneling, foil-backed insulation, and moisture may also change tool sensitivity. Read the scanner’s supported wall materials and maximum sensing depth before trusting an alert.
Tools and Confidence Checks
| Tool or clue | Best use | Key limitation |
|---|---|---|
| Electronic stud finder | Locating stud edges or centers behind suitable drywall | Calibration and surface conditions matter |
| Strong magnet | Finding screws or nails that fasten drywall to framing | Metal objects other than fasteners can attract it |
| Tape measure | Predicting adjacent studs after one is verified | Spacing can change around openings |
| Baseboard nail pattern | Finding hidden fastening points near wall bottom | Trim may be attached in unusual ways |
| Knuckle tap and flashlight | Supporting other clues on ordinary drywall | Sound and visible dimples are imprecise |
| AC wire detector | Warning of some live wiring near the surface | Can miss shielded, deep, or unenergized cables |
How to Find Wall Studs in Seven Methods
Method 1: Use an electronic stud finder correctly
Check the battery and verify the tool’s specific calibration routine. Many edge-finding sensors must begin flat against the wall on a section believed to be between studs. Hold the device in full contact with the surface and move slowly side to side. Mark the point where the indicator first identifies a boundary, then continue across to mark the opposite boundary. The midpoint is the likely stud center. Rescan in the opposite direction to check consistency.
Some scanners compensate automatically when started over a stud; others give an error and require you to start again in a different location. Zircon’s instructions note that moisture, texture, and wall composition can affect depth and accuracy. If readings jump randomly, replace the battery, clean the wall contact surface, and try a nearby height before making holes.
Method 2: Locate drywall screws with a magnet
Move a strong magnet slowly across the wall, then up and down near a likely stud path. When it catches, it may be resting over a nail or screw securing drywall to framing. Mark the spot with painter’s tape, then look above and below for a vertical line of similar hits. One isolated magnetic hit may instead be a metal plate, pipe, corner bead, or unrelated hardware.
On wood framing, a line of drywall fasteners often corresponds closely to the stud location. On metal framing, the magnet can respond across a broader region. Use this method as confirmation rather than permission to drill. Keep powerful magnets away from sensitive electronics and follow normal handling precautions for pinch hazards.
Method 3: Read baseboard and trim fasteners
Look for subtle nail dimples along baseboards, chair rails, and other trim. Carpenters often fasten trim into studs, so repeated nail positions can reveal the framing pattern. Shine a flashlight at a shallow angle to make small depressions more visible. Once a likely stud is found, measure for the next and verify independently. Trim may also be nailed to blocking, so the clue is suggestive, not conclusive.
Method 4: Use outlets as a location clue—not a drill target
Electrical boxes are often fastened to one side of a stud, but some remodel boxes grip only the drywall and are not attached to framing at all. If you intend to remove only the decorative cover plate, turn off power and observe safe electrical practices; do not touch terminals or insert probes into the box. If you cannot determine the stud location from external clues, stop and use a different technique.
Avoid drilling immediately above, below, or beside electrical outlets or switches just because a stud may be nearby. Cables may run vertically or horizontally in these areas. Treat the electrical box as a clue to be cross-checked, never a guarantee of a safe drilling path.
Method 5: Measure from a verified stud center
Once two methods point to the same stud, mark its center at a useful height. Measure 16 inches to one side and scan again. If there is no confirmation, check 24 inches, keeping in mind that framing may change around a door, window, or corner. Repeat at a different vertical height to see whether the indication follows a straight line. A series of consistent vertical hits is stronger evidence than a single beep.
Method 6: Tap the wall and inspect it with sideways light
Tap gently while moving across the wall. A hollow sound sometimes changes to a slightly firmer tone near a stud, especially on ordinary drywall. This Old House describes knocking as a traditional technique, but it is not foolproof. Insulation, multiple wall layers, and plaster affect acoustics. A flashlight held close to the wall can reveal taped seams, fastener dimples, or minor surface differences; these marks need confirmation with a scanner or magnet.
Method 7: Cross-check vertically before making a fastening plan
Use painter’s tape to mark the suspected line and scan at two or three heights. True studs generally run vertically, but horizontal blocking can appear as a temporary wide reading. Check that the wall type matches the tool setting, and interpret unusual wide readings cautiously. Plan the fixture so its anchors land at the correct positions without interfering with wiring, plumbing, or required framing details.
How to Find the Center of a Stud More Accurately
Mark both edges, then split the distance
On a suitable wall, scan horizontally from the left and from the right. If the readings reliably mark opposite edges, mark the center between them. A wood stud’s approximately 1.5-inch face offers limited room for fastener placement; an error near the edge can reduce holding strength or split the wood. Some center-finding scanners identify the middle directly, but repeated scans remain useful.
Confirm the line above and below the proposed mount
A detected stud at knee level may not be the same straight framing member near a ceiling opening, depending on the wall. Repeat scanning close to the planned fastener height. If a vertical path is interrupted or inexplicably shifts, investigate before drilling. Behind cabinets or tiled backsplashes, the wall may contain reinforcing blocking or other layers that change sensor readings.
Do not use an unverified test hole to solve a safety problem
People sometimes recommend driving a finish nail or drilling a test hole to confirm wood. That may be suitable only when the wall cavity and hidden services have been assessed, the location is safe, and any disturbance is permitted. Never use exploratory penetrations next to live electrical boxes, known plumbing, or in a wall whose contents are uncertain. A missed wire or pipe can be much more serious than a failed picture-hanger hole.
Troubleshoot False Stud Finder Readings
My stud finder keeps beeping everywhere
A device may be calibrating over a stud, detecting thick texture or moisture, or reacting to foil-backed material. Start in a new spot, check the battery and manual, and try a different scan mode only if the device supports it. Consistent broad signals do not necessarily mean the entire wall contains studs. For lath-and-plaster, combine trim clues and magnets or seek a specialty scanning service.
The magnet finds metal but the scanner finds no stud
The object could be a metal plate, corner bead, pipe, or screw that does not lie in a stud. Look for a series of magnetic hits in a vertical line and check spacing to adjacent likely studs. A single point is weak evidence. In metal-stud walls, consult a tool suited to the wall system and fasten using approved metal-stud hardware.
My wall has studs that are not 16 inches apart
That is normal in many areas. Openings, corners, blocking, renovations, and 24-inch-on-center framing can break the apparent rhythm. Locate the next actual member instead of forcing the layout to a standard interval. Do not infer load-bearing capacity from spacing alone.
Safety: Hidden Wires, Plumbing, and Heavy Mounts
Electronic warning lights have real limits. Zircon notes that its live-AC indication can miss wires based on shielding, depth, voltage state, or wall composition. A no-warning reading does not certify that the wall is clear. Review likely electrical and plumbing routes, de-energize circuits when work may affect them, and use a qualified tradesperson when uncertain. Avoid cutting into unknown walls to chase framing.
For wall-mounted televisions, shelving, handrails, cabinets, or furniture tip-restraint systems, locate the structural anchorage specified by the hardware manufacturer. A strong magnet or stud-center mark is not a substitute for selecting suitable screws and verifying the wall construction. Special assemblies, including fire-rated and masonry walls, may require other mounting methods.
FAQs About Finding Wall Studs
Can I find a stud without a stud finder?
Often yes. A strong magnet can locate drywall fasteners, while trim nail patterns, tapping, and careful measurements offer supporting clues. Cross-check two methods and do not assume the area is safe for drilling without checking for utilities.
Are wall studs always 16 inches apart?
No. Sixteen inches on center is common, but 24 inches on center and irregular spacing are also found. Doors, windows, corners, and remodeling interrupt the pattern. Always verify rather than relying on arithmetic alone.
How wide is a typical wood stud behind drywall?
The narrow face of conventional dimensional 2-by lumber is usually about 1.5 inches. However, doubled studs, blocking, steel framing, and other assemblies vary. Your fastener needs to fit the actual framing member, not just a generic measurement.
Will a stud finder detect electrical wires?
Some models offer live-AC warnings, but detection is conditional and can miss certain cables. Check the device’s operating limits and do not treat a silent scanner as proof there are no hidden services.
How do I find studs behind plaster or tile?
Standard drywall stud finders can struggle with uneven lath, dense tile, moisture, and thick finishes. Review tool compatibility, look for trim or fastener clues, and use a specialty scanner or professional if you cannot confirm the structure safely.
Final Thoughts
The dependable way to approach how to find wall studs is to combine evidence. A calibrated electronic finder, a magnet locating a vertical pattern of drywall fasteners, and careful 16- or 24-inch measurements can establish a more convincing stud location than any single signal. Recheck at the mounting height and mark likely centers clearly.
Finding the frame is only part of the job. Before driving a screw, think about hidden power cables, water lines, wall materials, and how much load the fixture must carry. If the readings conflict or the project involves heavy or safety-critical mounting, a professional assessment is safer than drilling into an uncertain cavity.