How to Repair Drywall Holes: Small, Medium, and Large
To learn how to repair drywall holes, choose the patch method according to the size and condition of the damage. A nail hole may only need spackle or joint compound, a medium hole needs a patch that bridges the opening, and a large hole generally needs a new piece of drywall secured to suitable backing. Sanding, priming, and matching the existing wall texture are just as important as filling the opening.
Quick Answer: Clean the damaged drywall, check for hidden utilities and moisture, use compound for pinholes, a suitable mesh or paper patch for moderate openings, and a supported drywall insert for larger holes. Apply thin coats of joint compound, let each coat dry or set as directed, feather the edges, sand gently, prime, and repaint.
This guide is for common residential gypsum wallboard in dry interior areas. It does not cover fire-rated partition reconstruction, heavily mold-damaged board, wet drywall, or structural damage. Older homes need special care: disturbing painted surfaces in houses built before 1978 can create lead dust, according to the U.S. EPA.
As an Amazon Associate we earn from qualifying purchases.
By DIY Ideas 4 Home Editorial Team
Assess the Hole Before You Start
The patch method for a drywall hole depends on its size and what sits behind it, so size up the damage first. A small nail hole, a doorknob dent, and a hole wider than your hand each call for a different repair.
Identify small, medium, and large damage
Small nail holes and shallow dents have sound board behind them and are usually simple to fill. A medium-size hole may have broken gypsum but intact surrounding paper that can support a mesh patch or a carefully made California patch. A large opening, such as damage from a doorknob or moving furniture, is more reliable when cut to a neat shape and fitted with a drywall piece anchored to blocking or studs.
There is no universal size boundary for every repair product. USG provides distinct methods for small holes, roughly 2-inch medium openings, and California-style patches up to about 6-by-6 inches in suitable circumstances. Follow the specific patch system’s size and load limits rather than relying on a single threshold found online.
Find and fix the cause of the damage
Before patching, check for roof leaks, plumbing seepage, recurring cracks, loose electrical boxes, or a door that repeatedly hits the same spot. A patch applied over damp drywall may soften or develop mold. Stained, mushy, swollen, or moldy board should be assessed and the moisture source corrected before finishing. If a wall has repeated wide cracks or significant movement, investigate the building condition.
Check for hidden utilities and hazardous surfaces
Assume wiring and pipes may run behind the board. Do not cut with a deep plunge unless the cavity has been inspected and the relevant services made safe. Shut off power to nearby circuits when there is risk of contacting a wire, and use appropriate detection and verification rather than relying on a stud finder’s warning light. In pre-1978 homes, EPA recommends lead-safe renovation practices and often a certified professional for work disturbing painted surfaces. Suspected asbestos or extensive mold calls for specialist guidance.
Choose the Right Patch and Tools
| Damage | Common repair | Key detail |
|---|---|---|
| Nail or screw hole | Spackle or joint compound | Thin application to avoid a raised bump |
| Shallow dent | Joint compound in layers | Remove loose face paper first |
| Small-to-medium opening | Self-adhesive mesh patch or taped repair | Follow kit size and compound instructions |
| Medium square opening | California patch where suitable | Paper flange must stay intact and bond cleanly |
| Large irregular opening | New drywall supported by blocking or studs | Match board thickness and securely fasten |
| Water-damaged or fire-rated assembly | Appropriate replacement by qualified person | Special assemblies have code requirements |
What to put in a basic drywall repair kit
Most DIY patches call for a utility knife, drywall saw as appropriate, putty knives in two widths, tape measure, straightedge, joint compound, drywall tape or patch material, sanding sponge, primer, and paint. For larger repairs, also prepare a matching drywall panel, backing strips or sound studs, suitable screws, and a drill-driver. Wear eye protection and reduce airborne sanding dust; protect vents and furnishings from dust migration.
Setting-type compound versus ready-mixed compound
Ready-mixed compound is convenient for small repairs but generally must dry between coats. Setting-type compound chemically hardens within a stated working time and is useful for some repairs, but the exact time depends on the product. Do not add extra water or work a batch after it begins to set. Read instructions for each compound, and remember that “set” does not always mean the surface is dry enough for paint.
How to Repair Small Nail Holes and Dents
Step 1: Clean the edges and remove loose paper
Scrape off flaking paint or loose gypsum with a putty knife. For a protruding screw or nail head, correct the fastener problem rather than merely burying it. Wipe away dust. If drywall face paper has peeled, use a compatible sealer or repair system as recommended so the paper does not blister beneath wet compound.
Step 2: Press a thin layer of compound into the defect
Using a narrow putty knife, push a small amount of spackle or joint compound across the hole. Scrape the excess nearly flush with the surrounding wall. Overfilling makes sanding more difficult and can leave a visible hump. For a dent, feather the compound slightly wider than the depression.
Step 3: Dry, sand, prime, and paint
Allow the patch to dry or set according to the instructions, then lightly sand the edges with a fine sanding sponge. Feel the area with your hand and examine it under side lighting. Add a second thin coat if it remains low. Prime the repair before painting to avoid flashing, where a patched area absorbs paint differently from the rest of the wall.
How to Patch Medium Drywall Holes
Step 4: Choose a suitable patch or California patch
For an opening too wide to fill directly, use a patch system within its rated size. Self-adhesive mesh patches are convenient on sound surrounding drywall. A California patch uses a fitted piece of gypsum board with an intact oversized face-paper flange as the bonding surface. USG describes this method for relatively small openings where replacing a full section is unnecessary. Always check that the wall cavity does not contain wires or plumbing where you intend to cut.
Step 5: Prepare solid edges and secure the patch
Trim only damaged loose material and brush away dust. For a mesh patch, center it across the opening and adhere it flat without wrinkles; the surrounding wall should be sound. For a California patch, cut the wall opening to the prepared board insert and embed its paper flange with compound. Do not leave fragile, unsupported material that flexes when pressed. The patch should sit flush with the wall face, not protrude.
Step 6: Feather compound across the entire patch
Apply a thin coat over the patch and extend it beyond the perimeter to blend the repair with surrounding drywall. Allow drying or setting per the compound directions. Follow with another wider, thinner coat to hide edges. Do not bury the patch in one thick layer; heavy coats shrink, crack, and take longer to dry. Use progressively wider knives for a smoother transition.
How to Fix a Large Hole in Drywall
Step 7: Plan the replacement opening safely
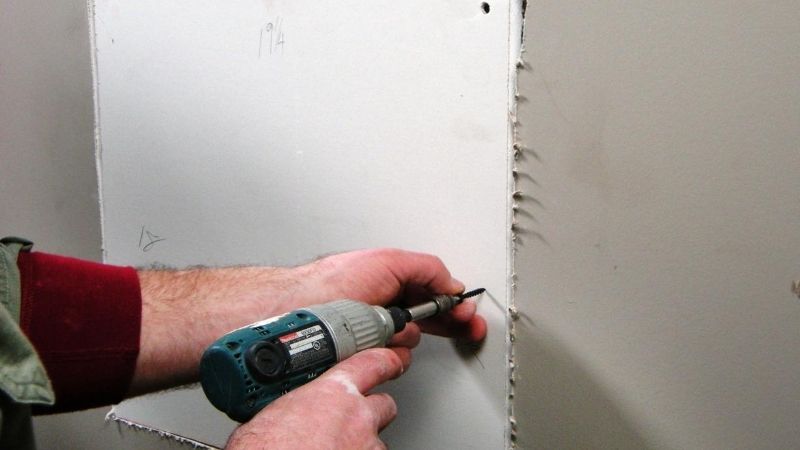
For a large or ragged hole, mark a square or rectangle around all unsound board, taking care not to cut through hidden services. Locate studs or install sound wood backing strips as the repair design permits. If the hole is near an electrical box, plumbing fitting, or structural member, stop and get appropriate help rather than slicing blind.
Step 8: Install a matching drywall panel on backing
Match the existing board thickness so the faces line up. Cut a replacement panel to fit without forcing it. Secure to the studs or adequate backing with drywall screws placed according to board and framing requirements, keeping fastener heads slightly dimpled rather than tearing through the paper. Unsupported patch edges tend to move, causing visible joint cracks later.
Step 9: Tape the seams and apply several thin coats
Embed paper tape in joint compound or use an approved mesh-and-compound system. Let the first coat dry or set, then apply wider finish coats to conceal the seams and fasteners. Sand lightly between coats only as recommended. If the repair spans a large section of wall, extending the final skim farther may help the surface appear flat under raking light.
Step 10: Match texture, prime, and repaint
Smooth walls need an evenly feathered surface. Orange-peel or knockdown walls require matching texture using the applicable approved technique and allowing it to dry before painting. Spot-prime all repaired compound. For an inconspicuous finish, you may need to repaint the entire wall section rather than only the patched square, because aging paint and sheen can make touch-ups visible.
Avoid Common Drywall Repair Mistakes
Using compound alone to bridge a large empty hole
Wet compound does not provide a dependable structural bridge across an unsupported void. It can slump, crack, or get pushed through the opening. Use tape, a manufactured patch, or a backed drywall insert depending on hole size and application instructions. Do not stuff newspaper into a large cavity and treat it as a code-compliant permanent repair.
Sanding too aggressively
Drywall face paper damages easily. Use a fine sanding sponge and light pressure, feathering only high spots. Excess sanding can expose the tape or fuzzy paper and force extra coats. A damp sanding sponge may help control dust on suitable compounds if used carefully. Protect people and nearby rooms from sanding debris.
Skipping primer or ignoring paint sheen
Unprimed joint compound often absorbs paint differently from the original wall, leaving a dull patch even when the repair is flat. Prime with a suitable wall primer and allow it to dry. Paint texture, gloss level, and lighting affect how visible the repair remains. A larger blend area is often worth the effort.
Repairing water damage without drying and inspection
Do not cover wet drywall or ongoing leaks. Paper-faced gypsum can lose integrity after sustained moisture exposure, and hidden growth may require removal and remediation. If the leak has affected insulation, framing, or wiring, assess those areas before closing the cavity.
When to Hire a Drywall Professional
Complex repairs are better handled by a qualified contractor when fire-rated separation walls, ceilings with sagging or heavy texture, widespread water damage, suspected lead paint or asbestos, or unknown wiring are involved. In attached garages, penetrations through fire-resistance-rated or otherwise code-required separations may require specific materials and assembly details. A neat cosmetic patch alone may not preserve fire protection.
FAQs About Drywall Hole Repair
Can I repair a small drywall hole without a patch?
Yes, nail holes and many shallow dents can be filled directly with spackle or joint compound on sound drywall. Larger openings usually need tape, a patch, or backing. Select the method by the actual hole and the repair product’s instructions.
Is mesh tape better than paper tape?
Neither is universally superior. Paper tape is widely used with bedding compound; self-adhesive mesh is convenient for some repairs and may require a compatible setting-type compound. Check the system requirements and support the opening properly.
How many coats of joint compound should I use?
Use as many thin coats as needed to conceal the repair and make a smooth transition. Small nail holes may need one or two; larger patches often need several. Let each coat dry or set as specified before the next application.
Why can I still see the patch after painting?
Common reasons include a raised edge, mismatched wall texture, skipped primer, or different paint sheen. Check the wall in sideways light, correct the surface gently, prime, and repaint with a matching finish.
Can I patch drywall that was wet from a leak?
Only after the leak is fixed and the remaining materials are demonstrably dry and sound. Water-softened, moldy, or deteriorated board may need replacement rather than a surface patch. Seek professional assessment for extensive damage.
Final Thoughts
The key to how to repair drywall holes is matching the repair to the opening. Fill nail holes with a thin coat, bridge moderate holes using an approved patch, and install supported drywall for large damage. Patient finishing—thin coats, careful feathering, light sanding, priming, and texture matching—creates a less visible result than hurried filling.
Safety matters as much as appearance. Check for utilities before cutting, address moisture damage at its source, and take lead-paint precautions in older homes. When a wall is part of a fire-rated assembly or damage is extensive, use the proper professional repair process rather than relying on an ordinary cosmetic patch.