How to Drill Into Concrete Without Ruining the Hole
To learn how to drill into concrete, use a tool that supplies a hammering action, fit a masonry bit compatible with that tool, and follow the anchor manufacturer’s required hole diameter and depth. Start square to the surface, work with steady pressure rather than brute force, and control the dust at the point where it is generated. Do not assume an ordinary wood bit or drill-only setting will cut sound concrete efficiently.
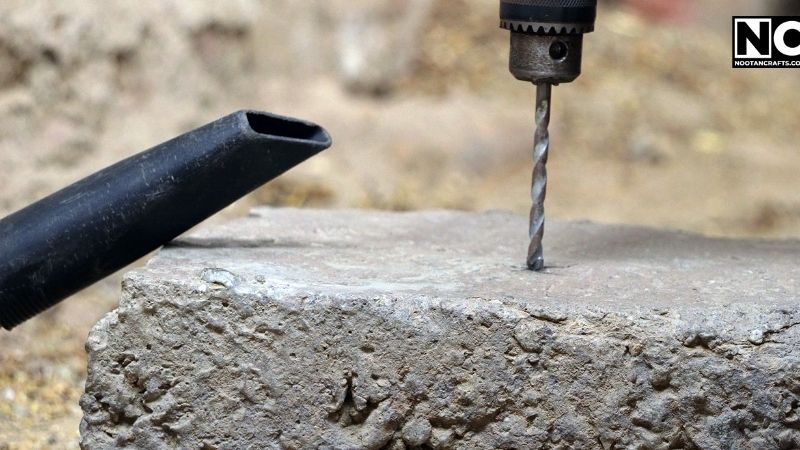
Quick Answer: Confirm that drilling is safe at the selected location; inspect for utilities, structural reinforcement, and restrictions. Select a hammer drill for suitable small holes or a rotary hammer for harder or repeated work. Use the correct carbide-tipped bit, a depth stop, and an appropriate dust-collection system. Start slowly, drill straight to the specified depth, and clean the hole using the anchor maker’s method before installation.
Concrete varies greatly. A small hole in a patio slab may be straightforward, while drilling a reinforced structural wall or post-tensioned floor can be dangerous. The following steps are intended for permitted, ordinary homeowner fastening tasks in known sound concrete. Structural concrete, suspected rebar, post-tension cables, utility services, or uncertain load paths call for building documentation and qualified advice before drilling.
As an Amazon Associate we earn from qualifying purchases.
By DIY Ideas 4 Home Editorial Team
Choose the Right Tool and Concrete Drill Bit
Drilling into concrete cleanly starts with matching the tool and bit to the material rather than forcing a standard drill. This section explains when a hammer drill or rotary hammer is needed and which bit type bites into masonry.
Hammer drill versus rotary hammer
A conventional hammer drill combines rotation with a percussion action and may suit small holes in ordinary masonry. A rotary hammer uses a more substantial hammering mechanism, making it helpful for harder concrete, larger holes, and repetitive anchor work. Many rotary hammers use SDS-plus or SDS-max bits rather than standard round-shank bits. The chuck and bit must match exactly; do not improvise with adapters that the tool maker does not approve. This Old House distinguishes these tool classes and recommends selecting equipment based on hole size and material.
Use carbide-tipped bits rated for the substrate
Concrete contains cement paste and aggregate that quickly wear ordinary twist drill bits. A carbide masonry bit breaks up the hard material as the hammer action works. For a hammer drill, use the compatible masonry bit specified by the manufacturer. For an SDS rotary hammer, select the correct SDS-plus or SDS-max bit and diameter. Replace a worn, chipped, or bent bit. Do not sharpen SDS concrete bits as if they were ordinary metal twist bits; different cutting-head designs require their own approved service methods.
Match the hole to the anchor instructions
An anchor’s required bore diameter, hole depth, embedment, spacing from edges, and installation method are product-specific. A screw-type concrete anchor can require a different preparation from a sleeve or expansion anchor, and adhesive anchors need specialized cleaning and curing directions. Do not copy one generic drill-depth rule to all fasteners. Refer to the hardware’s approved installation instructions and local code requirements, especially for railings, structural connections, overhead fixtures, or heavy loads.
| Task or condition | Appropriate first consideration | Main caution |
|---|---|---|
| Small hole in sound nonstructural concrete | Hammer drill plus compatible carbide bit | Check anchor size and dust capture |
| Several holes in hard concrete | Rotary hammer with proper SDS bit | Use side handle and compatible shroud |
| Hole for a specified concrete anchor | Follow exact anchor hole diameter and depth | Wrong diameter can reduce holding performance |
| Reinforced or post-tensioned concrete | Review plans and obtain qualified direction | Damaging rebar or tension cables can be dangerous |
| Unknown pipes, wires, or floor services | Locate and verify hidden services first | A guess is not a drilling plan |
Understand Concrete Dust and Other Hazards
Respirable silica is not ordinary household dust
Drilling concrete can release respirable crystalline silica, which is associated with serious lung disease when inhaled. OSHA’s construction guidance describes compatible drill shrouds or cowls with vacuum dust-collection systems to control airborne dust during handheld concrete drilling. For professional work subject to OSHA rules, specific equipment and procedures may be required. For DIY jobs, the sensible lesson is to minimize generation and inhalation, follow tool and vacuum instructions, isolate bystanders, and avoid turning a dust-producing task into indoor airborne exposure.
Use the right dust control rather than dry sweeping
A compatible dust extractor captures material near the bit and prevents much of it from spreading. OSHA identifies dust-control systems with appropriate airflow, high-efficiency filtration, and maintenance requirements for covered construction tasks. A random household vacuum and a paper mask should not be presented as equivalent to an engineered silica-control setup. Never blow accumulated concrete dust across the room with compressed air or dry sweep it. If a work method cannot control the dust safely, pause and choose suitable equipment or qualified help.
Confirm there are no structural or hidden-service conflicts
Before drilling into a basement wall, slab, garage floor, or exterior concrete, consider buried electrical lines, water lines, gas, drains, reinforcement, and embedded heating loops. Post-tensioned slabs require particular caution because striking a tendon can cause severe injury and expensive damage. Do not drill through an unknown structural member or cut discovered rebar simply to finish the hole. For work near utilities or structural reinforcement, have the location evaluated before proceeding.
Prepare the Site, Drill, and Hole Layout
Gather proper personal protective equipment
Wear impact-rated eye protection, appropriate hearing protection, protective footwear, and other PPE directed by the tool or dust-control instructions. Secure long hair and loose sleeves. A respirator, when required by the actual task and exposure assessment, must be appropriate for the hazard and used correctly; it should not be treated as a replacement for dust capture. Ensure adequate lighting and keep children and pets out of the work area.
Measure and mark the hardware locations
Hold the actual bracket or template against the surface, check its level and spacing, and mark each hole clearly. Verify minimum distance to concrete edges and spacing between anchors in the fastener’s technical data. If alignment is essential, make the marks before starting any hole so you can detect a bad layout early. Review whether the installation is permitted in that portion of the slab or wall.
Fit the side handle, bit, and depth control
Disconnect or lock out the power supply while changing accessories, in accordance with the tool instructions. Inspect the bit’s cutting end and shank, seat it fully in the correct chuck, and attach the auxiliary side handle. A bit can bind in aggregate and cause a sudden torque reaction. Set the depth stop to the anchor manufacturer’s specified hole depth; account for dust clearance only where instructions require it.
How to Drill Into Concrete in Eight Steps
Step 1: Verify the chosen area is safe to penetrate
Check building drawings and inspect nearby fixtures or visible service routes. Resolve any doubt about reinforcing steel, post-tension cables, or embedded pipes before making a hole. A basic wall scanner is not a universal utility locator. If you cannot establish that the proposed location is suitable, call the appropriate professional rather than beginning a series of exploratory holes.
Step 2: Position the dust-collection equipment
Fit the manufacturer’s compatible dust shroud or extraction attachment and set the vacuum system according to its instructions. Check hoses for kinks and ensure the filter and collection bag are in serviceable condition. Keep others away from the drilling zone and protect nearby furnishings. Planning capture before the bit touches concrete is more effective than cleaning dust from the room afterward.
Step 3: Install the correct masonry bit
Confirm bit diameter against the actual anchor instructions, and check whether the tool uses a standard hammer-drill chuck or an SDS holder. Seat the bit and test that it locks as specified. Never clamp an incompatible SDS shank in a standard chuck. Set hammer drilling mode, not chisel-only mode, for a normal round anchor hole. Make sure the auxiliary handle is secure.
Step 4: Begin with the bit square to the surface
Set the carbide tip on your mark and start gently so the point does not walk sideways. Keep the tool perpendicular unless the fastening system explicitly requires another angle. Hold the auxiliary handle and brace yourself for potential binding. For a wall, avoid climbing high or leaning from an unstable ladder while applying substantial force; use a stable access method instead.
Step 5: Let the hammering action do the work
Increase to the tool’s appropriate operating speed once the bit has established a clean starter pocket. Apply steady, controlled forward pressure. Excessive pushing can heat the bit, overload the motor, and make alignment worse. If the tool stalls or the bit stops advancing, release the trigger and diagnose the obstruction before proceeding. Do not make an oversized hole by rocking the drill.
Step 6: Clear dust using an approved method
Maintain capture at the drilling point throughout the operation. For deeper holes, carefully withdraw the rotating bit as the equipment instructions permit so debris can escape without spilling into the work area. If the anchor manufacturer specifies an exact hole-cleaning sequence, follow it, using compatible brushes and extraction equipment. Do not blow dust toward yourself or nearby people.
Step 7: Stop at the specified depth
Use the drill’s depth gauge or other suitable stop. Drilling too shallow can keep an anchor from seating; drilling too deep may damage an embedded item or violate the approved fastening method. If you feel metal or an unexpected obstruction, stop. Hilti advises verifying whether drilling through rebar is permitted before proceeding; for a household installation, that decision should not be improvised.
Step 8: Inspect and install the anchor correctly
Let the tool and bit stop completely, then inspect the bore. Follow the fastener maker’s cleaning, insertion, tightening, and curing instructions. Do not substitute a larger screw to rescue a badly oversized hole without technical approval. If an anchor spins, loosens, or breaks out concrete at an edge, stop and reassess placement and capacity. Final strength depends on suitable concrete, correct installation, and the mounting design, not merely a hole with the right-looking diameter.
Fix Common Concrete Drilling Problems
The drill makes noise but barely advances
Confirm that hammer mode is engaged and that the bit is rated for concrete and properly seated. A dull bit, extremely hard aggregate, wrong chuck system, weak hammer action, or obstructing steel can halt progress. Do not simply increase body weight behind the drill. Let it cool and reassess; if you encounter reinforcement, stop for a qualified decision.
The drill bit gets stuck or overheats
Release power and follow the tool maker’s jam-removal directions. Avoid twisting the live drill violently or grabbing a hot bit with bare hands. Packed debris, inappropriate force, incorrect mode, or contact with rebar may be involved. Confirm that dust extraction is effective and that the bit is not damaged before continuing. A bent or chipped bit belongs out of service.
The hole is too big or crumbles at the edge
An off-center start, worn bit, incorrect diameter, excessive wobble, or drilling too close to an edge may create a poor anchor hole. Do not compensate with improvised shims or a random oversized fastener. Consult the anchor technical guidance about alternate placement or approved repair, and avoid loading the damaged location until it has been evaluated.
You hit metal or suspect a cable
Stop immediately. Do not switch to a metal-cutting bit and proceed through reinforcement or buried services without documented approval. Rebar contributes to the concrete member’s performance; energized conductors and gas or water lines raise additional hazards. Have the area assessed and relocate or redesign the attachment as necessary.
Frequently Asked Questions
Can I drill into concrete with a regular drill?
Some softer masonry can be drilled slowly with appropriate equipment, but sound concrete generally calls for a hammer drill or rotary hammer with a compatible carbide masonry bit. Drill-only mode is often inefficient and can damage the bit or tool.
Do I need an SDS rotary hammer for one small hole?
Not always. A suitable hammer drill may handle a small hole in ordinary concrete. For dense concrete, multiple holes, or larger anchor work, a rotary hammer may be more effective. Check the specific tool and fastener requirements.
How deep should I drill for a concrete anchor?
Use the depth specified by the exact anchor manufacturer. Required embedment and cleaning procedures vary by anchor type; there is no safe universal measurement for every installation.
Can I drill through rebar if the bit reaches it?
Do not do so without verifying that cutting or penetrating the reinforcement is authorized and structurally acceptable. Stop and consult the relevant plans or a qualified professional, particularly for structural or post-tensioned concrete.
Is a normal household vacuum enough for concrete dust?
Do not assume it is. Concrete dust can include respirable silica, and effective control calls for compatible capture and filtration designed for the task. Follow applicable safety requirements and avoid dry sweeping or blowing dust into the air.
Final Thoughts
The most important part of drilling concrete happens before the trigger is pulled. Verify the location, the anchor design, the substrate, and the dust-control setup. Then use a compatible hammering tool and masonry bit, start the hole carefully, maintain a square drilling angle, and stop at the correct depth. Follow the anchor maker’s installation directions instead of a generic rule copied from another fastener. Never force a bit through unknown reinforcement or possible utility lines. With suitable equipment and a sound fastening plan, ordinary small mounting holes can be manageable; uncertain structural work is a reason to bring in a specialist, not to push harder.