How to Seal a Concrete Driveway Without Common Mistakes
Learning how to seal a concrete driveway begins with a clean, fully prepared concrete surface and a sealer matched to the finish you want. For most ordinary broom-finished driveways, a penetrating water-repellent sealer is a practical starting point because it protects without adding a thick glossy film. Clean away oil and loose debris, repair compatible cracks, let the surface dry, and apply the material in a thin, even pattern under the label’s weather conditions.
Quick Answer: Confirm you have concrete rather than asphalt, check for existing sealer, clean and degrease, repair nonstructural defects, allow proper drying, then apply a concrete-rated sealer with a roller or low-pressure sprayer as directed. Prevent puddles and block traffic until the manufacturer’s full cure window has passed.
A sealer can help reduce liquid absorption, staining, and some weather-related wear, but it will not level a sunken slab or repair cracks on its own. Good preparation has more influence on the outcome than buying the glossiest product on the shelf. This guide focuses on residential concrete, not blacktop driveway sealcoating.
As an Amazon Associate we earn from qualifying purchases.
By DIY Ideas 4 Home Editorial Team
Decide Whether Your Driveway Is Ready to Seal
Sealing only works when the slab is ready for it, so this section covers the checks that decide whether to seal your concrete driveway now or wait. Curing time, surface moisture, and any existing coating all affect the outcome.
Concrete versus asphalt: do not mix up the products
Concrete is generally gray and made with cement-bound aggregate; asphalt is typically dark and contains a bituminous binder. Asphalt sealcoat is not a substitute for concrete sealer. Read the label and confirm the sealer is intended for your exact concrete finish: plain broom-finished, decorative, stamped, stained, or previously coated. An incompatible product may fail to bond, discolor the surface, or create unwanted gloss.
Check whether an old sealer remains
On a dry driveway, place a few drops of clean water in several locations. If water beads consistently rather than soaking in, a water-repellent coating or sealer may still be present. This is only a screening check: oily contamination and dense concrete can also affect absorption. For a reliable decision, read the new product’s compatibility requirements and test a small, inconspicuous patch.
Visible peeling, cloudy film, trapped moisture, or slick spots suggest a failing film-forming coating. Applying another layer over it may make the problem worse. Some new sealers require complete removal of old coatings, which can be labor-intensive. If the history is unknown, consult the manufacturer’s technical support before proceeding.
Is new concrete old enough?
Standard guidance often calls for letting newly placed concrete cure about 28 days before applying many conventional sealers; the exact delay depends on the curing system and sealer. Concrete Network describes this as a common baseline, not a universal schedule. Specialized cure-and-seal systems have separate requirements and should not be treated as ordinary post-cure penetrating products. Ask the contractor what curing or finishing compounds were used.
Choose the Correct Driveway Sealer
| Sealer type | What it does | Useful for | Important caution |
|---|---|---|---|
| Penetrating silane/siloxane-type sealer | Repels water within surface pores | Ordinary broom-finished concrete where traction matters | Must be compatible with surface and existing treatment |
| Film-forming acrylic sealer | Leaves a visible protective film and possible sheen | Some decorative finishes | Can alter appearance and increase slipperiness |
| Other specialty coating | Creates a designed wear or decorative system | Specific coated driveway projects | Substrate preparation and recoat rules may be demanding |
| Concrete stain or paint | Changes color or surface appearance | Decorative resurfacing projects | Not interchangeable with penetrating sealer |
Why penetrating sealers are often useful outdoors
Concrete Network notes that penetrating products do not typically leave the glossy surface film that can increase slipperiness. This makes them worth considering where traction is a priority. They do not make the concrete waterproof against every source of moisture and should not be used to hide active cracking. Choose a formula approved for the driveway’s climate and exposure, including deicing salts if applicable.
Check coverage, coats, and weather restrictions
Estimate the area by multiplying driveway length by width, excluding any spaces you will not treat. Coverage changes with texture, porosity, and application method. Use the manufacturer’s stated square-foot-per-gallon range rather than assuming a fixed number. Many products require a certain air and slab temperature, a dry-weather window, and a specified recoat interval. Some penetrating systems use a wet-on-wet pass instead of fully cured separate coats; do not automatically apply two coats.
Tools and Preparation Checklist
Have a broom, stiff nylon brush, protective gloves, eye protection, clean buckets, cleaner approved for concrete, absorbent material for oil, and the correct sealer applicator. A roller and extension pole work for some materials, while a low-pressure garden sprayer suits others. Read the sprayer compatibility requirements before filling it with any solvent-based liquid. Keep pets, kids, and vehicles away from the work area.
Choose a calm day without expected rain during the prep, dry, and curing windows. Excess wind can create overspray on cars, plants, and siding. Avoid working on excessively hot concrete if the product warns against rapid drying. Contain cleaning residue and never direct oily wash water or chemicals into storm drains.
How to Seal a Concrete Driveway in Eight Steps
Step 1: Protect nearby surfaces and plan your exit
Move vehicles and plan to finish at the street end so you will not walk across fresh sealer. Cover adjacent garage trim, siding, planted areas, and decorative stone as recommended. Inspect driveway drains and runoff paths before washing. Mark expansion joints and existing cracks so you can repair them properly rather than bury them under sealer.
Step 2: Sweep and pretreat stains
Remove leaves, gravel, and sand with a broom. Treat oil or grease with an absorbent followed by a concrete-compatible degreaser; allow the cleaner to work only for its approved dwell time. Heavy contamination can prevent sealer absorption. Keep petroleum residue out of the gutter. If an old coating is peeling or incompatible, follow the removal steps approved by the new sealer’s manufacturer.
Step 3: Wash without damaging the concrete
Scrub with a stiff brush and suitable cleaner, or use a pressure washer only when the slab and finish can tolerate it. Test a small hidden area first; excessive pressure can etch weak concrete and permanently change the appearance. Avoid spraying beneath siding or into expansion gaps. Collect or control dirty runoff in accordance with local rules, then rinse using the minimum water necessary.
Step 4: Let the driveway dry thoroughly
Lowe’s advises allowing a cleaned driveway to dry at least 24 hours before inspection and sealing, but that is a starting point rather than permission to ignore product-specific requirements. Shaded zones, joints, and porous areas can remain damp longer. Moisture trapped under some film-forming sealers can cause whitening or delamination. Wait until the entire slab meets the selected material’s moisture standard.
Step 5: Fix cracks and broken spots first
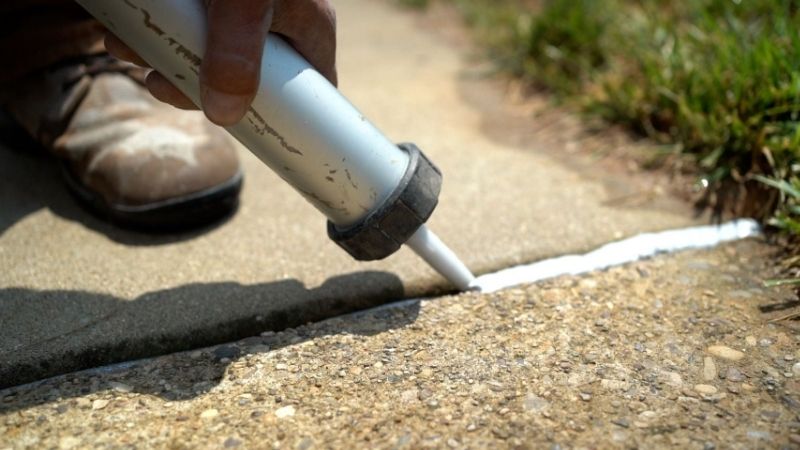
Remove loose debris and repair nonstructural cracks with a compatible concrete crack filler or flexible joint sealant, following width and cure requirements. Do not use a rigid mortar in an active expansion joint. Let repairs reach the cure condition required for the sealer. If there are significant offsets, settlement, or large areas of spalling, have the driveway evaluated rather than sealing over active defects.
Step 6: Test the sealer on a discreet area
Try the chosen product in a small representative location. Look for unacceptable darkening, sheen, tackiness, or uneven absorption after the prescribed wait. This matters especially for colored or stamped concrete. If the test fails, stop before covering the entire driveway. Mixing old and new coating types without confirmation can leave a patchy, difficult-to-remove finish.
Step 7: Apply thin, even coverage without pooling
Start near the garage, working toward your exit. Follow the label’s approved sprayer or roller method, keeping overlapping passes consistent. A penetrating product usually should absorb into the surface; excess on top may become residue. A film-forming product may require careful thin coats. Spread or remove puddles as directed and avoid spraying parked cars or neighboring property. If a second pass is specified, apply it at the correct stage instead of guessing.
Step 8: Allow full cure and check the finished surface
Restrict foot traffic, tires, pressure washing, and sprinklers for the time stated on the can. The material may feel dry before it is ready for vehicles. Inspect the sealed surface after curing in natural light, noting missed spots or glossy patches. Never add a thick emergency coat to fix a cloudy or sticky area; identify the cause and follow technical support instructions.
Avoid These Driveway Sealing Mistakes
Sealing on wet or dirty concrete
Moisture, grime, oil, and old incompatible coating all interfere with effective treatment. Even a high-quality sealer cannot penetrate through grease. Clean and dry the surface first, and choose an appropriate test patch. Puddled sealer can create a glossy or slippery layer in places that should remain textured.
Treating every sealer as a two-coat paint job
Some concrete sealers require one saturation application, some call for two thin coats, and some for wet-on-wet passes. More is not automatically better. Follow the technical data sheet for coverage, backrolling, waiting times, and cleanup. Overapplication can leave white residue, tackiness, or slippery spots, especially with film-forming products.
Applying sealer to damaged or unsuitable concrete
Sealer does not strengthen weak, crumbling concrete. If the surface powders heavily or a previous treatment is deteriorating, investigate first. Pressure washing can make a failing surface worse. For repeated water pooling or edge deterioration, correcting grading and drainage is often more urgent than another coat.
Maintain a Sealed Concrete Driveway
Sweep grit and leaves periodically, clean spills promptly, and avoid harsh chemicals or sharp metal scrapers that damage the finish. Check whether water continues to bead and whether the surface is showing wear; these checks can inform when maintenance is needed, but they are not a fixed reapplication schedule. Concrete Network cites roughly two to three years as a common maintenance interval for some sealers, but product life varies with traffic, weather, and chemistry.
Reapply only when the system needs it
Before resealing, confirm that the existing product can be recoated and whether another cleaner or stripping process is required. Adding new material too soon can cause buildup. A label may also distinguish pedestrian-use surfaces from driveways exposed to hot tires and deicing salts. Store leftover materials safely and dispose of wash water and containers per local instructions.
FAQs About Concrete Driveway Sealing
What is the best type of sealer for a plain concrete driveway?
A suitable penetrating water-repellent sealer is often a good choice because it preserves much of the existing surface texture and appearance. Verify compatibility, local climate, and expected vehicle exposure before selecting a product.
How long should concrete dry before sealing?
At least 24 hours after washing is a common planning baseline, but dry time can be longer with shade, humidity, porosity, and the chosen sealer. Follow the exact label and moisture guidance rather than treating one day as a guarantee.
Can I seal a brand-new concrete driveway?
Usually after adequate curing, often around 28 days for many conventional sealers. The proper interval varies, especially if a curing compound is present. Ask the installer and read the sealer data sheet.
Do I need to repair cracks before sealing?
Yes, repair suitable nonstructural cracks and damaged spots first with compatible materials. A penetrating sealer is not a crack bridge, and coating over an active crack does not fix movement or drainage problems.
Will concrete sealer make my driveway slippery?
A penetrating sealer generally has less impact on traction than a glossy film-forming finish. However, surface texture, application buildup, water, snow, and product chemistry all matter. Review slip-resistance guidance, especially for sloped driveways.
Final Thoughts
When planning how to seal a concrete driveway, spend most of your effort on diagnosing the surface, selecting a compatible concrete-specific sealer, and preparing the slab correctly. Proper stain removal, moisture control, sound repairs, and even application usually matter far more than the number of coats. For a typical broom-finished driveway, consider a suitable penetrating product if you want water repellency without a shiny appearance.
Make the manufacturer’s instructions your final authority for temperature, coverage, recoat interval, and return to traffic. If the driveway has major settlement, crumbling concrete, or a failing old coating, solve that issue first. A sealer is preventive maintenance for sound concrete, not a structural repair.