A narrow crack in a dry, stable drywall ceiling can often be repaired with joint compound, and a cracked taped seam usually needs new reinforcement. Learning how to patch ceiling cracks starts with identifying which problem you have. A painted-over line is different from a ceiling panel that is sagging or opening around a leak. For a small, accessible drywall repair, plan for several application and drying stages rather than one thick patch.
Quick Answer: First rule out active moisture, loose panels, and movement. Scrape away unsound material only after checking that the existing finish is safe to disturb. Re-bed paper tape where a drywall seam has failed, spread thin coats of joint compound, then sand lightly, prime, and paint after the patch is dry. Stop and seek professional assessment for bulging, rapidly changing cracks, or an unexplained wet ceiling.
As an Amazon Associate we earn from qualifying purchases.
By DIY Ideas 4 Home Editorial Team
Before You Start: Tools, Materials and Safety
A crack that follows a straight line between drywall sheets needs a different repair from a shallow split in paint. For a sound, dry ceiling, assemble a safe platform and a small set of finishing tools before opening compound. The USG Sheetrock Paper Joint Tape submittal sheet identifies paper tape as reinforcement for drywall joints; compound alone does not replace tape across a failed seam.
| Tool or Material | Size or Spec | Why You Need It | Substitute |
|---|---|---|---|
| Drywall knives | 6-inch and wider finishing knife | Bed tape, then feather thin coats | A drywall taping knife set |
| Paper drywall joint tape | USG tape, 2-1/16-inch nominal width | Reinforce a reopened seam | Compatible tape system per compound instructions |
| Joint compound | Ready-mixed taping compound or approved setting-type compound | Fill, embed, and smooth the repair | Compatible finishing compound for later coats |
| Knife and scraper | Sharp utility blade, putty knife | Remove loose paper and flaking material | Small stiff taping knife |
| Sanding and dust control | Fine sanding sponge, eye protection, suitable respirator | Level dried ridges without spreading dust | Vacuum-assisted drywall sanding tool |
| Work platform and coverings | Stable ladder or work platform; drop cloths | Reach the ceiling without overstretching | Properly rated platform ladder |
| Primer and ceiling paint | Drywall primer; matched sheen and color | Prevent a dull patch and blend the finish | Compatible stain-blocking primer after a resolved leak |
Read the Crack Before You Patch
A fine line limited to the paint film can be cosmetic; scrape only peeling edges and confirm that the surface beneath is firm. A straight line in the location of a drywall board joint, sometimes accompanied by a raised strip, suggests loose or fractured joint tape. The correct response is to remove unsound tape and rebuild that joint rather than smear new compound over the ridge.
Look across the ceiling in raking light from a window or flashlight. A bowed section, a panel that moves when touched gently, fresh staining, or a widening diagonal split changes the job from finishing to diagnosis. A patch hides evidence without correcting movement. Photograph the area and contact a qualified contractor if the crack is associated with displacement, recurring water damage, or suspected framing trouble.
Check Old Paint and Ceiling Texture
The U.S. Environmental Protection Agency’s lead-safe renovation guidance, updated in March 2026, identifies pre-1978 housing as a concern when renovation disturbs painted surfaces. EPA recommends a lead-safe certified contractor for DIYers planning work in older homes. Even a small ceiling patch can create dust during scraping and sanding, so do not treat age as irrelevant because the crack itself looks harmless.
Some older textured or popcorn ceilings may also contain asbestos. EPA’s Asbestos in the Home guidance cautions that sanding and scraping suspect textured paint can release fibers. Do not test this by cutting a sample yourself without appropriate professional direction. Arrange assessment by a qualified asbestos professional before disturbing suspect ceiling finishes. An ordinary N95 dust respirator is not a substitute for an asbestos abatement program.
Set Up for Overhead Dust and Access
Move furniture away or cover it, protect the floor, and isolate the work area from children and pets. Turn off nearby ceiling fans and avoid sanding close to exposed electrical fixtures; have an electrician address questionable wiring or wet light fittings. Keep both feet supported on a stable work platform and reposition it instead of reaching sideways with a loaded knife.
For normal nonhazardous drywall sanding, the 3M product page for its Particulate Respirator 8210 lists NIOSH-approved N95 filtration and identifies drywall sanding as an intended application. Its stated filtration efficiency is at least 95 percent for certain non-oil-based particles, provided it is used correctly. Wear fitted eye protection as well; falling compound is as much a nuisance above your face as dust in the air.
How to Patch Ceiling Cracks Step by Step
The Home Depot’s How to Tape and Mud Drywall guide describes embedding joint tape in compound and building successive thin coats. Apply that same principle to a localized ceiling joint rather than trying to conceal it with a mound of mud. The repair below assumes the ceiling is conventional gypsum drywall, the panel remains securely supported, and the original finish is safe to disturb.
Step 1: Confirm the Ceiling Is Dry and Stable
Inspect the attic, roofline, bathroom plumbing, or upstairs fixtures where accessible without entering unsafe areas. Look for damp insulation, recurring stains, blistered paint, and moisture concentrated near a ceiling penetration. If water is active, stop before opening the surface; a roof or plumbing repair and adequate drying must come first. A damp patch cannot reliably bond to underlying material, and trapped moisture can damage the new finish.
Decide whether the split is within the paint skin, at a taped joint, or in a plaster ceiling rather than drywall. Do not drive screws blindly into the ceiling in hopes of correcting a loose board: concealed cables and pipes may be close by. If the drywall hangs down, feels soft, or has detached from supports, arrange an inspection or proper panel replacement before cosmetic work. A good finished surface begins with a sound substrate.
Step 2: Clear Loose Material and Dust
Once the finish has been cleared for safe disturbance, score the edges of loose paint with a utility knife and gently lift material that no longer adheres. Keep the knife nearly flat so you do not gouge the gypsum face paper. If old joint tape is bubbled or peeling, cut back to a firmly bonded section and remove the failed piece instead of forcing fresh mud through a loose flap.
On a simple surface nick that does not reach a drywall joint, remove crumbs and wipe away fine dust with a lightly damp cloth. Do not soak the gypsum. Let the cleaned spot dry before proceeding. A long tape failure usually needs a wider repair zone than the original visible line because reinforcement must seat on stable material on both sides of the joint.
Step 3: Pre-Fill Gaps and Prepare the Joint
For an opened drywall joint, use a compatible setting-type compound to fill any void that would otherwise leave the tape unsupported. Keep this material flush with the surrounding face rather than pushing a thick ridge onto the ceiling. Mix only a small batch you can apply within the product’s working time and follow the manufacturer’s water instructions. Never add water to material that has already started chemically setting in order to reuse it.
USG’s Sheetrock Easy Sand 45 submittal sheet lists an approximate 45-minute working time and a 50 to 65-minute setting interval under its published conditions. Those figures describe chemical setting, not permission to paint immediately: thicker applications, room conditions, and later drying coats affect the total schedule. If the split is confined to sound paint, skip seam pre-filling and follow the coating maker’s surface repair directions instead.
Step 4: Embed Tape Over a Failed Seam
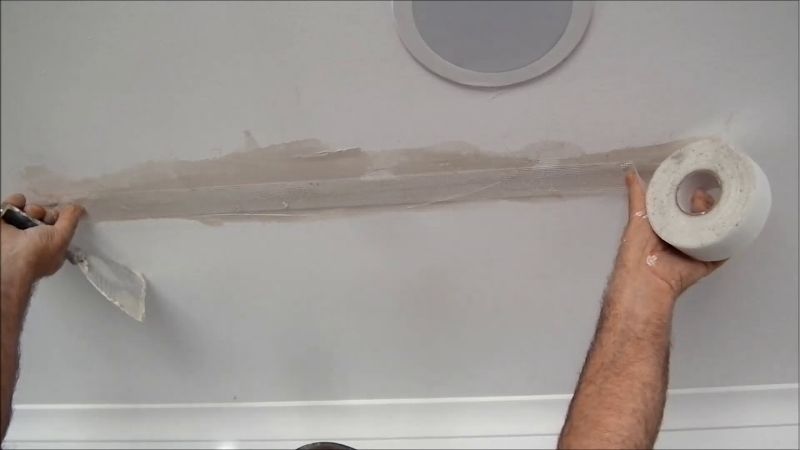
Spread a thin bed of compatible taping compound along the reopened seam with a narrow drywall knife. Center a fresh strip of paper joint tape over the joint, then press it into the wet compound with steady strokes from the middle toward the ends. Keep enough material beneath the paper to establish adhesion while squeezing out excess compound and air pockets. A lifted corner today is likely to show through the next finish coat.
USG’s Paper Joint Tape submittal sheet describes high tensile strength and a roughened bonding surface; the commonly sold 2-1/16-inch tape is made to bridge drywall joints rather than serve as decorative filler. If using fiberglass mesh instead, check the compound manufacturer’s specified system: mesh-tape instructions may call for a setting-type first coat. Do not mix tape and compound products on the assumption that every combination behaves the same.
Step 5: Feather the First Finish Coat
When the taped bed has set or dried according to the material instructions, check for wrinkles, lifted edges, and knife marks. Correct a loose section now rather than burying it. Apply a thin finishing coat extending beyond the tape on both sides. Use the wider knife with more pressure at the outer edges so the compound tapers gradually into the existing ceiling, with no abrupt ledge that will cast a shadow in side light.
Thin coats have another advantage overhead: less wet material is trying to hang from the ceiling while you work. Avoid repeated passes after the compound begins to firm up, since dragging a partially set surface can pull the bed apart. For ready-mixed compound, do not rely on a fixed clock; wait until the entire layer is dry and its color and feel are consistent before applying the next coat.
Step 6: Build the Final Coat and Check Flatness
After the preceding coat is dry, examine the surface from the side with a flashlight. Fill only the remaining shallow troughs and widen the next coat enough to hide the transition. The Home Depot’s How to Patch and Repair Drywall guide describes repeated coats and a wider finishing knife for a smooth repair; a flat feathered ceiling patch needs the same patience even when the original defect was just a narrow crack.
Use a straightedge or the flat side of a wide knife to check for a raised seam. A slight crown may stand out after paint, especially across an illuminated ceiling. Resist sanding an underfilled repair until the board’s face paper shows; add a little more finish compound instead. Where a damaged plaster key or detached lath is involved, ordinary drywall compound is not the right structural repair system, and a plaster specialist may be needed.
Step 7: Sand, Prime, Paint, and Watch
Allow the final compound coat to dry fully, then lightly sand only high spots with a fine abrasive. Keep dust contained and use a suitable vacuum rather than sweeping powder through the room. USG’s all-purpose joint compound submittal sheet specifies a minimum 55 degrees F during cold-weather gypsum finishing and calls for adequate ventilation to remove excess moisture. Low temperature and damp indoor air are reasons to extend drying time, not reasons to paint over damp compound.
Remove sanding dust, prime the repaired surface with a drywall-compatible primer, and let that dry before applying matched ceiling paint. Paint a broad enough area to avoid a visible touch-up rectangle; differences in sheen may require painting the entire ceiling plane for a consistent finish. Note the repair date and take a photograph. If the same crack reopens, investigate movement, support, or moisture rather than repeatedly adding more cosmetic layers.
Products That Help
For an actual failed drywall seam, USG Sheetrock Brand Paper Joint Tape supplies joint reinforcement; USG’s submittal sheet identifies it as cross-fibered paper for use with the manufacturer’s joint compounds. USG Sheetrock Brand Easy Sand 45 Joint Compound is a setting-type option for pre-filling and taping, with an approximate 45-minute working window stated on the product page. Choose an appropriate smaller batch if you are learning to work overhead, and follow the tape and compound instructions together rather than assuming that working time is drying time.
The 3M Particulate Respirator 8210 is a specific N95 option for ordinary, nonhazardous drywall sanding dust; 3M lists drywall sanding among its intended uses. Buy a correctly fitting respirator and replacement protection when required, but do not use this product as justification to disturb a suspect lead-painted or asbestos-containing surface. If no seam has failed, joint tape may be unnecessary, so spend money on the repair identified during inspection rather than buying a full taping setup automatically.
Common Mistakes to Avoid
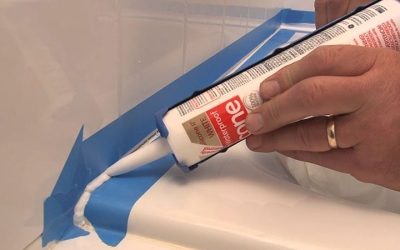
The recurring problem is treating every visible line as a gap to caulk. A flexible bead may suit certain trim transitions, but it does not reconstruct a failed drywall joint. Likewise, painting straight over broken paper tape usually preserves a weak layer underneath. The correct sequence is to remove material that cannot bond, restore reinforcement where needed, and finish on a dry, stable base.
Another mistake is chasing speed with heavy mud. A thick coat can shrink, slump, or take much longer to dry than expected, and aggressive sanding can expose the board’s face paper. Work with light, controlled passes and allow each stage to finish properly. Finally, do not cover a stain before the source of water is fixed: a stain-blocking primer can hide residual discoloration, but it cannot seal a leaking roof or pipe.
Frequently Asked Questions
These questions help distinguish an ordinary finishing problem from an issue that needs investigation before any drywall material is applied.
Can You Fill a Ceiling Crack Without Tape?
Yes, for a shallow cosmetic defect confined to sound paint or a small surface blemish, an appropriate repair compound may suffice. A recurring line along a drywall sheet joint is different: if the existing joint reinforcement has split or detached, filling the line alone does not restore the missing bridge. Use the tape-and-compound method for a failed seam, provided the underlying board is secure.
Will a Repaired Ceiling Crack Come Back?
It can, especially when the underlying movement or moisture remains. A stable drywall seam repaired with sound adhesion and reinforcement has a better chance of lasting than a surface-only cover-up, but no cosmetic treatment can stop building movement. Reopening in exactly the same spot is a useful clue to reassess framing, board attachment, or seasonal changes rather than applying another thin skim coat.
Should I Use Spackle or Joint Compound?
Choose based on the damage, not just the size of the package. Lightweight spackle can suit tiny surface dings when the manufacturer’s label permits overhead use. Drywall joint compound with compatible paper tape is the more appropriate system when a taped gypsum-board seam must be rebuilt. For a deep gap, a compatible setting-type prefill can reduce shrinkage before the finishing coats, but use the exact mix and handling procedure stated by its maker.
Can I Paint Over the Patch the Same Day?
Only when every layer and the selected primer are ready under the products’ instructions. USG’s Easy Sand 45 product data distinguishes a 45-minute working period from an approximate 50 to 65-minute setting period, and its submittal guidance describes next-day decoration as typical rather than an automatic same-day promise. A ready-mixed finish coat may require substantially more drying time in humid rooms. Painting early traps moisture and can telegraph the patch through the finish.
Final Thoughts
For homeowners planning how to patch ceiling cracks, the decision that matters most comes before the first knife stroke: verify that the ceiling is dry, supported, and safe to disturb. Rebuild a failed drywall seam with compatible tape and compound, but leave sagging panels, unresolved leaks, and suspect older textures to qualified professionals. After painting, compare a dated photo of the repair with the same view several weeks later; renewed movement is more useful evidence than another layer of filler.