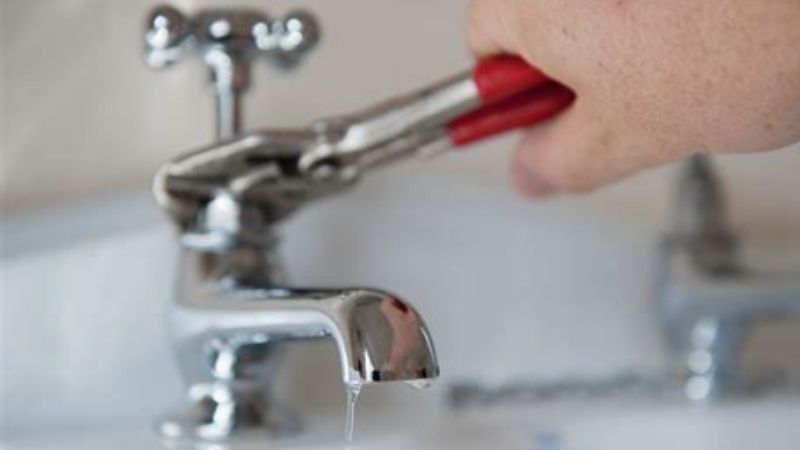
A faucet that drips after the handle is fully closed usually needs a valve seal or cartridge repair, not a harder twist of the handle. The right approach to how to fix a leaking faucet depends on what is inside it: compression washers, cartridge assemblies, ball seats and springs, or ceramic-disc components. A straightforward accessible repair may take around an hour, but corroded shutoffs, hidden leaks, and unavailable parts can make it a professional job.
Quick Answer: Identify the faucet make and valve design, close both supply stops, relieve pressure, and disassemble the handle according to the model’s instructions. Replace the worn component with the exact compatible part, reassemble without overtightening, restore water slowly, and check the spout, base, and connections for leaks. Stop if the shutoff valves fail or water is leaking inside a wall.
As an Amazon Associate we earn from qualifying purchases.
By DIY Ideas 4 Home Editorial Team
Before You Start: Tools, Materials and Safety
A drip at the spout often points to an internal valve seal, while moisture around the handle, spout base, or supply connection may involve a different O-ring or connection. Moen’s cartridge replacement instructions explicitly require the water supply to be shut off before a cartridge is removed. That is the starting point for any faucet style, even if the visible leak looks minor.
| Tool or material | Size or spec | Why you need it | Substitute |
|---|---|---|---|
| Adjustable wrench | Fits bonnet or retainer if model requires | Opens accessible fastening hardware | Correct-size open-end wrench |
| Screwdrivers and hex keys | Match handle fasteners | Remove covers and handles | Manufacturer-specific handle tool |
| Replacement seal or cartridge | Exact model-compatible part | Restores the failed shutoff surface | Genuine repair kit for that valve |
| Cloths, stopper, shallow tray | Enough to catch trapped water and parts | Protects sink and prevents lost screws | Small bowl and clean towel |
| Plumber’s grease | Faucet-safe, manufacturer-approved silicone grease | Helps suitable seals seat during assembly | None if manual says install dry |
Identify the faucet before buying parts
Compression faucets often have two handles that turn through several revolutions, pressing a rubber washer against a metal seat. Cartridge valves may have one or two handles, while classic ball faucets use a movable ball with seats and springs. Ceramic-disc faucets contain a cartridge-like ceramic valve assembly. Handle appearance is only a clue; inspect the maker’s mark, installation records, or an exploded parts diagram to determine the actual mechanism.
Some modern faucets combine mechanisms that look alike from the outside. Moen’s own documentation distinguishes different cartridge numbers and assembly steps by faucet family; assuming that one brand uses one cartridge can waste a trip and damage the valve. Photograph the fixture and, if safe to do so, bring the removed part or exact part number to the store.
Confirm that water can be shut off
Turn both hot and cold stop valves under the sink clockwise until closed, then open the faucet to release pressure and verify flow stops. Put a towel and container beneath the connections; small amounts of water can remain in the faucet. If a stop valve will not close completely, use a known working main shutoff before proceeding. If you cannot isolate the line reliably, do not dismantle the fixture.
Make certain everyone in the home knows that the water is off for a repair so it is not restored while the valve is open. For a pull-down faucet, note any supply hose and counterweight position but do not tug or twist them unnecessarily. A leaking stop valve or supply tube deserves its own repair, rather than more force on the faucet handle.
Recognize situations better handled by a plumber
Get professional help for corrosion that has seized a cartridge into the valve body, deteriorated copper or flexible supply lines, water emerging from inside a wall, or a faucet body that is cracked. The same applies when the main shutoff cannot be located or when an older connection starts moving as you try to loosen a nut. A few dollars saved on a washer is not worth a damaged water line.
If a water leak has reached nearby outlets or electrical equipment, avoid the wet area and have the hazard assessed appropriately before continuing. Likewise, a faucet that leaks only when a dishwasher or other connected appliance operates may not have an internal cartridge problem at all.
How to Fix a Leaking Faucet Step by Step
Use the steps below as a common framework, then follow the manufacturer instructions for the specific valve. Do not substitute generic disassembly instructions for a model with proprietary clips, threaded retainers, or electronic controls.
Step 1: Pinpoint where water appears
Dry the faucet and surrounding countertop before testing. Observe whether the faucet drips from the spout when off, seeps from around a handle during use, pools beneath the spout base, or leaks at a connection under the sink. These symptoms do not guarantee one failed part, but they guide the inspection and prevent replacing a cartridge when a loose supply fitting is the true cause.
A spout drip on a two-handle faucet can come from either hot or cold valve. If you need to isolate a side, briefly close the individual hot or cold stop and observe the result while the faucet is otherwise assembled. Do not dismantle until both stops are off again and pressure is relieved.
Step 2: Shut off supplies and protect the drain
Close both shutoffs, open the faucet to relieve pressure, then plug the sink drain and spread a cloth over the basin to catch clips and screws. Verify that no meaningful flow continues. Photograph the handle orientation and any accessible retaining hardware before removal so you have a reference for reassembly.
Some valves remain pressurized if a stop is not sealing; do not loosen a retaining nut to “check” whether the line is truly off. Revisit the shutoff instead. If a valve begins dripping externally while being operated, stop and address the supply valve problem before proceeding with the faucet repair.
Step 3: Remove the handle and expose the valve
Look for a decorative index cap, rear set screw, or small access opening and select the correct driver or hex key. Remove the handle carefully, keeping parts in their original order. A corroded handle may require a manufacturer-approved puller; levering against a thin faucet body or countertop can cause expensive damage.
Once exposed, note whether the valve has a clip, threaded retainer, bonnet nut, or separate cap and cam. Moen cartridge examples show that even related faucets can use different retainers and orientation features. Photograph the assembly before lifting out the internal part, especially if springs or small seats are present.
Step 4: Inspect the correct wear component
On a compression faucet, remove the stem and inspect the rubber washer, its fastening screw, and the valve seat for damage. On a cartridge faucet, check the model-specific cartridge and external O-rings. On a ball faucet, inspect the seats, springs, cam, and seals following the matched kit’s diagram. On a ceramic-disc valve, assess the seals and valve assembly; do not scratch the mating ceramic faces.
Do not assume a flattened gasket explains every leak. A severely pitted valve seat, scored cartridge housing, damaged faucet casting, or cracked spout may require other service or replacement. If the part is stuck, resist escalating force with long levers that could twist the supply plumbing.
Step 5: Install the exact replacement part
Match cartridge numbers, stem length, seal dimensions, and orientation tabs to the original model. For compression valves, seat the correct washer squarely and replace a worn screw if supplied. Ball assemblies need the correct springs and seals arranged as the kit specifies. For cartridge or ceramic-disc designs, clean accessible sediment gently, then insert the matched unit in its documented orientation.
Use a thin film of manufacturer-approved plumber’s grease only on seals where specified, not petroleum jelly or random lubricant that may be incompatible with rubber. Some cartridges are keyed to fit one way; forcing a reluctant cartridge into place can damage the body. Follow the maker’s torque or snugging instructions rather than inventing a universal “extra quarter turn.”
Step 6: Reassemble the handle without overtightening
Replace retaining clips, nuts, trim pieces, handle screws, and caps in the order documented for the model. Confirm every clip fully engages its intended groove before restoring pressure; an incompletely secured cartridge can leak or move. Keep decorative finishes protected with a cloth when using pliers or wrenches.
Operate the handle gently while the supply is still off. It should move freely through its expected range without scraping or binding. If the handle stops in the wrong position, do not force it: check cartridge orientation or indexing components. Excessive tightening can distort gaskets, strip small screws, or crack plastic retainers.
Step 7: Restore water slowly and verify the repair
With the faucet assembled, open the supply stops gradually, check underneath for leaks, and then run the hot and cold settings as applicable. Allow trapped air and debris to clear as directed by the manufacturer. Turn the faucet off and watch for a spout drip, then inspect around the handle, escutcheon, spout base, and supply fittings with a dry tissue.
Test more than once, including a few handle movements and a period with the valve shut. A brief wet countertop after work may be leftover rinse water; recurring fresh moisture identifies a real problem. If a leak persists, shut off supply again and review the part number and assembly rather than tightening blindly or applying sealant to the outside of the faucet.
Products That Help
A matched faucet repair kit is the most useful purchase, but only after identifying the valve family. Moen’s support instructions for specific 1225 and 1255 cartridges illustrate why cartridge numbers and retainer designs matter. A small hex-key set, soft-jaw wrench or cloth-protected wrench, and a divided tray are practical supporting tools for controlled disassembly.
Choose replacement O-rings or washers by the actual manufacturer’s specification. A generic washer assortment can be useful for older compression valves, yet it does not replace the need to confirm thickness and diameter. Keep the original parts until the faucet has passed a leak test in case orientation or matching must be reviewed.
Common Mistakes to Avoid
Do not open the valve before isolating both supply lines, assume all single-lever faucets have the same cartridge, or try to stop a spout drip by wrenching the handle harder. Avoid scratching plated trim when lifting a decorative cap, and do not discard clips or springs that appear minor; they may be necessary to retain the new assembly safely.
Finally, distinguish a faucet leak from a leak under the sink. A supply connection, drain trap, sprayer hose, or countertop joint can wet the same cabinet, but replacing the faucet cartridge will not fix it. Dry the area and trace the first fresh water before ordering another part.
Frequently Asked Questions
Correct parts and dependable shutoff access usually matter more than specialized plumbing skills for this repair.
Why does my faucet still drip after a cartridge replacement?
The cartridge may be incorrect, misaligned, or not fully seated, or the valve body may have mineral deposits or damage. Some faucets also have separate O-rings or seals that must be replaced. Shut off the water again, confirm the model and manufacturer instructions, and seek help if the valve housing is damaged.
Can I fix a leak without removing the handle?
Sometimes, if the actual leak is at an external accessible connection that only needs the correct service. A drip at the spout of a conventional faucet generally requires reaching an internal seal or valve, which means removing at least the handle. Do not pour sealant into a faucet or attempt to repair a pressurized valve externally.
Does a two-handle faucet always use rubber washers?
No. Many two-handle faucets use cartridges or ceramic-disc mechanisms, not old-style compression stems. Count the turns and identify the model, but confirm the valve design before buying parts. Using the wrong washer or forcing a compression repair method onto a cartridge valve may damage the fixture.
When should I replace the whole faucet instead?
Consider replacement when the casting is cracked, internal valve seating surfaces are badly corroded, essential parts are discontinued, or repeated repairs do not hold. Check whether existing water connections are sound and whether a replacement fixture fits the sink. A plumber should address unreliable shutoffs and deteriorating supply lines first.
Final Thoughts
The practical skill in how to fix a leaking faucet is not dismantling every valve you encounter; it is identifying the one component that actually seals water and making sure you can shut off the line before touching it. Save the faucet model and replacement part number with your home records after a successful repair, which can turn the next drip into a simpler maintenance job.