For most hinged interior doors, how to fix sticking doors begins with locating the exact rubbing point, not cutting the door smaller. Loose hinges can let the latch-side corner sag; humidity can make wood swell; and a thick paint edge can create friction even when the hardware is sound. A homeowner can often correct a simple hinge or latch problem with a screwdriver in under an hour, but a stripped screw hole needs repair time and a genuinely oversized door may need more careful fitting. The trick is to choose the least destructive correction first.
Quick Answer: Close the door slowly, mark where it catches, and compare the gaps around the frame. Tighten sound hinge screws, repair stripped holes, and check the strike plate before sanding anything. If trimming is unavoidable, confirm the door material and paint safety first, remove very little, and reseal the exposed edge.
As an Amazon Associate we earn from qualifying purchases.
By DIY Ideas 4 Home Editorial Team
Before You Start: Tools, Materials and Safety
This procedure is for a conventional hinged interior door in an occupied US home. It does not assume that a steel exterior door, fiberglass entry door, pocket door, or labeled fire door may be cut or adjusted the same way. The Home Depot’s guide to interior-door repair recommends identifying the contact point first, then correcting hinges or the strike plate before changing the door itself.
| Tool or Material | Size or Spec | Why You Need It | Substitute |
|---|---|---|---|
| Phillips or other matching screwdriver | Tip must fit existing hinge screws | Tighten hardware without stripping heads | Low-torque driver with the correct bit |
| Pencil, painter’s tape and paper | Thin paper strip | Find and record the exact contact area | Removable low-tack marker |
| Long, flat-head wood screw | Match hinge countersink and framing depth | Secure a loose upper hinge into sound framing | Correct-size replacement hinge screw |
| Wood dowel, wood glue and drill | Dowel to fit stripped hole | Rebuild damaged wood threads | Fitted wooden plug |
| Level, straightedge and flashlight | Small household sizes | Check frame and identify distorted gaps | Good room lighting and a rigid ruler |
| Sanding block or hand plane | Only if the door is trim-safe | Remove a confirmed local high spot | Fine hand sanding for minor paint ridges |
| Finish or paint appropriate to door | Match existing coating | Protect any exposed wood edge | Manufacturer-approved edge sealer |
Check the Type of Door Before Cutting
A solid-wood slab generally allows a different repair approach than a hollow-core, molded, fiberglass, or metal door. Thin veneer and narrow internal rails may leave little safe material to remove. For a factory-finished exterior door, use the exact maker’s adjustment instructions instead of treating the slab like ordinary lumber. Therma-Tru’s door shop documentation, for example, restricts trimming for certain fiberglass and fire-rated doors. If there is a fire-rating label on the hinge edge or a door between the garage and living area, stop before drilling new hardware positions or shaving its perimeter.
Look at where the latch side meets the jamb and whether the door has an even clearance around the top and sides. A consistent narrow gap with rubbing through a humid season suggests a different cause from a wide wedge-shaped gap near the upper hinge. Photographs taken before removing hardware make it easier to return pieces to their original locations.
Protect Yourself From Dust and Pinch Points
Support the door whenever loosening a hinge, keep fingers away from the closing edge, and wear eye protection if drilling or planing. Use a hand tool rather than a high-powered driver for final tightening; a spinning screw can enlarge a damaged hole. Before working around an electrical strike, powered access-control device, or hidden wiring, isolate the circuit and use a qualified tradesperson where needed.
Paint age matters. The US Environmental Protection Agency’s 2026 lead-safe renovation guidance warns that sanding or scraping paint in pre-1978 housing can create hazardous lead dust. The EPA generally does not apply its contractor Renovation, Repair and Painting certification rule to an owner working on their own home, but it still recommends lead-safe work practices. Do not dry-sand an unknown old painted door; arrange appropriate lead assessment and safe remediation before disturbing the coating.
Decide Whether This Is a DIY Repair
Try a basic adjustment when the jamb is firm, the hinges are intact, and the door opens without a dangerous amount of force. Choose professional evaluation if a frame is visibly twisted, a wall has new diagonal cracks, the floor is moving, or a door repeatedly changes position after adjustment. A sticking exterior door that will not lock securely is also a security problem, not merely a cosmetic nuisance.
The rough schedule depends on the fault. The Home Depot categorizes ordinary interior-door adjustment as a beginner project that can take under two hours. That is a reference for simple repairs, not a guarantee: glued dowels need time to cure, paint needs to dry, and a warped or water-damaged frame can extend the work well beyond a short afternoon.
How to Fix a Sticking Door Step by Step
Work through the following seven steps in order, stopping as soon as the door operates correctly. A well-placed screw is less invasive than cutting away wood, and a latch issue should not be solved by enlarging the entire doorway. Each correction ends with the same practical check: the door should swing freely, latch without lifting the handle, and remain securely hung.
Step 1: Find the Exact Spot Where It Rubs
Open the door completely, then close it slowly while watching the top, latch side, hinge side and bottom. Do not slam it through resistance. Slide a narrow paper strip around the perimeter when the door is nearly closed; notice where the strip jams. A bright rubbed patch, scuffed finish, or transferred paint often confirms the friction point. Mark the location with low-tack painter’s tape, not permanent marker on a finished surface.
Next, compare the visible gap at the top with the gap near the bottom. If the upper latch-side corner bites into the jamb while a lower section has extra clearance, the door may be sagging. If the edge binds along much of its length during damp weather, investigate moisture first. If it closes smoothly until the last inch of travel, check the latch and stop molding. This diagnosis prevents removing wood from the wrong edge.
Step 2: Tighten the Hinges Without Overtightening
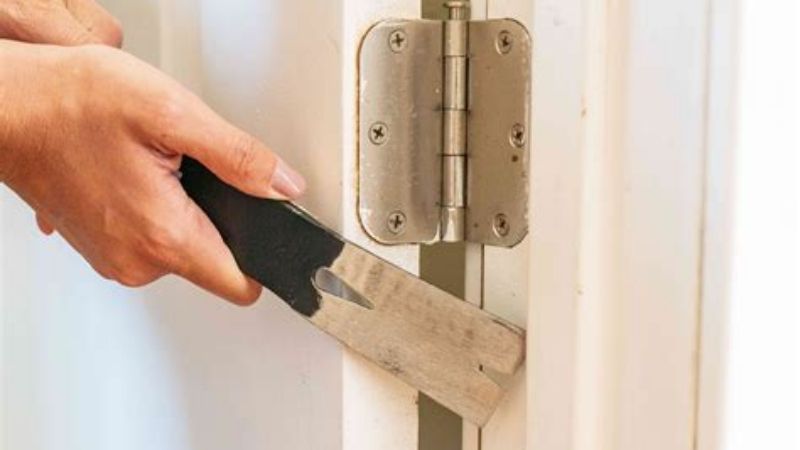
Open the door enough to expose both leaves of every hinge. Support its weight, then seat a correctly fitting screwdriver firmly in each screw head. Tighten the upper hinge first, followed by the middle and lower hardware. A screw should become snug, not continue rotating indefinitely. If a head is already damaged, use a suitable removal method rather than forcing a slipping bit.
Close and reopen the door after each hinge correction. The Home Depot’s interior-door repair instructions describe replacing some upper-hinge fasteners with longer screws, sometimes about 3 inches long, to draw a sagging door back toward sound framing. Only do that after checking the jamb depth, likely hidden utilities, and whether the fastener’s head will sit flush in the hinge recess. Driving an oversized head proud of the hinge can create a new binding point.
Step 3: Restore Stripped Screw Holes
A screw that turns but never tightens has lost its grip. Take out the loose fastener and examine the surrounding wood. For a sound wood jamb with an enlarged hole, remove the affected screw, glue in a properly fitted wood dowel or plug, let it set, and trim it flush. Then make a centered pilot hole sized for the replacement screw. Repair one connection at a time while other screws and a helper support the door.
The Home Depot’s weatherproofing guide also describes using a glued wooden golf tee or toothpicks to restore small stripped holes. A shaped plug is preferable where the hole is substantially damaged because it supplies a more predictable wooden core. Titebond’s wood-glue guidance recommends not stressing a newly glued joint for at least 24 hours, although actual curing depends on temperature, fit, and product directions. Do not rely on a still-wet plug to carry the weight of a heavy door.
Step 4: Check the Strike Plate and Door Stop
If the slab swings easily until it approaches the frame, put a small piece of removable tape over the strike opening and gently operate the latch to see where it lands. A latch contacting the upper or lower edge of the strike plate indicates a hardware-alignment issue, not necessarily swelling. Tighten a loose strike plate, inspect whether the metal is bent, and try the door again before enlarging any hole.
Only shift a strike plate if the hinge alignment is correct and the latch still misses. Repositioning typically involves careful marking, making a new pilot hole in sound wood, and patching the original hole if necessary. Preserve the plate’s secure mounting. Separately, a stop molding that has been pushed too close to the door can make the final inch feel jammed; check whether the rubber seal or stop contacts the door evenly along its height.
Step 5: Address Moisture and Paint Buildup
Look for a seasonal pattern before removing material. Wood absorbs and releases moisture, which can change its dimensions; a summer-only bind may disappear when indoor humidity falls. The EPA’s indoor-air-quality guide recommends keeping relative humidity in the roughly 30 to 50 percent range. A hygrometer is useful here: record the room reading along with the date and the rub location rather than guessing from how the air feels.
Repair an active plumbing leak, run an exhaust fan that vents outdoors, or use air conditioning or dehumidification as the space requires. Let a previously damp door stabilize before permanently reshaping it. If sticking began immediately after repainting, inspect overlapping coats at the door edge and jamb stop. New paint may need additional cure time, or a localized ridge may need controlled removal after checking paint safety.
Step 6: Sand or Plane Only a Confirmed High Spot
This step is for an appropriate wood door whose hinges, jamb and moisture problem have already been addressed. Mark the actual rubbing section and remove the door if the required tool cannot be controlled safely while it hangs. Support the slab flat on padded sawhorses. For a minor finish ridge, try a sanding block with gentle, even passes. For a clearly oversized solid-wood edge, take light strokes with a sharp, correctly adjusted plane along the grain and away from the corner to limit splintering.
Rehang or test-fit frequently instead of cutting to an assumed gap measurement. A single heavy pass can leave a visible daylight line after the humid season ends. This Old House’s account of a sticking-door repair shows hinge corrections being assessed before planing and illustrates why mortise depth must also be considered. Do not copy an example cutting depth onto a different door: its wood type, veneer, hinge arrangement and manufacturer’s trim allowance may not match.
Step 7: Seal the Edge and Test the Door Again
Any newly exposed wood should receive a finish compatible with the existing door. Unsealed end grain or edge material can take up moisture and bring back the same problem. Remove dust safely, follow coating directions for preparation and drying, and keep the slab from touching wet finish. For a bathroom or laundry-room door, address the room’s moisture source as part of the same repair rather than counting on paint alone.
Open the door through its entire swing and close it several times without pushing on the top or lifting the handle. Check that the latch engages without force and that the perimeter gap remains visually consistent. Inspect the next morning, after normal temperature changes, and during the next humid spell. If the bind returns at the same corner despite secure hinges, ask a carpenter to evaluate the frame before any more wood is removed.
Products That Help
For a sagging hinge that needs a framing-length fastener, the Fringe Screw three-inch Long Hinge Screw, size #9 and model FS9L18SN, is a named flat-head option sold for interior door hinges. The Home Depot listing identifies the satin-nickel finish and three-inch length. Check the existing hole pattern, head seating, framing conditions and local price before purchasing; it is not a universal fit for every hinge.
For wooden screw-hole repairs, Titebond Original Wood Glue is suitable for a tightly fitted wooden dowel in a sound wood jamb, provided its curing instructions are followed. If trimming is genuinely required on a compatible solid-wood door, STANLEY’s SURFORM 6-inch Pocket Plane, model 21-399, offers a replaceable 5-1/2-inch fine-cut blade according to the maker’s product page. That tool removes material readily, which makes it inappropriate as the first response to a hinge or latch problem. Buy a plane only after ruling out those simpler causes.
Frequently Asked Questions
The right long-term fix depends on whether the contact comes from hardware movement, seasonal moisture, or an actual problem with the door slab or frame. These questions cover distinctions that can save an unnecessary replacement.
Why Does My Door Stick Only in Summer?
High seasonal humidity may swell wood enough to reduce a small clearance. Compare a hygrometer reading during the sticky period with a reading after the weather changes. Rule out a leaking pipe, condensation and poor bathroom ventilation. Correct the moisture source before planing: cutting a swollen door during a wet week can make it noticeably loose during drier months.
Can I Use Longer Screws in Every Door Hinge?
No. A long screw helps when the frame-side hinge needs firmer purchase in structural framing, but length alone does not solve a bent hinge, cracked jamb or poorly placed hinge mortise. Before substitution, match the screw’s head shape and diameter to the countersink, account for nearby utilities, and check the construction behind the jamb. Hollow metal frames and specialty hinge systems may require different hardware.
Should I Sand a Painted Door That Will Not Close?
Not until you know where it catches and why. Tightening a hinge or realigning a strike plate often avoids paint disturbance altogether. In homes built before 1978, treat old paint as a potential lead hazard until assessed and use the EPA’s lead-safe guidance. On a newer, trim-safe wood door with a small paint ridge, controlled sanding may be suitable once the source of friction is confirmed.
When Is Replacing the Door Better Than Repairing It?
Replacement can make sense when a slab is severely twisted, the internal core is damaged, repeated moisture has caused delamination, or the repair would violate a manufacturer trimming limit. But replacing the slab will not correct a frame that has shifted out of square. Have the opening measured and its jamb evaluated first; otherwise a new door may bind in the same place as the old one.
Final Thoughts
The safest, least wasteful repair starts with the rub mark: tighten hinges, rebuild loose screw holes, correct the latch path and stabilize humidity before considering material removal. For a specific hardware problem, compare a compatible Fringe Screw long hinge screw or Titebond Original Wood Glue repair before buying cutting tools. Reserve the STANLEY SURFORM 21-399 for a confirmed, trim-safe wood edge. If the frame is moving, the door is fire-rated, or old paint may contain lead, professional assessment is more valuable than a quick shave off the slab.