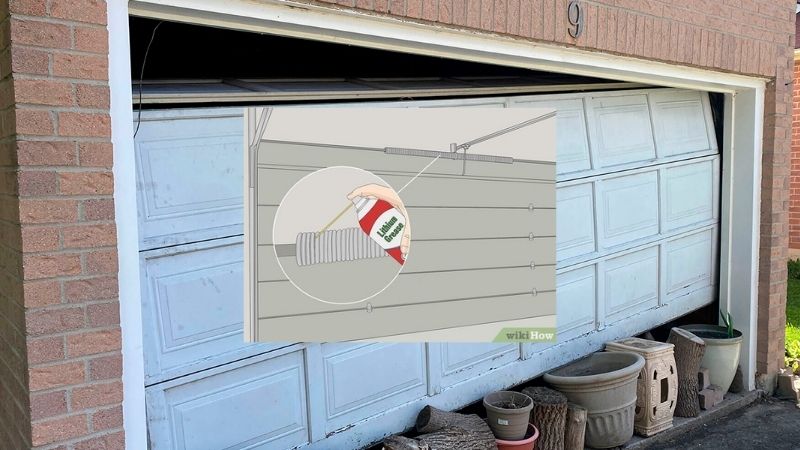
If you are asking, “Why is my garage door not closing?” begin with the simplest clue: what happens after you press the control? A door that starts down and immediately reverses points toward a different problem from a door that does not move at all. Photo-eye sensors, obstructions, wall-control settings, opener travel limits, and mechanical binding can all prevent normal closing.
Quick Answer: Clear the doorway, inspect the safety sensors near the floor, clean their lenses, confirm that they face one another, and check for a blocked or damaged track. Try the wall control and remote separately to narrow down the issue. If the door is crooked, unusually heavy, has a broken spring or frayed cable, or fails a safety-reversal test, stop operating it and call a qualified garage-door professional.
These checks are intended for homeowners, not as instructions to defeat the opener’s safety devices. Never remove or bypass photo-eye sensors, hold a safety circuit in a forced state, or turn up closing force to push past an obstruction. An automatic garage door is heavy enough to cause severe injury.
As an Amazon Associate we earn from qualifying purchases.
By DIY Ideas 4 Home Editorial Team
Match the Symptom Before You Touch Anything
Chamberlain’s troubleshooting guidance for a garage door that will not fully close begins by asking whether safety sensors are properly aligned. Modern openers may also report flashing LEDs, diagnostic arrows, or a numerical error code. The exact meaning varies by brand and model; note the pattern before clearing it.
| What the Door Does | Likely First Checks | What Not to Do |
|---|---|---|
| Starts closing, then reverses near the floor | Photo-eye beam, nearby objects, floor obstruction, bottom seal | Bypass sensors or increase down force |
| Reverses at the same higher point each time | Track blockage, stiff rollers, travel settings, physical binding | Force the door past resistance |
| Wall control works but remote does not | Remote battery, lock/vacation mode, compatibility, pairing | Erase all programmed remotes without reason |
| Motor hums but door barely moves | Broken mechanism, engaged lock, heavy/unbalanced door | Keep cycling a stalled motor |
| Door looks crooked or one cable is loose | Mechanical failure requiring service | Touch cables, springs, or bottom brackets |
| Door closes but rebounds off the floor | Travel setting, floor seal interference, mechanical condition | Randomly change force controls |
Look for Sensor Warnings and Obstructions
Safety reversing sensors normally sit on opposite sides of the opening near the floor. Many models use indicator lights, but LED colors and diagnostic codes vary; consult your opener’s manual rather than assuming one brand’s colors apply to all doors. Observe whether the lenses are dirty, misaligned, knocked sideways, or obscured by stored equipment.
If the opener’s light flashes when closing is attempted, record how many times it flashes and check the specific manufacturer chart. Do not take a generic number of flashes as universal proof of a sensor fault. The motor, wall control, and sensors can display different alerts on the same system.
Distinguish Opener Trouble From Door Trouble
A working motor does not guarantee a healthy garage door. Broken springs and binding rollers can prevent a door from moving even though the opener has electrical power. Conversely, a mechanically sound door may fail to close because a sensor beam is interrupted. Identifying which side of the system is at fault prevents inappropriate force adjustments.
Do not disconnect an open door from its opener if you suspect a spring or cable problem. Without adequate counterbalance, the door can fall. If the door is visibly damaged or cannot remain under controlled movement, leave it in a safe position and request professional service.
Why Your Garage Door Will Not Close: 9 Checks
Check 1: Remove Anything in the Doorway
Walk the full threshold while the door is still and look for toys, snow buildup, leaves, bins, garden tools, and small items placed close to the photo-eye line. Remove everything from the opening. Inspect the bottom seal for a loose strip that might catch the floor during descent. Close the door using a normal control only after all people and pets are clear.
Also examine any new floor threshold. If the door problem began after installing weatherstripping, the gasket or threshold could be too thick or poorly positioned. Correct the physical interference rather than trying to override the opener’s reaction. A new seal should compress at the floor, not buckle and hold the panel up.
Check 2: Clean and Align the Safety Photo Eyes
Locate the two photo eyes at opposite sides of the opening. Wipe dusty lenses gently with a clean, dry microfiber cloth. Remove spider webs and items crossing the beam. If one bracket was bumped, align the sensor faces using the adjustment allowed by your opener manual, then check the indicator lights according to that model’s instructions.
Do not loosen structural track hardware or bypass sensor wiring. If a cable has been damaged or a light stays off despite correct power and alignment checks, stop and refer to the manufacturer’s electrical troubleshooting instructions or a qualified service provider. Some models also react to sunlight striking a receiver at certain angles; do not disable the sensor to test this possibility.
Check 3: Try the Wall Button and Remote Separately
Press the wall-mounted control once while watching from a safe location. If it works but the handheld remote does not, investigate the remote battery, programming, range, and wall-control lock feature. Some openers have a vacation or remote lock mode that disables handheld controls without disabling the wall panel.
Keep the remote and wall controls away from children. Do not make repeated motor attempts when the door is physically jammed. If both controls fail, look for power or a motor-unit diagnostic rather than immediately erasing the opener memory.
Check 4: Verify Power and Basic Wall-Control Settings
Check whether the motor unit has power, including the outlet and applicable circuit breaker, without opening electrical covers. A tripped breaker, disconnected plug, or failed receptacle may explain a completely inactive opener. If a grounded outlet appears faulty or wiring is damaged, stop and contact an electrician.
On units with a display or lock indicator, review the owner’s manual before changing settings. A child-lock or vacation setting is not the same as a photo-eye obstruction. If the opener uses a battery backup, the audible alerts and behavior during an outage may differ from normal line-power operation.
Check 5: Inspect Tracks and Rollers Visually
With the door stopped, use a flashlight to look along the exposed tracks. A pebble, leaf buildup, or other debris near the bottom can interfere with travel. Clear only loose accessible debris that does not require placing your hands beside loaded rollers or hinges. Observe whether a roller is outside the track, a track is bent, or a panel rubs the frame.
Do not straighten loaded tracks, loosen brackets, or remove a roller from a moving door. These components are part of a counterbalanced mechanical assembly. A visibly displaced roller or damaged rail calls for professional service. Cleaning the track is not the same as lubricating it; most garage-door manufacturers advise keeping the track surface free of greasy buildup.
Check 6: Look for the Engaged Manual Door Lock
Some garage doors have a mechanical slide lock or T-handle that engages the track. When used with an automatic opener, an engaged manual lock can make the motor strain without moving the door. Check the lock position while the door is stationary and verify the correct disengaged position using the door manual.
If the lock is bent, the door is jammed against it, or the opener has pulled hard on the assembly, do not force the mechanism. Turn off automatic operation and obtain service. Prevent recurrence by establishing a safe household routine for locking an automatic door and following the manufacturer’s lockout instructions.
Check 7: Review Travel Limits Without Guessing
Travel settings tell the opener where to stop during opening and closing. If a door reaches the floor and then reverses, an incorrect close-travel setting is one possibility. However, mechanical binding or an excessively thick seal can create the same symptom. Correct those physical issues first.
Use the exact manual for your model to check travel adjustment instructions. Older units may have manual screws while newer models use electronic buttons. After any travel or force change, the safety reversal system must be tested. Never increase closing force as a substitute for repairing a binding or unbalanced door.
Check 8: Inspect Weatherstripping and Temperature Effects
A warped side seal, frozen bottom gasket, ice at the threshold, or new floor strip can physically resist the closing door. In freezing weather, keep people clear and do not cycle the motor repeatedly against ice. Identify whether the bottom of the door is stuck to the ground and safely remove ice or wait for it to thaw according to your door’s finish and seal instructions.
Cold weather can also change how flexible seal materials behave. Replace a badly hardened gasket with a compatible cold-weather product. Avoid pouring boiling water over an electrical opener or fragile finish and do not use open flames near the door.
Check 9: Stop When You See Spring, Cable, or Balance Trouble
A loud snap followed by failure to move, a large visible gap in a torsion spring, an uneven bottom edge, or loose/frayed lift cables signals a mechanical problem. Keep everyone away from the door, stop using the opener, and contact a qualified technician. Do not touch or adjust spring winding cones, cable drums, bottom brackets, or extension-spring attachments.
If the motor is straining, immediately stop repeated attempts. A heavy door can overheat or damage its opener. Professionals can evaluate the door’s balance and counterbalance hardware before replacing a motor or adjusting electronic limits.
Test the Safety System After a Simple Fix
Verify Photo-Eye Reversal
With the area cleared, start a normal closing cycle and use an appropriate small object to interrupt the sensor beam without placing your body in the door’s path. The door should stop and reverse as specified by the opener manufacturer. If it continues closing, stop operating the system and obtain service.
Do not assume solid sensor lights mean every safety feature works. Sensor alignment is a preliminary check; a functioning contact-reversal system is separately necessary. Perform all tests from a safe, visible location with no children or pets near the opening.
Perform the Contact-Reversal Test
For many Chamberlain and LiftMaster residential systems, place a 1-1/2-inch-high object or a 2×4 laid flat in the center of the fully open door’s path, then close using the opener. The door must reverse on contact. Follow your model’s manual if it specifies a different approved testing procedure.
Chamberlain recommends testing the safety reversal system monthly and again after any adjustment. A door that fails to reverse is not ready for routine use. Do not compensate by adjusting more force or disabling a sensor.
When a Garage Door Repair Is Not DIY
Broken Springs and Lift Cables
Springs store energy needed to counterbalance a heavy overhead door. Cable tension and spring geometry can cause serious injury if disturbed. Never attempt to tighten a winding cone with improvised tools, disconnect cables from loaded bottom brackets, or remove spring anchor components. These repairs belong to trained garage-door technicians.
Motor Strain, Bent Tracks, and Repeated Reversals
If the motor hums, stalls, overheats, or the door repeatedly reverses after ordinary sensor checks, further trials can compound damage. Likewise, a visibly bent rail or door panel requires mechanical inspection. An opener replacement alone does not resolve a bent or poorly balanced door.
Electrical Wiring and Failed Safety Electronics
Accessible lens cleaning and battery replacement are generally homeowner tasks. Exposed mains wiring, damaged low-voltage circuits, wet opener housings, and persistent sensor errors require proper diagnostics. Disconnect power and contact a qualified service professional where electrical work is necessary.
FAQs: Garage Door Not Closing
Why Does My Garage Door Start to Close and Then Go Back Up?
A blocked or misaligned safety beam is a common cause, but floor obstructions, an overthick bottom seal, track binding, or wrong travel settings may cause similar behavior. Record when the reversal occurs and check the safest physical causes first.
Why Will My Garage Door Close From the Wall Button but Not the Remote?
Investigate the remote battery, wall-control lock mode, compatibility, and pairing. Do not erase every registered remote unless you intentionally want to remove previous access codes. Follow model-specific reprogramming instructions if necessary.
Can I Close My Garage Door With Faulty Sensors?
Do not bypass or disable the safety reversing sensors. They protect people and objects in the doorway. If sensors are faulty or cannot be aligned, stop automatic operation and arrange repair before returning the system to normal use.
What If My Garage Door Closes but Immediately Reopens?
That pattern can indicate a close-travel problem or an obstruction at the floor, but other faults are possible. Check the bottom gasket and threshold with the door stationary, consult the correct model guide, and retest safety reversal after any qualified adjustment.
Does a Garage Door That Is Hard to Lift Have an Opener Problem?
Not necessarily. A heavy door often indicates a counterbalance or mechanical issue, not merely an underpowered opener. Do not disengage a suspect door in an open position. Have the springs, cables, and balance inspected by a garage-door professional.
Final Thoughts
If you are wondering why is my garage door not closing, use the symptom to guide the diagnosis. Clear the opening, check the photo eyes, compare the wall control and remote, and visually inspect the tracks and seals. These simple checks often distinguish a small obstruction from a more serious mechanical fault.
Safety always overrides convenience. Never disable reversal features or increase force to close a binding door. Stop at the first sign of broken spring hardware, damaged cables, or failed safety testing, and seek qualified service instead.