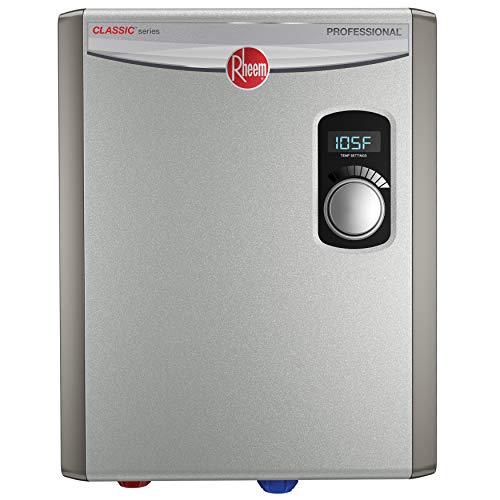
A storage-tank heater gradually collects minerals and grit from incoming water. Learning how to flush a water heater means removing that sediment without exposing yourself to scalding water or switching the heating system on while the tank is empty. This is a manageable maintenance task for a homeowner with an accessible drain valve, a suitable drain and the correct manual. Corroded fittings, unresolved leaks and unfamiliar gas controls are reasons to stop and hire a plumber.
Quick Answer: Shut down the heat source, allow the water to cool, close the cold-water inlet, and attach a hose to the bottom drain valve. Drain the tank, use fresh cold water to rinse sediment out, then close the drain and refill fully before restoring heat. Use the sequence in your exact model’s instructions.
As an Amazon Associate we earn from qualifying purchases.
By DIY Ideas 4 Home Editorial Team
Before You Start: Tools, Materials and Safety
This guide is for conventional residential storage tanks, whether electric or gas-fired. A. O. Smith’s tank-maintenance guide distinguishes this procedure from tankless descaling, which circulates a cleaning solution through a heat exchanger and requires different valves and equipment. Before touching anything, locate your heater’s model label and match its owner’s manual to the installed fuel type and control arrangement.
| Tool or Material | Size or Spec | Why You Need It | Substitute or Caution |
|---|---|---|---|
| Drain hose | Garden-hose threads matching the tank drain | Directs water and suspended grit safely away | Use a hose approved for the actual water temperature |
| Drain or container | Can accept the discharge without overflowing | Prevents flooding and damage to finished floors | Use a floor drain if available; buckets require close supervision |
| Slotted screwdriver | Tip fits your drain valve, if slotted | Opens some plastic or brass drain fittings | Many models have a hand-operated valve instead |
| Gloves and eye protection | Heat-resistant as appropriate | Protects against splashes and loose sediment | Does not make scalding water safe to handle |
| Towels and flashlight | For dry inspection of the base and fittings | Helps find small leaks before and after flushing | Do not work on wet electrical equipment |
Keep the Water Cool and the Heater Off
A. O. Smith’s published draining instructions recommend turning a tank heater off for a few hours before emptying it so the water can cool. On an electric tank, isolate the designated circuit breaker or disconnect. On a gas tank, follow the exact control-panel or gas-valve shutdown instructions; some manuals call for pilot mode and others for off. Do not improvise with piping, gas valves or venting. Water may still be dangerously hot even after waiting, so never point the hose toward a person, plant bed or surface that could be damaged.
Bradford White’s instruction document 238-52169-00 warns that electric elements can be damaged if powered without water. Its tank-draining section also directs water away from people because opening a relief valve or drain can release scalding liquid. The U.S. Consumer Product Safety Commission’s tap-water scald alert, Publication 5098, recommends around 120 degrees F as a residential setting to reduce burn risk; this is not proof that standing water has cooled enough for safe draining.
Check Your Tank, Drain Valve and Outlet Route
Find the cold-water inlet valve above the tank, the drain valve close to its base and a nearby hot-water faucet you can open to admit air. Identify the temperature-and-pressure relief valve but leave it untouched unless your model’s manual specifically calls for using it during draining. An ordinary hot-water faucet is often the simpler vent. Never cap, plug or block the relief-valve discharge pipe.
Check that the drain-valve threads are intact, that the hose does not kink, and that its far end lies at a safe drainage point below the tank when gravity drainage is needed. If your heater sits above a finished room without a floor drain, a small bucket is a poor substitute for an unattended hose: even a partial tank holds much more water than a bucket can contain. Plan how you will stop the flow before you begin.
Know When Not to Drain It Yourself
If the tank has been neglected for years, its drain fitting may be brittle or packed with scale. Forcing a seized handle can turn a maintenance job into an uncontrolled leak. Stop before opening it if corrosion surrounds the connection, the floor pan is already wet, the shutoff valve does not close, or you cannot identify the correct power disconnect. A water heater with a leaking tank shell needs evaluation, not aggressive flushing.
If you smell gas, leave the building and contact the gas utility or emergency services from outside; do not operate electrical switches or attempt a flush. Licensed service is also appropriate when a unit is hardwired in a way you cannot isolate, the relief valve is discharging abnormally, or access to the heater requires disturbing electrical wiring or gas connections. The safest DIY repair is sometimes deciding not to start.
How to Flush a Tank Water Heater Step by Step
The order matters more than the speed: prevent heating during draining, give water a safe exit, rinse with the drain open, and confirm a completely refilled tank before restarting. The following sequence follows the common elements of A. O. Smith’s published tank-flushing guidance and Bradford White’s draining-and-flushing instructions. If your manual differs, use the model-specific procedure rather than mixing instructions from different heaters.
Step 1: Turn Off the Heat Source
For an electric heater, identify and switch off its dedicated circuit breaker, not merely the temperature dial on the tank. If the breaker is unlabeled or the panel is unsafe to access, stop and contact a qualified professional. For gas equipment, use the control setting described in the manufacturer’s manual and do not disassemble the gas train. The water heater should not be firing during the rest of this work.
Confirm the unit is no longer actively heating before you handle the drain. An indicator light may stay on for reasons specific to the model, so do not treat one light as proof the electrical supply is isolated. In particular, restarting electric elements before water covers them can cause a dry-fire failure. Bradford White’s 238-52169-00 instruction document explicitly requires refilling before power is restored.
Step 2: Allow Cooling and Shut Off Cold Water
Give the tank water time to cool. A. O. Smith advises shutting the heater off for a few hours ahead of draining, but actual cooling depends on initial temperature, tank insulation and household use. This waiting period is not a guarantee against burns. Keep children and pets away from the work area and position the drain outlet so a surprise surge cannot reach anyone.
Close the cold-water supply valve serving the tank, often located on the inlet pipe above it. This separates the water already stored in the tank from the home’s cold-water supply while you prepare to drain. If the valve turns endlessly, leaks from its stem or fails to stop inflow, do not continue. A functioning shutoff is a basic safeguard if the drain refuses to close later.
Step 3: Attach the Hose and Vent the Tank
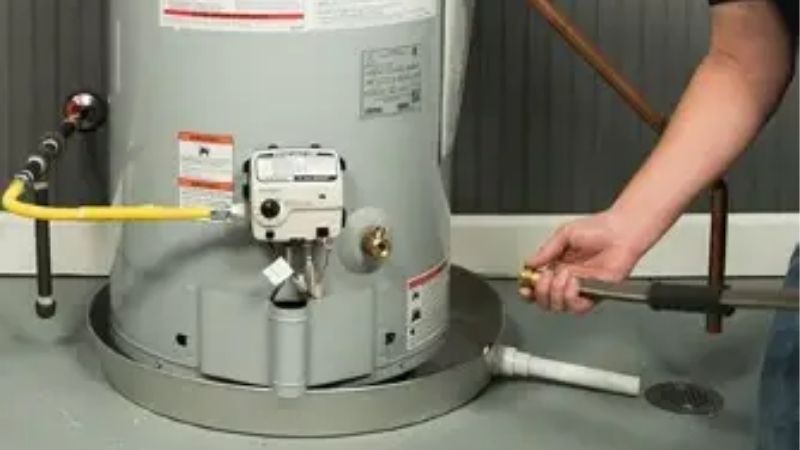
Thread the hose onto the bottom drain valve with the valve still closed. Hand-tighten the connection until seated without cross-threading; excessive force can damage plastic drain-valve threads. Route the free end to a floor drain or other permitted discharge location that can accept the volume of water and sediment. Ensure the entire path is secure and cannot flip out of position when flow begins.
Open a nearby hot-water faucet. Once the cold inlet is closed, the hot faucet should stop flowing continuously and can serve as an air vent while the tank empties. Bradford White’s draining directions allow air through a hot faucet or, when appropriate under the manual, the relief valve. Using the faucet avoids manipulating a relief valve that might fail to reseat on an older heater. If hot water continues forcefully at the faucet, recheck the cold-water shutoff before opening the drain.
Step 4: Open the Drain and Empty the Tank
Slowly open the drain valve with its fitted handle or the correct screwdriver. Water should travel through the hose, perhaps carrying cloudy particles or flakes. Stay nearby and look for drips around the hose joint and valve body. If you use a container, close the valve before that container fills and move it only when the water is cool enough to handle safely. Never rely on a small bucket to capture an entire tank unattended.
A slow or interrupted stream may be caused by a closed air path, a kinked hose, poor gravity fall or sediment obstructing the drain. Check only the safe, external items first. Do not remove the drain valve under pressure, insert a metal rod into the tank or attempt to pry open a seized plastic fitting. A. O. Smith’s tank-flushing guide advises calling a plumber if trapped sediment prevents proper drainage. Once flow stops, keep the hose connected for the flushing phase.
Step 5: Rinse Out Sediment With Cold Water
With the tank empty, the drain valve open and the discharge hose secure, partially reopen the cold-water inlet. Incoming water stirs the loose material left along the tank bottom and pushes it out through the open drain. Bradford White’s 238-52169-00 instructions call for allowing several gallons through the hose, shutting off the supply to drain the remainder, and repeating until the water looks clear. Avoid a full-pressure blast if your model specifies a gentler flow.
Watch the discharge rather than guessing at a fixed rinse time. Gritty brown water that becomes clearer indicates sediment is leaving; clarity alone does not prove every deposit has been removed. Hard scale fused to internal surfaces may require a plumber, and water that stays rusty after several rinses may indicate a separate corrosion problem. Do not add vinegar, acids or household cleaners directly to a storage tank unless the water-heater manufacturer specifically authorizes that chemical procedure.
Step 6: Close the Drain and Refill Completely
Turn off the cold inlet briefly if needed to control the flow, then close the drain valve carefully and disconnect the hose when it is safe. Open the cold-water inlet for normal filling. Keep one hot-water faucet open so displaced air has a way out. At first, the faucet may spit air or flow unevenly; wait until it delivers a continuous, steady stream of water. Bradford White’s manual uses water flowing from an open hot tap as the confirmation that the tank is full.
Inspect the drain fitting, hose-thread area and surrounding floor as the tank refills and pressurizes. A slow drip at the drain that will not stop with gentle closure is a reason to leave the heat source off and arrange repair. Avoid overtightening plastic components or trying to replace a drain valve with the tank full. If the hot tap continues coughing or delivers little water, confirm the inlet valve is fully open and the tank has had enough time to purge air before proceeding.
Step 7: Restore Heat and Check for Leaks
Only after a steady hot-faucet flow proves the storage tank is full should you restore the electric breaker or restart gas heating according to the appliance manual. Keep an eye on the drain valve and exposed pipe connections during the next heating cycle. Heating can reveal a slow leak that was not obvious with cold water. If you smell gas, shut down the task and leave the area rather than attempting further adjustments.
Do not expect hot water immediately after an emptied tank is refilled with cold water. Recovery depends on the heater’s tank size, fuel source and rated output. Instead of repeatedly changing thermostat settings, wait for the normal heating cycle described by the manufacturer. A. O. Smith’s homeowner guidance says to let a hot-water faucet run for at least 3 minutes after flushing to help remove trapped air, but check the instructions for your particular model and household plumbing.
Products That Help
The Flexzilla HFZG525YW Garden Hose is a practical option when a nearby drain is beyond the reach of a short hose. Flexzilla’s Garden Hose Specs lists a 25-foot length, a 5/8-inch inside diameter and 3/4-inch garden-hose-thread fittings for this exact part. Confirm the heater’s drain connection and the hose’s suitability for the actual water temperature; cooling the tank first remains essential. The Klein Tools 32500 11-in-1 Screwdriver includes 1/4-inch and 3/16-inch slotted bits according to Klein’s product page. Buy it only if your drain valve uses a slot and you lack a correctly fitting driver.
For catching a small amount of cool discharge or drips, The Home Depot 05GLHD2 Homer Bucket is a labeled 5-gallon container, as stated on the retailer’s product page. This does not make it a safe reservoir for a full water-heater drain or for scalding discharge. If you have a suitable floor drain already, you may not need any new accessories beyond a hose that fits.
Common Mistakes to Avoid
Two shortcuts create disproportionate risk: energizing an electric tank before it is full and assuming a hose connection will remain watertight unattended. Other avoidable errors include routing sediment into a sink that cannot handle grit, opening the drain without a safe discharge path, forcing a stuck valve and treating tankless descaling as the same process. The first visible sign of a clogged drain should lead to checking the hose path, not dismantling pressurized plumbing.
Flushing is not a cure-all for a noisy or inefficient heater. The cleaning procedure removes loose tank sediment but does not restore a failed thermostat, heating element, corroded anode or deteriorated gas component. If popping sounds continue after maintenance, the cause needs separate diagnosis; our water-heater popping guide explains which symptoms distinguish mineral buildup from plumbing noise. Keep a note of the flush date and the condition of the discharge to help with future maintenance decisions.
Frequently Asked Questions
The right maintenance interval and equipment depend on water hardness, tank design and the condition of its valves. The answers below address the decisions that most often arise once the hose is off and the heater is running again.
How Often Should You Flush a Water Heater?
For many residential storage tanks, once a year is a useful starting point, not a universal requirement. Rheem’s May 2026 homeowner guide recommends annual flushing for most households, while A. O. Smith says hard water or visible sediment may call for more frequent attention. Some commercial heaters have different schedules. Follow the interval specified for your model, especially if your water is unusually hard or a service professional has identified heavy scaling.
Can You Flush a Water Heater Without Draining It?
Some manuals allow a short sediment rinse through the drain while water remains in the tank. Others, including Bradford White instruction document 238-52169-00, describe emptying first and then rinsing the vacant tank with the drain open. These are different procedures, not interchangeable shortcuts. Use the procedure stated in your own manual; never assume that running water from the bottom valve for a minute has cleared heavy deposits.
What if No Water Comes Out of the Drain Valve?
First verify that the cold-water inlet is closed, a nearby hot faucet is open, the hose is not kinked and the outlet is not elevated in a way that blocks gravity flow. If the drain itself seems plugged, stop rather than unscrewing it from a filled or pressurized heater. A. O. Smith specifically advises service help when sediment clogs the drain. A plumber can determine whether the valve should be serviced, replaced or left alone until the tank is safely isolated.
Is Flushing the Same as Descaling a Tankless Heater?
No. A conventional tank is flushed by draining stored water and rinsing sediment out the bottom; a tankless water heater generally needs a manufacturer-approved cleaning solution circulated through its heat exchanger using service valves and a pump. A. O. Smith’s tank-versus-tankless maintenance guide treats these as separate operations. Do not pour chemicals into your storage tank or attempt a tankless service procedure without the exact model instructions and appropriate equipment.
Final Thoughts
A safe flush is complete only when the rinse water clears, the drain stays dry, the tank refills through the cold inlet and a hot tap runs steadily before heating resumes. If the bottom valve is seized, leaking or clogged, let a plumber handle it rather than increasing force. Record the maintenance date, follow your manufacturer’s interval and check the drain fitting after the next heating cycle. For occasional maintenance, a properly fitted hose and simple hand tools are more useful than a chemical cleaning kit.