
Key takeaways
- Warranty Description: 2 year
- Tension Supported: 2000 pounds
- Grip Size: Standard
Most home gym plans die on the floor of a garage, not on a spreadsheet. Lay down painter’s tape at 48 inches by 48 inches — a typical power cage footprint — and then walk around it with a 7-foot barbell in your hands. Suddenly the water heater is a problem, the bumper of a Civic is a problem, and the garage door track two inches above the pull-up bar is a very specific problem. That tape exercise decides the cage-versus-half-rack question faster than any review does, because a full cage asks for depth behind the bar and a half rack asks for a spotter, a safety habit, or an honest ceiling on how heavy you’ll go alone.
The trade is straightforward once you name it. A four-post cage surrounds you, so the safety bars catch a failed squat no matter which way you dump it, and the frame is stiff enough that a loaded bar barely rings. A half rack gives back roughly a foot to eighteen inches of depth and lets you walk the bar out into open air, which is why lifters with 8-foot ceilings and shared floor space keep choosing them. CAP Barbell sits in the middle of this argument because its rack line is modular: the same 1-inch hole spacing and bolt-together uprights show up on full cages, short squat stands, and the attachment catalog that turns one into something closer to the other.
Our top picks
 GOIMU DP01 Power Cage
- Warranty Description: 2 year
- Tension Supported: 2000 pounds
- Grip Size: Standard


As an Amazon Associate we earn from qualifying purchases at no extra cost to you.
Quick Comparison
| Style | Typical footprint | Ceiling needed | Best for | Main compromise |
|---|---|---|---|---|
| Full power cage (4 posts) | ~48″ x 48″ plus walk space | 7’6″+ for overhead work | Solo heavy squats and bench | Eats floor area; hard to move |
| Half rack (2 posts + base) | ~48″ x 30″ | 7′ workable | Tight garages, mixed-use rooms | Spotter arms only catch forward |
| Squat stand / short rack | ~48″ x 24″ | Under 7′ possible | Storage between sessions | No pull-up bar on many models |
| CAP modular rack + attachments | Depends on configuration | Varies by upright height | Budget builds that grow | Assembly time; bolt checks |
How to Choose
- Measure the bailout zone, not the rack. Add 24 to 36 inches behind and in front of the uprights. A cage that fits the tape but not your walkout is a coat rack.
- Check hole spacing where it matters. Uniform 2-inch spacing is fine for squats; 1-inch spacing through the bench-press range is what lets you set safeties an inch above your chest instead of three inches too low.
- Match capacity to your actual ceiling, plus margin. If your squat tops out near 300 pounds, a rack rated in the 500-pound range has honest headroom. Read whether the rating covers the J-cups, the safeties, or the whole frame.
- Decide bolt-together or welded before you fall in love. Bolted racks ship in manageable boxes, fit through doorways, and can be disassembled for a move — at the cost of periodically snugging hardware.
- Budget for the second purchase. Dip bars, landmine, plate storage, and a lat pulldown attachment often cost more than the frame over time. Buy into a system that sells them.
Top Picks Reviewed
CAP Barbell Power Racks and Attachments
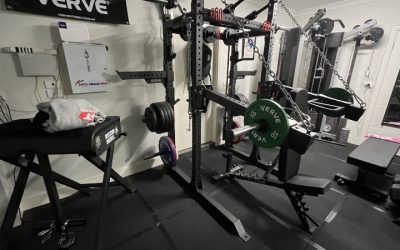
CAP’s appeal is unglamorous and real: heavy-gauge steel, bolt-together construction, and a price that leaves money for a bar and plates. The uprights use standard-diameter holes and pin-style hardware, so J-hooks, safety bars, and dip attachments swap without special tools. Assembly is a genuine afternoon — expect to sort bolts, follow a spare diagram, and leave everything finger-tight until the frame is square, then torque in a cross pattern. Once it’s tight, it’s tight. The frames feel most solid with plate storage hanging off the rear posts; a bare bolted rack always shifts a little more than a welded one, and 200 pounds of dead weight on the horns fixes most of that.
Running It as a Full Cage
In four-post form, you get the thing that actually matters for training alone: safety bars on both sides of your body. Set them so a failed squat lands on steel rather than on you, then stop worrying about the last rep. Bench inside the cage and you can push to failure with the safeties an inch or two above chest level. The cost is depth. Confirm your pull-up bar clears the ceiling and any garage door hardware before you commit to the tall uprights.
Running It as a Half Rack or Short Stand
The shorter and two-post configurations trade the rear posts for floor space and give you an unobstructed walkout, which suits pressing variations and low ceilings. Spotter arms catch a forward dump but not a backward one, so this setup rewards conservative single sets and a habit of dumping the bar deliberately. If you park a car in the same bay, this is the version you’ll actually use, because you can shift it against a wall and reclaim the room.
Frequently Asked Questions
Do I need to bolt the rack to the floor?
Not for most home lifting. Bolting helps if you drop loaded bars from height, do kipping pull-ups, or use a lat attachment that pulls the frame forward. Plate storage on the rear posts is the easier fix, and it doesn’t put holes in a rented slab.
Is a half rack safe for solo bench pressing?
With properly set spotter arms, yes — provided the arms extend past your chest and you’ve practiced lowering the bar onto them. What a half rack can’t do is catch a bar you tip backward over your head. If that scenario worries you, choose the cage.
How much ceiling height do I really need?
Eight feet is comfortable for a full-height rack with a pull-up bar. At 7 feet, look at short uprights and expect to skip strict overhead pressing inside the frame. Measure to the lowest obstruction, including light fixtures and door tracks, not to the drywall.
Will a budget rack handle a 400-pound squat?
Many are rated for it, but rating is only half the story. Check whether the J-cups have UHMW or nylon liners, whether the safeties are pins or straps, and re-torque the bolts after your first few heavy sessions. Flex at the top of the uprights is normal on bolted frames; movement at the joints is not.
Final Thoughts
Pick the geometry your room allows, then buy the sturdiest version of that geometry you can afford. A cage is the better tool if you have the depth and the ceiling, because it removes the need to be brave. A half rack wins when the space is shared, and a modular line like CAP’s softens the decision by letting you start small and bolt on capability later. Do the tape test tonight, write down your ceiling height, and shop with those two numbers in hand — everything else is preference.
Write Your Review
No reviews yet. Be the first to share your experience!