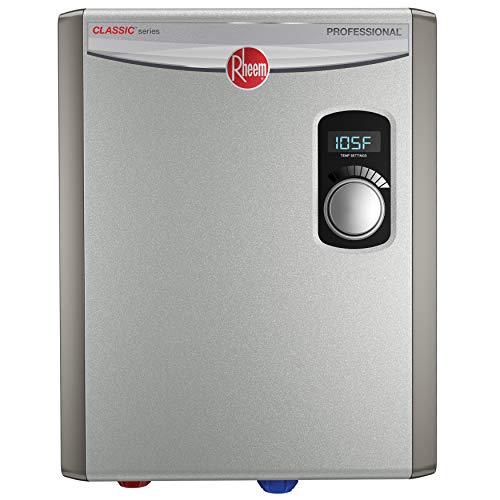
A working water heater in a heated house rarely needs to be drained just because winter is approaching. For the question how to winterize water heater equipment, the critical distinction is occupancy: protect exposed plumbing if the home stays heated, but plan a controlled shutdown and drainage when an empty building may freeze. Tank-style, tankless, and heat-pump models require different precautions. The wrong sequence can damage heating elements, leave water trapped, or create a scalding hazard.
Quick Answer: Identify the heater type and check its manual. For a heated home, insulate suitable exposed water lines and confirm the surrounding space will stay warm. For a home left unheated, turn off the heating source, allow water to cool, isolate supply, and drain the heater by its manufacturer-approved procedure. A tankless heater requires its own freeze-protection or drain instructions.
As an Amazon Associate we earn from qualifying purchases.
By DIY Ideas 4 Home Editorial Team
Before You Start: Tools, Materials and Safety
Winter preparation is primarily about keeping liquid water from freezing in equipment and connected plumbing. A. O. Smith’s Water Heater Maintenance Guide warns that a storage tank must be completely full before heating is restored, while Rinnai’s Protect Your Rinnai Product During Extreme Cold Temperatures explains that powered freeze protection cannot be assumed during an outage. Gather supplies only after deciding which situation applies to your home.
| Tool or Material | Size or Spec | Why You Need It | Substitute |
|---|---|---|---|
| Manufacturer’s model manual | Exact model and fuel type | Identifies shutdown, drainage, and restart steps | Official manufacturer document library |
| Measuring tape and pipe insulation | Match measured outside diameter and temperature rating | Protects accessible piping from heat loss | Compatible fiberglass pipe cover near hot components |
| Garden hose for a storage tank | Fits the tank drain outlet; rated for the water temperature | Routes drainage to a safe location | Suitable buckets if flow is controlled |
| Gloves, eye protection, towels | Heat-resistant gloves and splash protection | Reduces exposure to hot water and small spills | Plumber-assisted draining if access is unsafe |
| Labels and household checklist | Durable tag, permanent marker | Warns others not to energize an empty tank | Visible written shutdown note |
Choose the Correct Winterization Route
An occupied home with reliable space heat generally needs pipe protection, leak checks, and normal equipment operation, not an emptied water heater. A seasonal cabin with its heat turned off is different: water left inside the tank, valves, recirculation loops, or connected pipes can freeze. The A. O. Smith HPWH Service Handbook, document 321547-000, specifically calls for draining the water heater when it will be shut down during freezing temperatures.
Record the model number from the rating plate and identify a gas storage tank, electric storage tank, heat-pump water heater, or gas tankless unit. If the appliance supplies hydronic space heating, is connected to solar equipment, or uses a recirculation system, have the entire arrangement assessed before isolating or draining it. Those systems can retain water in locations a basic tank-draining procedure does not reach.
Control Burn, Gas, and Electrical Hazards
Hot water can cause severe burns. The U.S. Consumer Product Safety Commission’s Avoiding Tap Water Scalds alert advises a residential hot-water temperature around 120 degrees F to reduce scald risk, but a thermostat setting does not make freshly heated water safe to drain immediately. A. O. Smith recommends switching the heating source off several hours before draining so the contents can cool. Keep children and pets away from the discharge route.
For an electric storage tank, isolate power at the correct breaker before water leaves the tank. On a gas unit, follow its labeled gas-control shutdown instructions; never disassemble fuel connections or obstruct the vent. If you smell gas, leave the area and contact the gas utility or emergency service from outside. Do not cap, plug, or bypass the temperature-and-pressure relief discharge piping. If a valve appears damaged or cannot be operated safely, stop and call a plumber.
Check Whether the Job Is DIY-Safe
A sound drain valve, accessible shutoff, safe drainage destination, and readable manufacturer’s instructions make the storage-tank portion more manageable. Conditions that favor a professional include heavy corrosion around the drain, a failed shutoff, uncertain wiring, frozen piping, a leaking relief valve, or any system that needs compressed-air blowout. Depressurizing plumbing in an unheated building may be a whole-house winterization job, not a water-heater-only task.
How to Winterize a Water Heater Step by Step
Use the early steps for any heater that remains in service through winter. The shutdown steps apply only when the water heater is intentionally being taken out of operation because the location may freeze. In either case, verify the plan against the exact owner’s manual instead of treating a tankless unit as a smaller storage tank.
Step 1: Identify the Heater and the Freeze Exposure
Photograph the model label and the nearby piping before changing a valve. Check whether the unit is inside conditioned space, in an attached garage, in a vented crawlspace, or mounted outdoors. Focus first on pipes that pass through unheated sections; the tank may be warm while a narrow exposed connection is below freezing. A location that only occasionally experiences freezing can still be vulnerable during a prolonged outage.
Step 2: Insulate Accessible Water Lines
Measure the outside diameter of each exposed pipe, then choose insulation with the matching inside opening. Install continuous lengths on suitable accessible hot and cold lines and fit the elbows without large gaps. The U.S. Department of Energy’s 2024 Job Aid 23-3 specifies minimum R-3 insulation for at least 6 feet of both lines from a water heater in its weatherization work standard. That is a useful installation reference, not a promise that insulation alone prevents freezing.
Keep pipe covering away from combustion openings and hot vent parts. The same DOE job aid instructs installers to maintain at least 6 inches of clearance around draft diverters and single-wall vent piping. For pipes close to a heater where ordinary foam would be unsuitable, select insulation rated for the temperature or have a plumber specify it. A pipe sleeve slows heat loss; without an ongoing heat source, water inside can still eventually freeze.
Step 3: Check Temperature, Venting, and Leaks
For equipment that will continue operating, confirm that normal controls, room heat, and combustion air pathways remain available. The CPSC’s 120-degree-F scald-prevention guidance offers a starting point for residential hot-water settings, subject to the appliance manual and special household needs. Do not confuse raising the tank temperature with protecting remote pipes from freezing. Extreme settings increase burn risk and do not repair a cold garage or exposed outdoor run.
Check for damp fittings, dripping drain valves, blocked vent terminations, and water accumulating in a drain pan. On gas units, leave burner air inlets and exhaust routes fully open. On heat-pump water heaters, preserve the air circulation and service clearances the manual specifies; the Department of Energy’s residential water-heater purchasing guidance says not to add insulation blankets to these units. If an existing tank is visibly leaking, arrange repair or replacement before winter.
Step 4: Prepare a Storage Tank for Shutdown
Skip this step if the house remains heated and the water heater is staying in service. In a freezing-prone vacant property, first turn off the heat source according to the specific manual. A standard electric model typically requires its dedicated breaker switched off; a gas storage model has a model-specific control or shutdown sequence. Tag the electrical disconnect so another person does not accidentally restore power while the tank is empty.
Let stored water cool before connecting the hose. A. O. Smith’s How to Drain a Water Heater instructions describe switching off the fuel or electrical supply, closing the cold-water inlet, and using a hot-water faucet to relieve pressure. Keep the drain route secured, and position the outlet where it cannot soak electrical equipment. If the drain is above floor level, verify that the hose does not kink or reverse the flow path.
Step 5: Drain the Storage Tank Completely
After cooling and isolating the heater, attach a suitable hose to the tank’s drain fitting and run the outlet to an approved drain or safe exterior discharge point. Open a hot-water faucet as directed by the owner’s manual, then open the tank drain carefully. Watch the first discharge for temperature and leaks. The A. O. Smith draining instructions note that some drain designs need a flathead screwdriver rather than hand operation.
Continue until the tank has emptied as the manufacturer requires for freeze storage. Do not assume a reduced trickle proves the interior is empty; sediment, a clogged outlet, or a trapped vacuum can interrupt flow. If the drain stops unexpectedly, leave the heater off and obtain qualified assistance rather than removing fittings under uncertain pressure. The purpose here is to prevent trapped water from freezing, not to perform a high-pressure sediment flush.
Step 6: Winterize Tankless Equipment Separately
Do not connect a garden hose to a tankless unit and assume the storage-tank steps apply. Rinnai’s Protect Your Rinnai Product During Extreme Cold Temperatures guide says that many tankless units depend on electricity for internal freeze protection. For an occupied, heated location with reliable power, follow the model’s power and piping recommendations. A powered heater does not necessarily protect external water lines, and an outage can defeat its automatic protection.
For prolonged power loss, Rinnai gives a general process involving shutting off water and gas, turning off the controller, disconnecting power, closing isolation valves, and draining through designated service valves; condensate traps or pump drains may also need attention. Other manufacturers use different valve arrangements. Find the freeze-draining procedure for your exact model and let a qualified technician handle any step you cannot identify. Never open a gas fitting in an attempt to release trapped water.
Step 7: Protect Remaining Plumbing and Label the System
An empty water heater is not proof that the rest of the building is winterized. Water may remain in supply branches, mixing valves, traps, a recirculation pump, expansion tank connections, and fixtures. Arrange whole-house drainage or professional winterization when leaving an unheated property. Insulation and cabinet doors cannot substitute for removing water from plumbing exposed to sustained freezing conditions.
Step 8: Refill and Recommission After Winter
When the property is again safely heated, inspect the tank, piping, and floor for freeze cracks before restoring pressure. Close the drain fitting according to its manual, restore cold-water supply gradually, and open a hot faucet to vent air as the tank fills. A. O. Smith’s maintenance guide warns that an electric tank’s heating element can be destroyed if energized without enough water around it. Wait for a steady water flow and follow the complete fill-and-purge process before powering the appliance.
For gas equipment, use the manufacturer’s relighting or commissioning instructions; schedule a technician if any control or vent appears damaged. Inspect every connection during the first heating cycle and check again afterward. If pipes were professionally blown out, ask the plumber to return the system to service. The completion check is not simply whether the tap feels warm: the tank must be full, valves must be in their operating positions, and there must be no fresh leak.
Products That Help
For accessible lines away from hot venting, Frost King’s P11X Tubular Foam Pipe Insulation is a pre-slit polyethylene product sold as four 3-foot sections for 3/4-inch copper or 1/2-inch iron pipe. Measure before ordering; nominal pipe size is not a universal outside-diameter match. Near equipment where foam is unsuitable, the Frost King F11XAD Pre-Slit Fiberglass Pipe Cover is a separate, high-temperature product listed as a 3-foot, 1/2-inch-thick sleeve for 3/4-inch pipe. Neither item keeps an unheated, water-filled system safe indefinitely.
For an older conventional storage tank that permits an added jacket, Frost King’s SP57/11C Water Heater Insulation Blanket is listed as 48 inches high, 3 inches thick, and intended to wrap a circumference of about 75 inches. Frost King’s product instructions require gas burner and vent areas, electric controls, and important fittings to remain clear. Do not install a blanket over a heat-pump water heater or an appliance whose manufacturer prohibits additional insulation. These products improve protection against heat loss; they do not replace full draining for an unheated vacancy.
Common Mistakes to Avoid
The most consequential mistake is changing the order: draining an electric tank and then leaving its breaker on. Another is relying on a gas water heater’s pilot or a tankless unit’s freeze-protection feature during a long power failure. A third is wrapping insulation over a gas draft hood, a relief valve, a service access panel, or a heat-pump fan intake. These shortcuts can turn a modest winter preparation task into equipment damage or a safety hazard.
Finally, do not add antifreeze to a potable-water heater on the assumption that any product labeled plumbing antifreeze is suitable. Chemical treatment, if ever permitted, must follow the appliance manual and local potable-water requirements. Do not reuse this guide as instructions for a boiler, solar water-heating loop, or RV appliance; those systems have distinct winterization procedures and materials.
Frequently Asked Questions
These practical decisions often come up after a homeowner has identified the equipment and chosen whether it will remain in service. Each one can change the safest winterization plan.
Should I Drain My Water Heater Every Winter?
No. A water heater that operates inside a reliably heated, occupied home normally does not need seasonal emptying for freeze protection. Draining becomes relevant when the equipment or attached water lines may be exposed to freezing temperatures during a shutdown or vacancy. Routine mineral flushing is a separate maintenance task with its own frequency and manufacturer instructions. Confusing those purposes can lead to needless handling of valves and fittings.
Will Pipe Insulation Prevent a Freeze Without Heat?
No. Insulation slows the movement of heat, but it cannot generate warmth. A pipe in a space that remains below freezing can eventually freeze even with a sleeve installed. The DOE’s Building America guidance treats pipe insulation as one part of an overall building strategy and also highlights air sealing where plumbing crosses exterior walls. If you cannot maintain safe building heat, arrange to drain vulnerable sections or use an approved, professionally designed freeze-protection system.
Can I Turn Off a Tankless Heater for a Vacation?
Only after checking its freeze-protection requirements. Rinnai cautions that internal safeguards often need continuous electrical power, while connected exterior piping still needs separate protection. Some models have a vacation or recirculation setting, but that does not necessarily drain the heat exchanger. When prolonged cold or a power outage is possible, follow the exact unit’s freeze-drain method rather than assuming the Off button makes a water-filled heater safe.
Should the Tank Drain Valve Stay Open While Away?
Follow the manufacturer’s storage instructions instead of applying one position to every heater. The proper state depends on whether the piping has been isolated, whether the whole building was drained, and how the tank must be returned to service. Label any valve left in a special position so it is not missed when the water supply is restored. A plumber can document the final valve lineup if the installation has multiple shutoffs or recirculation loops.
Final Thoughts
The most useful safeguard is a restart plan written before the property is locked up. A shut-down, empty tank can look ordinary months later, and someone may flip a breaker before noticing the warning label. Once you have matched the winterization method to the exact model and the building’s freeze exposure, leave clear records of the shutoffs, drainage, and refill requirements. That final handoff can matter as much as the physical work when the house is opened again.