The most dependable answer to how to prevent ice dams starts inside the house, not on the roof. Seal warm-air leaks into the attic, confirm insulation reaches the eaves without blocking designed ventilation, and keep meltwater drainage paths open. A seasonal inspection is manageable for some homeowners; attic retrofits and snowy-roof work may require specialists. No single product can eliminate every ice dam during severe weather.
Quick Answer: Before freezing weather, inspect attic air leaks and insulation, correct ventilation problems, and clean gutters and downspouts. After snowfalls, consider careful ground-level snow removal only where it is safe. If water enters the home or heavy ice threatens people below, move away from the danger area and contact a qualified contractor.
As an Amazon Associate we earn from qualifying purchases.
By DIY Ideas 4 Home Editorial Team
Before You Start: Tools, Materials and Safety
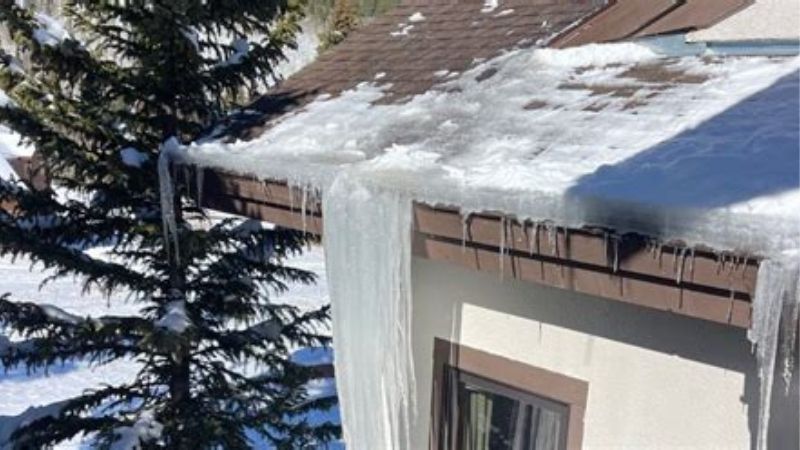
University of Minnesota Extension explains that an ice dam develops when higher roof surfaces melt snow while colder eaves refreeze that water. The relevant temperature boundary is 32 degrees F, but the more useful household question is why one part of the roof stays warmer than another. Before buying materials, identify your roof assembly and distinguish an actual leak from harmless icicles.
| Tool or Material | Size or Spec | Why You Need It | Substitute |
|---|---|---|---|
| Flashlight and camera | For dry, accessible attic inspection | Record damp spots, penetrations, and insulation gaps | Qualified energy auditor |
| Air-sealing gasket | Fit measured hatch gap | Reduce warm-air leakage around an attic access panel | Contractor-installed insulated hatch cover |
| Appropriate insulation | R-value selected for climate and assembly | Slow heat transfer through attic ceiling | Professional blown-in insulation |
| Ventilation baffle | Matched to rafter spacing | Keep soffit air path clear where the roof is vented | Contractor-selected compatible baffle |
| Roof rake | Reachable from a safe ground position | Reduce edge snow when conditions allow | Professional snow-removal service |
| Gutter and downspout inspection | Visible drainage route to discharge | Find debris, ice blockage, or poor outlet drainage | Professional gutter cleaning |
Recognize the Roof Pattern
Look for a thick ridge near the overhang, ice behind gutter edges, or water marks that appear during a thaw rather than during ordinary rain. Ice dams do not require a blocked gutter; water can refreeze on the roof edge itself. The National Weather Service notes that repeated melting and freezing can push water beneath shingles and eventually into walls or ceilings.
A roof that sheds snow evenly may have a different heat-loss pattern from one that repeatedly exposes a bare, warm patch while surrounding shingles stay snow-covered. That comparison is a clue, not a definitive diagnostic test: sun exposure, roof geometry, and wind can change how snow disappears. Photograph the problem after storms from a safe location and keep a dated record for an energy auditor or roofer.
Stay Away From Falling Ice and Roof Edges
Do not climb onto an icy roof to chop a dam, and do not stand under icicles while scraping overhead. University of Minnesota Extension specifically warns that winter roof work and snow removal from below can injure people and damage roofing materials. Keep children and pets out of the fall zone. If utility cables run near the work area, leave the job to a professional; long metal poles and electrical lines are a dangerous combination.
Attic work also has limits. Never walk between supported framing members, cover recessed fixtures that are not rated for insulation contact, or seal gaps around a chimney with ordinary foam. Damaged wiring, combustible clearances, unknown insulation materials, and wet roof decking need qualified inspection. Tightening a house can also affect combustion appliances, so a weatherization professional should verify safe combustion air and venting.
Know Whether the Attic Is Vented
A conventional vented attic has an insulated ceiling plane and a separate airflow path through soffit and upper roof vents. A conditioned attic with insulation at the roof deck is a different assembly. Do not cut new vents into an unvented design based on a general ice-dam checklist. The Department of Energy’s building-science guidance distinguishes these assemblies because misplaced insulation, air barriers, or ventilation openings can produce moisture problems.
For a vented attic, look for daylight or designed intake at soffit locations without insulation spilling into the channels. For a finished half-story or cathedral ceiling, hidden knee walls and shallow roof cavities complicate the diagnosis. Ask a building-envelope contractor to identify the existing control layers before opening finishes. A correct diagnosis prevents buying roof accessories that cannot address heat escaping from the rooms below.
How to Prevent Ice Dams Step by Step
The lasting fix is to keep the roof deck closer to outdoor conditions so snow does not melt unevenly. University of Minnesota Extension places ceiling air sealing ahead of added insulation, with ventilation addressed as part of the correct roof design. Treat the steps as an order of operations: diagnose first, correct heat loss, protect drainage, and only then consider temporary snow-control measures.
Step 1: Map Leaks and Snowmelt Areas
On a dry day before winter, inspect ceilings beneath recurring ice-dam locations for old stains, peeling paint, or damp drywall. From a safely accessible attic walkway, note open chases for plumbing and wiring, hatch gaps, and locations where insulation stops short of the exterior wall. Use a camera instead of stepping beyond safe decking. Compare the findings with the roof photographs taken during previous storms.
If a large section of the roof melts early while the eaves remain white, ask whether a bath fan, warm duct, or unsealed ceiling opening lies beneath it. University of Minnesota Extension identifies air leakage, ducts, exhaust outlets, and chimneys as possible local heat sources. Mark the suspected location for repair without assuming the ice line directly identifies the opening. A blower-door test can help an energy auditor narrow the search.
Step 2: Seal the Ceiling Air Boundary
Address accessible attic-hatch drafts first. The Department of Energy’s Air Sealing Attic Access guidance recommends weatherstripping along the frame, a closure that compresses the gasket, and an insulated cover where practical. Close the hatch on a thin strip of paper at several spots: if the paper slides out with little resistance, the gasket may not be contacting evenly. This is a simple field clue rather than a standardized test.
Next have appropriate ceiling penetrations sealed using materials rated for the surrounding assembly. Plumbing chases and partition-top openings can move significant warm, moist air into a cold attic even where fluffy insulation appears thick. Have recessed light fixtures, flues, and electrical penetrations assessed individually. Building Science Corporation’s ice-dam guidance emphasizes a continuous air barrier, not the hope that added vent openings will carry away excessive indoor heat leakage.
Step 3: Restore Insulation Without Gaps
Once major air leaks are addressed, check the depth and continuity of attic insulation. ENERGY STAR’s published retrofit table recommends different R-values depending on climate zone and existing insulation. For an uninsulated wood-framed attic in climate zone 5, its table lists R-60; where that attic already has about 3 to 4 inches, the table lists R-49 as the addition target. These are guidance values for the stated scenario, not universal building-code instructions.
Pay particular attention to the perimeter above exterior walls. Short roof-truss heels can squeeze insulation thin precisely where eaves begin to freeze. Use baffles and suitable blocking before placing loose-fill material in a vented attic, and do not compress batts or bury soffit openings. ENERGY STAR also advises treating the attic as an air-sealing project before topping up insulation. A contractor can determine the installed R-value and moisture implications of your existing layers.
Step 4: Preserve Designed Intake and Exhaust
Trace the intended airflow route from soffit intake toward upper roof exhaust in a vented assembly. The Department of Energy describes attic baffles as chutes that keep insulation away from the underside of the roof deck. Its building-science guidance describes a typical 2-inch air channel for these baffles, although the design must match local code and the roof’s specific construction.
Check for crushed or missing baffles, insulation pushed against the sheathing, and blocked intake grills. Do not assume that installing a powered attic fan will solve an ice dam. University of Minnesota Extension cautions that mechanical attic ventilation is not a recommended ice-dam fix in its Minnesota guidance because it can draw unwanted air and create moisture issues. Have a roofing or energy contractor evaluate unexplained condensation before changing airflow.
Step 5: Keep Drainage Clear and Eaves Protected
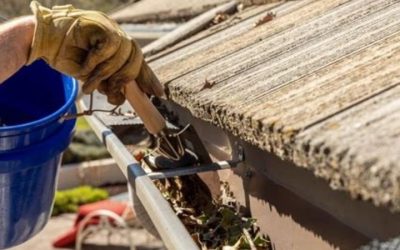
Before the first hard freeze, arrange gutter and downspout cleaning so meltwater has a route away from the house. The National Weather Service recommends clearing leaves, sticks, and debris from those channels as part of roof ice-dam prevention. Confirm that discharge is not directed onto an entry path where it can refreeze into a slip hazard. Clearing gutters helps drainage, but it does not correct the warm-roof and cold-eave temperature difference that creates an ice dam.
During a reroofing project, ask about self-adhered ice-barrier membrane along vulnerable eaves. The Department of Energy’s Eaves Sealed in Cold Climates guidance describes a membrane extending from the roof edge to at least 2 feet up the roof deck beyond the interior plane of the exterior wall, for cold-climate conditions covered by that detail. This is a water-intrusion defense beneath the roof covering, not a treatment applied on top of an active ice dam. Have the roofing contractor follow the locally adopted code and product instructions.
Step 6: Reduce Reachable Edge Snow Safely
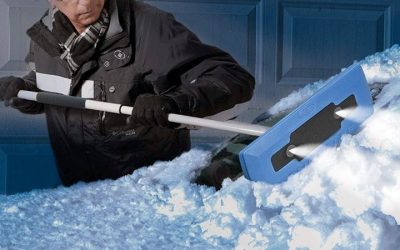
After snowfall, consider a roof rake only when you can work from stable ground, well clear of falling snow, ice, and overhead lines. The National Weather Service describes roof rakes as one way to remove snow without climbing onto a roof. Use smooth, controlled pulls that do not pry shingles or strike flashing. A roof rake removes a contributing ingredient, snow, but it does not address the air leaks that can recreate the problem at the next storm.
Do not try to expose every shingle or force a rake through a hard ice layer. If the roof is steep, the snow is compacted, the eaves are several stories high, or a safe ground position is unavailable, hire an insured snow-removal contractor. Heavy accumulations also involve roof-load questions that should be judged by a structural professional when the building shows sagging, cracking, or unusual movement.
Step 7: Respond Early to Water Intrusion
During thaws, check previously affected ceilings and attic locations without touching electrical equipment near wet material. A spreading stain, dripping trim, or damp insulation means the situation has moved beyond seasonal prevention. Protect belongings where you can do so safely, document the damage for your insurer, and call a roofing contractor experienced with ice dams. Do not knock down an overhead ice ridge or pour chemicals onto a roof in an attempt to create a drain.
University of Minnesota Extension describes emergency drainage channels in ice as a short-lived response, not a permanent fix, and stresses the hazards of winter roof work. Arrange professional control of an active leak first. Afterward, allow saturated materials to dry fully and inspect for hidden damage before restoring finishes. Schedule a separate building-envelope evaluation so the same roof area does not leak whenever snow and temperature patterns repeat.
Products That Help
Frost King’s Premium Rubber Foam Weatherseal V25GA is a gray, self-stick EPDM D-section gasket listed by the manufacturer at 5/16 inch wide, 1/4 inch thick, and 17 feet long. It can help seal a compatible attic hatch when the opening matches its compression profile. For vented attic retrofits, ADO Products lists its Durovent Baffle DVB2346 at 23.5 by 46 inches, intended for 24-inch on-center framing; use it only where a contractor confirms that baffle fits the assembly.
The Snow Joe RJ204M Roof Rake offers a manufacturer-listed 25-inch clearing width and a telescoping handle from 6.2 to 21 feet, according to its owner’s manual. It is a snow-removal tool for situations with safe ground access, not a way to break roof ice. Verify the model’s current availability, assembly instructions, and safe working reach before purchasing; some roofs should be handled only by professionals.
Common Mistakes to Avoid
Do not rely on clean gutters alone, install powered fans without understanding attic pressure, or cover soffit intakes while adding insulation. Do not mistake a water-protection membrane for a cure for uneven roof heat, and do not use roofing deicers casually around plants, metal, or runoff paths. Heating cables may be considered by a roofing professional for a difficult localized detail, but they should not replace repairs to the underlying air and insulation barriers.
Likewise, resist the urge to crank down the thermostat solely to make an attic colder. Correcting the separation between conditioned rooms and roof decking is more practical than sacrificing indoor comfort. Track whether the same eave refreezes after air sealing and insulation corrections. That observation, along with a professional moisture inspection, is more informative than judging the roof by the number of icicles hanging from one storm.
Frequently Asked Questions
Even after the main attic and roof-edge corrections, unusual roof geometry and weather can leave homeowners with questions about which measures actually reduce damage risk.
Can Ice Dams Form With Clean Gutters?
Yes. Ice dams form when meltwater reaches a colder roof-edge surface and refreezes, even if the gutter channel itself is open. University of Minnesota Extension identifies uneven roof surface temperature as the defining mechanism. Clean gutters reduce drainage obstructions but do not stop melted snow from freezing on the eave or lower shingles.
Does More Attic Insulation Always Fix Them?
No. Insulation slows heat transfer, but uncontrolled warm-air leaks can still move heat and moisture toward the roof deck. ENERGY STAR advises sealing air leaks before installing more attic insulation. The appropriate R-value also depends on the climate zone, existing insulation, and whether the roof assembly is designed as vented or unvented.
Are Icicles Proof That the Roof Is Leaking?
No. Icicles show that some water has reached a location where it froze, not that it passed through the roof covering. The National Weather Service treats repeated freeze-thaw and backed-up water as a damage risk, particularly when accompanied by stained ceilings or walls. A photograph and moisture inspection are more useful than an icicle count.
Should I Install Heated Roof Cables?
Not as the first prevention measure. Cables can provide localized melting in a correctly designed system, but they do not stop indoor heat loss into an attic. A roofer should first assess the leak path, roof materials, electrical protections, and manufacturer installation requirements. Where ice dams recur across a broad eave, an air-sealing and insulation assessment addresses the cause more directly.
Final Thoughts
Preventing ice dams is mainly a building-envelope project: identify the warm-air path, seal the ceiling boundary, restore climate-appropriate insulation, and preserve the ventilation system your roof actually uses. Keep drainage clear before freezing weather, and treat snow raking as a limited, ground-level option rather than a substitute for repairs. Start with a careful inspection of the attic hatch and eave insulation; if leaks, steep roofing, or uncertain construction are involved, commission a professional energy and roof assessment before buying materials.