To learn how to winterize outdoor faucets, start by removing anything attached to the spout, then identify whether the faucet has an indoor shutoff valve or a frost-free design. An ordinary hose bib needs its supply isolated and its remaining water drained. A correctly installed frost-free wall faucet usually protects itself by draining when shut off, but an attached hose can defeat that protection. For accessible valves, this is a manageable job before freezing weather arrives.
Quick Answer: Disconnect the hose, close the dedicated indoor supply valve if there is one, open a conventional outdoor faucet to drain the line, and release water through any designated drain port. For a frost-free faucet, remove the hose and close the handle so its tube can empty as designed. Add an insulating cover only after addressing trapped water, and call a plumber if a valve leaks, will not turn, or appears damaged.
As an Amazon Associate we earn from qualifying purchases.
By DIY Ideas 4 Home Editorial Team
Before You Start: Tools, Materials and Safety
The American Red Cross identifies hoses and hose-bib supply lines as preventable winter freeze risks: disconnect the hose, isolate an indoor valve when available, and drain the exposed line. A cover may reduce cold air exposure, but it does not drain a water-filled pipe. Prepare the tools you actually need for your plumbing layout instead of buying a kit before finding the shutoff.
| Tool or Material | Size or Spec | Why You Need It | Substitute |
|---|---|---|---|
| Small bucket and towels | Enough to catch leftover line water | Collects water from a bleed screw or outdoor spout | Shallow tray and absorbent rags |
| Flashlight | Handheld or headlamp | Helps locate an indoor branch shutoff in a dim utility area | Bright portable work light |
| Faucet insulation cover | Fit the shape and reach of the installed spout | Adds a layer against cold air after draining | Compatible insulated cover already owned |
| Phone camera | Clear photo of valve and piping | Records existing position and any leak for a plumber | Written note and sketch |
Know Whether Your Faucet Is Frost-Free
A conventional hose bib typically closes near the exposed handle; the short pipe behind it can remain water-filled unless the indoor supply is shut off and the branch is drained. A frost-free sillcock uses a longer valve stem with the actual sealing point farther indoors. Woodford’s Model 17 product documentation says protection depends on correct installation and removing the hose when freezing conditions arrive.
Do not assume the faucet is frost-free because it has a large handle, vacuum-breaker cap, or insulated exterior plate. Follow the pipe indoors if you can do so safely, look for a manufacturer marking, or compare the valve to its owner’s guide. If the type remains uncertain, shut down an identified branch supply and consult a plumber rather than assuming that an exterior cover fixes the problem.
Find the Correct Shutoff Without Forcing It
Look where the outdoor pipe enters a basement, utility room, crawl space, or accessible finished-wall service panel. The branch shutoff may be a lever-style ball valve or a round-handled stop valve, sometimes with a small drain cap. Operate only a valve you can positively trace to the outdoor faucet; accidentally closing a different plumbing circuit creates confusion and may interrupt essential fixtures.
An indoor shutoff is not always present, especially on frost-free installations. If a shutoff is seized, heavily corroded, or leaking around the stem, do not use extra leverage to force it. A minor faucet-winterizing job can become a major indoor leak when an old valve body or fitting fails. Photograph the valve location for a licensed plumber to assess.
Handle Frozen or Damaged Plumbing Differently
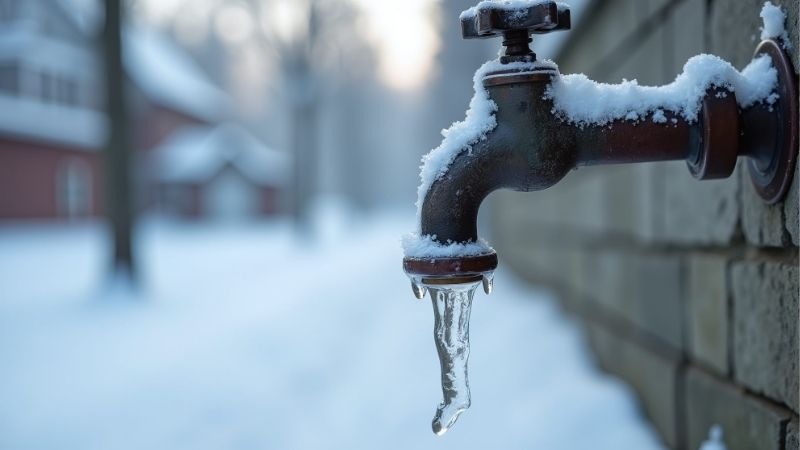
Plan this job before the first freezing forecast rather than after a faucet stops flowing. If the line may already be frozen, stop using the spout and look for cracked metal, damp drywall, or water collecting beneath the branch. The American Red Cross cautions against using an open flame to thaw pipes and recommends a licensed plumber if the frozen portion is inaccessible or cannot be thawed safely.
Keep electrical equipment away from standing water and know where the home’s main water shutoff is located. Do not add automotive antifreeze to domestic supply lines; the Red Cross specifically warns against antifreeze in these pipes unless directed by appropriate professionals. If a burst or active leak is suspected, isolate the water and prioritize repair over completing the normal seasonal checklist.
How to Winterize Outdoor Faucets Step by Step
Begin on a mild, dry day so you can check for leaks after draining. The sequence below separates conventional hose bibs from frost-free models at the point where their operation differs. Do not remove plumbing fittings or dismantle a vacuum breaker just to prepare for winter; the normal winterizing process uses the handle, an accessible branch shutoff, and a drain provided by the installer.
Step 1: Remove Every Hose and Attachment
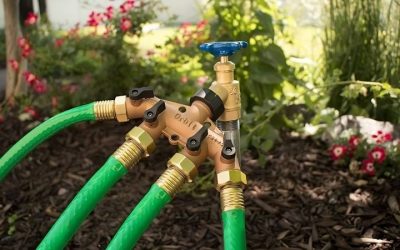
Unscrew the garden hose from the outdoor spout, then remove splitters, watering timers, sprayer adapters, and quick-connect attachments that could hold water against the outlet. Utah State University Extension’s November 2024 yard guidance specifically recommends disconnecting hoses from spouts before cold weather. A connected hose can trap water in a frost-free sillcock even though its internal valve is well inside a heated wall.
Check that the outlet threads are visible and no adapter remains attached. If a fitting is frozen in place or badly corroded, do not apply enough force to twist the entire faucet out of the wall. The separate job of emptying and storing a garden hose can wait; the immediate priority here is leaving the faucet outlet unobstructed so the valve can drain correctly.
Step 2: Locate and Identify the Indoor Supply Valve
Go inside and follow the supply line from the wall penetration toward the nearest accessible valve. Confirm the branch by having another adult briefly identify which outdoor faucet it feeds while the system is still working, without leaving the faucet running unattended. Mark the valve only once you are certain of the connection. Homes with several patios or hose bibs may have distinct shutoffs that need their own check.
For a conventional faucet, the dedicated indoor valve is the primary freeze-prevention control. If you cannot find a branch shutoff, do not automatically turn off the entire house for the season. Ask a plumber whether the installation has an accessible frost-free valve, whether a new interior shutoff is advisable, or whether the supply line needs a more permanent correction.
Step 3: Shut Off Water to a Conventional Hose Bib
Close the identified indoor supply valve using the normal direction for that valve type. A lever ball valve is closed when its handle sits across the pipe, while many wheel-style valves close by turning clockwise. Do not apply a wrench to a fragile plastic handle or continue turning after a valve reaches its stop. A valve that will not close fully needs attention rather than a harder grip.
Return outside and open the faucet briefly to confirm that the normal supply flow stops. You may initially see water held in the short branch line. If a steady pressurized stream continues, the wrong shutoff may have been selected or the valve may be passing water. Resolve that before installing a cover, because insulation cannot compensate for an undrained conventional branch.
Step 4: Open the Outdoor Outlet to Drain the Line
With the conventional branch supply shut off, leave the outdoor handle open so gravity can release water through the nozzle. The American Red Cross specifically advises keeping an ordinary outside hose bib open after closing its indoor valve; this also gives water left in the line room to expand. Put a small bucket under the faucet if runoff might reach a slippery walkway.
Wait until the dripping stops, but avoid treating a fixed number of seconds as proof that a pipe is empty: branches vary in length, pitch, and trapped low spots. If no water comes out, it may already have drained, or the piping may be obstructed. Check the indoor route and the manufacturer’s configuration before declaring a questionable line safely winterized.
Step 5: Release Water at an Installed Bleeder
Some interior shutoff valves have a small drain screw or cap on the downstream side. If your valve has this feature and its instructions permit homeowner draining, position a container beneath it and gently release the remaining water after the main valve is closed. The outdoor handle must be open for air to enter. Never loosen a pressurized pipe union or a fitting you cannot identify.
When the last water has drained, reseat the bleeder according to the valve’s instructions so it will not leak when service resumes in spring. Leave the outdoor handle open on a conventional winterized branch, consistent with Red Cross guidance. Record where the bleeder sits; a forgotten open drain can cause indoor water damage when the branch supply is turned on again.
Step 6: Let a Frost-Free Faucet Drain by Design
A frost-free faucet is different: remove the hose and close the outdoor handle so the valve seals at its indoor seat and the barrel drains toward the spout. PRIER’s product page for its P-164 says residual dripping can continue for as long as 60 seconds after shutoff; that brief drain is not automatically a defect. Water running continuously after the drain period, however, deserves inspection for a worn seal.
Woodford’s March 2025 installation instructions for Models 14 and 17 require a slight downward pitch toward the outside nozzle and a supply connection in a heated space. If the faucet is pitched back toward the wall or sits inside an unheated cavity, it can hold water and freeze despite its name. A homeowner cannot repair that geometry by wrapping the exterior handle.
Step 7: Insulate the Exposed Spout and Nearby Pipe
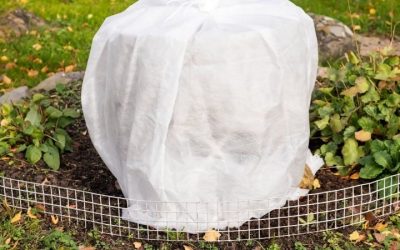
After removing attachments and completing the right drainage procedure, fit an exterior faucet cover that sits flush against the siding without forcing the handle. Frost King’s product page identifies the FC1 as an oval foam cover intended for outdoor faucets. It can slow heat loss around the opening, but it offers no guarantee against a prolonged freeze and should never be treated as a substitute for isolating a water-filled branch.
Check the pipe on the indoor side of the exterior wall as well. The Red Cross recommends insulation for vulnerable lines in garages, crawl spaces, and other unheated areas. Seal obvious air gaps around penetrations with suitable building materials, but keep access to shutoffs and drains. Where the pipe itself is in an unheated space, a plumber may recommend relocating or adequately protecting it rather than relying on a decorative sleeve.
Step 8: Check for Leaks and Plan Spring Reopening
Inspect the wall penetration and the visible line indoors for staining, moisture, or corrosion. Photograph the shutoff position, note which faucet it serves, and put a reminder near the valve to check the bleeder before restoring water. A dry pipe exterior does not prove the full concealed run is sound, but it provides a useful baseline if a leak appears after the first thaw.
When freezing weather has passed, close the conventional outdoor handle and any interior bleeder, open the indoor supply slowly, then test the outside spout while watching the indoor connection. If a frost-free faucet has burst inside the wall, water may only become visible when the valve is turned on. PRIER warns that this symptom requires keeping the damaged P-164 off and arranging professional repair.
Products That Help
The Frost King FC1 Foam Faucet Cover is a simple accessory for a correctly drained ordinary spout; Frost King’s FC1 product page identifies the exact oval cover, so measure your faucet’s projection and surrounding clearance before buying. For an old conventional faucet that repeatedly freezes, the Woodford Model 17 Freezeless Faucet offers an anti-siphon design listed by Woodford to ASSE 1019, but its protection still depends on proper heated-side installation, downward drainage, and hose removal.
The PRIER P-164 Quarter-Turn Wall Hydrant is another specific replacement option when a plumber is already opening the wall or repairing damaged plumbing. PRIER’s P-164 documentation describes a frost-free shutoff location inside the heated portion of the structure and an integrated vacuum breaker. Confirm wall thickness, pipe connection, local code, and the correct length before purchasing either replacement hydrant; neither should be installed solely to avoid this year’s hose-removal task.
Common Mistakes That Leave Water Trapped
The most consequential mistake is leaving a hose, timer, or splitter installed on a standard frost-free faucet. Another is closing the outside handle on an ordinary faucet after isolating the indoor valve, unintentionally retaining water in its branch. A third is mistaking a foam cover for protection against a full pipe of water. Match the valve operation to the hardware instead of following a single rule for every outdoor tap.
Be cautious when winterizing a vacation home. The American Red Cross advises keeping indoor heat at no lower than 55°F when away during freezing weather, because plumbing beyond the spout can also be vulnerable. An exterior faucet cover cannot replace building heat or maintenance of unheated plumbing. If a sprinkler manifold or irrigation backflow assembly connects to the same area, it requires its own manufacturer-specific winterizing procedure, not these hose-bib steps.
Frequently Asked Questions
These questions matter when the faucet design, weather, or drainage behavior does not match the standard seasonal routine.
At What Temperature Should Outdoor Faucets Be Winterized?
Finish before temperatures are forecast to reach 32°F, the freezing point of water, rather than waiting for a pipe to ice up. Actual damage depends on exposure, insulation, wind, and duration, so the first subfreezing forecast is a practical deadline, not a guarantee that a line will freeze immediately. The American Red Cross recommends these preventive measures ahead of winter storms, especially for exposed outdoor branches.
Do Frost-Free Outdoor Faucets Need Insulating Covers?
Not always. A properly installed frost-free faucet designed to drain after shutoff may not require an external cover, but one can provide supplemental protection around an exposed opening. Woodford’s Model 17 instructions emphasize heated-side supply placement and correct downward pitch instead of requiring a cover. If a hose remains attached or water sits in the barrel, foam around the exterior will not correct the underlying problem.
Why Does My Outdoor Faucet Drip After I Shut It Off?
A short drip can be normal for a frost-free faucet as it empties its barrel. PRIER’s P-164 support material says that this drainage may last up to 60 seconds. If dripping continues or water is seen inside the home whenever the outdoor valve is turned on, do not assume normal drainage. Shut the valve off and have the seat, vacuum breaker, and concealed body checked.
Should I Let an Outdoor Faucet Drip All Winter?
Not as a substitute for winterizing a conventional, shutoff-equipped hose bib. The American Red Cross recommends shutting off its indoor supply and leaving the exterior faucet open so the branch drains, which is different from leaving pressurized water trickling all season. Emergency trickle advice for a vulnerable indoor water line is a separate situation. Follow the proper winterization procedure for the outdoor fixture and seek plumbing advice for a line that cannot be isolated.
Final Thoughts
Once you know the faucet type, how to winterize outdoor faucets becomes a repeatable seasonal task: separate the hose, remove trapped water by the correct method, and check the area that stays hidden inside the wall. Put a label on the right indoor shutoff with its outdoor location before you finish. That small record makes a spring restart less error-prone and helps a plumber find the right branch quickly if future freezing weather reveals a problem.