Learning how to winterize a greenhouse means preparing the structure, water supply, and growing space before the first hard freeze, not just putting extra plastic over the roof. Remove diseased plant matter, repair loose panels, plan for snow and wind, and decide whether plants need active heating. A small home greenhouse can often be prepared over a weekend if no structural or heating repairs are needed; damaged frames, gas equipment, or permanent electrical work require a qualified professional.
Quick Answer: Empty and clean the greenhouse, inspect anchors and glazing, seal unwanted drafts, drain vulnerable plumbing, and test your temperature monitoring. If you heat the space, service the heater before winter and preserve controlled ventilation to prevent condensation. If you leave it unheated, move frost-sensitive plants elsewhere instead of assuming a clear covering will keep them warm overnight.
As an Amazon Associate we earn from qualifying purchases.
By DIY Ideas 4 Home Editorial Team
Before You Start: Tools, Materials and Safety
Start with your greenhouse type and your winter goal. A light hoop house protecting hardy greens needs different measures from a glass structure housing tropical plants. UMass Extension’s Greenhouse Energy Conservation Checklist emphasizes closing unintended leaks and repairing coverings; winter readiness still depends on intact ventilation, drainage, and the structure’s local snow-load rating.
| Tool or Material | Size or Spec | Why You Need It | Substitute |
|---|---|---|---|
| Brush, bucket, mild detergent | Compatible with glazing and frame finish | Remove debris and algae before any disinfection | Soft sponge and water |
| Greenhouse film repair tape | UV-resistant, suitable for polyethylene film | Patch small tears without replacing a sound cover | Manufacturer-approved panel repair kit |
| Replacement glazing or film | Match panel thickness or film fastening system | Replace cracked, brittle, or loose sections | Manufacturer-specified replacement parts |
| Seals and weatherstripping | Match the door or vent profile | Stop uncontrolled air leaks at closures | OEM gasket or weather seal |
| Low-temperature thermometer | Records overnight minimum, rated below freezing | Identify whether your planting zone stays above its limit | Suitable data logger with min/max history |
| Garden hose and shutoff access | Know indoor valves and drain points | Empty exposed water lines before freezing weather | Help from irrigation installer |
Set a Winter Goal for Your Plants
Choose among an empty storage greenhouse, a cool shelter for hardy crops, or a heated growing space. Do not assume that an unheated greenhouse is a frost-free room. Cloud cover, wind, thermal mass, and the outdoor minimum influence what happens after sunset. UMass Extension’s guidance on overwintering container-grown ornamentals notes that less-hardy potted plants need additional protection even under a greenhouse covering.
Make a simple inventory of each crop’s cold tolerance and whether its roots sit in exposed containers. A warm-loving transplant in a small pot may fail before a well-established winter-hardy plant. Relocate tender specimens to appropriate indoor conditions before tackling the building repairs; this avoids leaving irreplaceable plants in a suddenly cold workspace.
Separate DIY Checks From Professional Work
Visual inspections, cleaning, and fitting a manufacturer-approved gasket are reasonable homeowner tasks. Stop at sagging roof members, cracked structural connections, corroded wiring, leaking fuel lines, or any heater that trips a breaker. Wet greenhouse floors make improvised extension cords and unprotected electrical devices especially hazardous. Shut off power before handling electrical accessories, and have a licensed electrician address permanent wiring or circuit problems.
Combustion heaters need a suitable outdoor air supply and properly functioning exhaust. Never run a portable generator or an outdoor patio heater inside an enclosed greenhouse. UMass Extension’s Heating System Maintenance guide recommends having furnaces and boilers cleaned and adjusted by a competent service professional before the winter heating season.
Check the Frame and Site Before Snow
Look at anchor points, door hinges, brace bolts, and places where water pools against the foundation. The UConn Extension guide Prepare Your Greenhouses for Weather Events explains that snow containing one inch of water weighs about 5.2 pounds per square foot, illustrating why wet snow is not merely a cosmetic problem. Check the manufacturer’s snow and wind limits rather than assuming every small kit tolerates local storms.
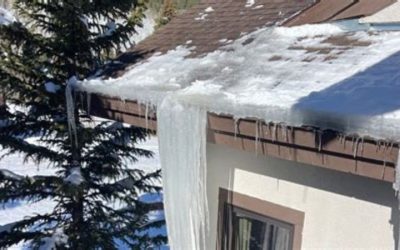
Clear surrounding drains and keep a ground-level access route open for inspections. Arrange professional reinforcement if the frame bends, anchors shift, or the stated snow rating falls short of local design loads. Do not climb a slippery greenhouse roof or strike cold glass or polycarbonate to knock off ice.
How to Winterize a Greenhouse Step by Step
Work from sanitation outward to the enclosure, then address water and climate control. This order avoids trapping infected debris behind insulation or patching film before inspecting its support frame. Schedule the final heater and thermometer checks before forecast lows can freeze plumbing or injure plants.
Step 1: Remove Spent Plants and Clean Surfaces
Pull weeds, remove dead roots, discard diseased crops, and take used pots or growing trays off benches. Sweep up fallen leaves and old potting media instead of leaving them beneath benches through winter. UConn Extension’s Start Clean and Stay Clean fact sheet says plant debris and weeds can shelter insects and disease organisms that emerge when temperatures rise.
Wash glazing and benches with a cleaner appropriate for their finish, working from higher surfaces down to the floor. Where disinfection is warranted, first remove organic residue and then apply a disinfectant specifically labeled for greenhouse surfaces according to its directions. Keep products apart unless their labels expressly permit mixing. The successful check is a dry, uncluttered space with clear drains, not a lingering chemical smell.
Step 2: Tighten the Structure and Repair Covering
With the greenhouse empty enough to see its joints, check missing screws, torn attachment strips, loose roof vents, and hinges that fail to close. Retighten fasteners only to the greenhouse maker’s specification; overtightening brittle panels can create new cracks. Small holes in polyethylene film can often be patched with compatible UV-resistant greenhouse tape on clean, dry material.
Replace film when it has widespread brittleness or damage that a patch cannot stabilize. For polycarbonate, use manufacturer-approved seals or panel replacements rather than treating a film patch as a structural repair. Inspect from a safe position on the ground, and do not load the roof while repairing overhead glazing. You should finish with secured panels and doors that latch without forcing the frame out of square.
Step 3: Seal Gaps Without Blocking Vents
Close doors and operable vents, then look for light and moving air around the frames on a breezy day. Replace torn weatherstripping and worn closure seals with profiles made for your structure. Seal unintended gaps along wall-to-foundation joints, but keep drainage holes and designed ventilation passages open. UMass Extension identifies poorly closing louvers and damaged coverings as avoidable routes for winter heat loss.
If you add bubble insulation or a second layer of glazing, use the greenhouse manufacturer’s mounting method so condensation can drain and coverings remain secure. Extra layers can reduce heat loss, but they also change light transmission. Do not block automatic vent arms or emergency openings. Check that the doors latch normally and the vent actuator can still move through its full travel.
Step 4: Drain Hoses and Exposed Water Lines
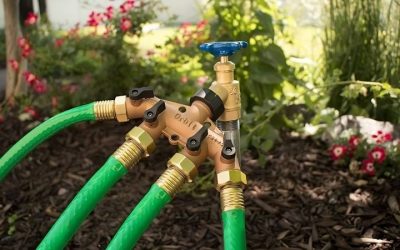
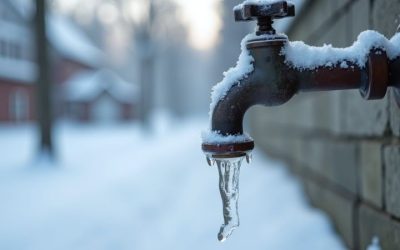
Disconnect outdoor hoses, empty watering cans, and store spray nozzles where trapped water cannot freeze. Identify the upstream shutoff for a permanent supply line, close it as directed, then open the appropriate downstream drain. An automatic irrigation manifold, pump, or backflow assembly may require a dedicated winterizing procedure; follow its manual or use an irrigation technician rather than guessing where to apply compressed air.
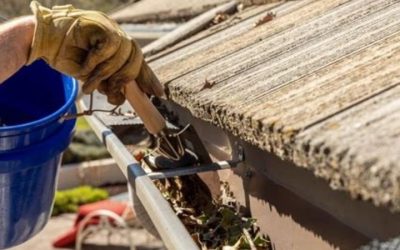
Check gutter outlets, condensate drains, and floor drains for obstructions. A blocked outlet can create ice at a doorway or return water beneath the structure. If your greenhouse will continue to operate with running water, have freeze-exposed plumbing appropriately insulated or protected by an approved heat-trace system installed to applicable electrical rules. The practical pass condition is no standing water in components intended to be empty.
Step 5: Test Heat and Overnight Monitoring
For heated greenhouses, run the installed heating system through a normal thermostat cycle before the first cold snap. Inspect filters and unobstructed air paths where the manufacturer’s instructions permit. UMass Extension’s Heating System Maintenance guide calls for annual professional servicing of greenhouse furnaces and boilers, preferably in fall. Do not work on gas valves, burners, flues, or hardwired thermostat circuits yourself.
Put the temperature sensor near plant height, away from direct sunlight or a heater outlet. Record a nighttime low rather than relying only on the pleasant daytime reading. A thermometer that reads below 32°F can reveal whether an unheated shelter actually freezes. If the plants require a temperature the greenhouse cannot maintain during a prolonged outage, move them to an appropriate backup location before the weather turns.
Step 6: Vent Moist Air and Adjust Watering
Cold-season sealing must not become total air isolation. The University of Florida IFAS Greenhouse Ventilation guide explains that winter air exchange remains necessary because condensation and high humidity favor fungal disease. The guide gives two to three air changes per hour as an engineering range for greenhouse winter ventilation, not a universal setting for every backyard kit. For a small structure, follow its vent design and monitor the actual humidity and leaf wetness.
Water early enough for foliage to dry before night and avoid soaking the floor just before closing up. North Carolina State Extension reports that Botrytis blight is favored by relative humidity around 85 percent or higher combined with cool conditions. A gentle circulation fan or carefully timed venting may reduce persistent moisture, but electrical equipment must be rated for the space and positioned away from water. If the inside surfaces drip each morning, investigate ventilation before adding more insulation.
Step 7: Prepare for Wind, Snow and Power Loss
Check your weather forecast for high winds and wet snowfall, secure spare panels, and store loose pots and equipment where they cannot strike glazing. UConn Extension advises checking truss connectors and braces before storms. Keep exterior walkways accessible and know how to remove snow safely from the ground using equipment approved by the greenhouse maker. Uneven drifts can threaten the sidewalls as well as the roof.
Plan what happens if the heater or grid power fails during a cold night. Keep a phone contact for service, know which plants can be moved quickly, and arrange a frost-safe alternative for highly valuable collections. Never bring a fuel-burning generator into the greenhouse or a connected shed. After a storm, check for bent supports, broken glazing, and frozen vents from a safe position before resuming normal operation.
Products That Help
For small film tears, Greenhouse Megastore Poly Patching Tape GF-PPT-02NL is a 2-inch-wide, 108-foot roll of UV-resistant tape intended for polyethylene greenhouse covers. It is a targeted repair purchase, not a substitute for failing frame supports. Where a whole polyethylene skin needs replacing, Greenhouse Megastore 6mil Standard Clear Greenhouse Film GF-6MC-1255 is a UV-resistant 6-mil film; confirm the greenhouse dimensions, anchoring method, and the retailer’s warning about direct contact with PVC piping before ordering.
ThermoWorks ThermoDrop TX-5300-WH is a compact min/max thermometer with a published range from -13°F to 122°F, useful for checking the lowest temperature reached inside the greenhouse. Its product page lists a $25 price as of October 2026. Check the current product listings and fit before buying any of these items. A thermometer cannot replace heating, and tape cannot repair structural snow damage.
Frequently Asked Questions
These answers cover issues that appear once the structure is ready, including winter crops, insulation placement, and unexpected warm days.
Can I Grow Vegetables in an Unheated Greenhouse?
Yes, if you choose crops suited to the winter light and temperature at your location. Cold-tolerant greens may survive conditions that would kill tomatoes or peppers, but low light can greatly slow new growth. An unheated cover mainly modifies exposure and the daytime microclimate; it should not be treated as guaranteed freeze protection. Check local extension planting guidance and measure the greenhouse’s overnight minimum before committing valuable seedlings.
Should I Insulate Every Greenhouse Panel?
No. Insulation that blocks too much light can work against plants during short winter days. Focus first on damaged seals, known cold spots, and areas that can accept a manufacturer-approved insulating layer without interfering with vents or drainage. Greenhouse Energy Conservation Checklist from UMass Extension discusses double covering and interior bubble-lined walls as options, but the best approach depends on glazing, light needs, and whether the greenhouse is heated.
What if My Greenhouse Gets Hot on a Sunny Winter Day?
Vent it when interior conditions exceed the needs of your plants, even if the outside air is cold. Solar heating can produce a temperature spike while the ground is still frozen. Watch the actual plant-level temperature rather than deciding solely from the season. Open the intended roof or side vents as conditions allow, then close or adjust them before nighttime temperatures drop; an automatic opener must remain free of snow and ice.
Can I Leave Empty Pots and Potting Mix Inside?
Clean, dry pots can be stored inside if they do not obstruct vents, walkways, or inspection access. Remove old diseased media and contaminated debris rather than recycling them into seed-starting trays. Unopened bags of potting mix should be kept off wet floors according to the manufacturer’s storage guidance. Once the greenhouse is empty of growing crops, label stored supplies and retain a clear path to the water shutoff and electrical disconnect.
Final Thoughts
The most useful final check for how to winterize a greenhouse is a trial run on an ordinary cold night before the first serious storm. Compare the thermometer’s overnight minimum with the needs of your least hardy plant and check the glazing for fresh condensation the next morning. If the greenhouse is colder or wetter than planned, change the crop plan or arrange qualified repairs before investing in more insulation. A sealed shell without reliable temperature control is still not a safe winter home for tender plants.