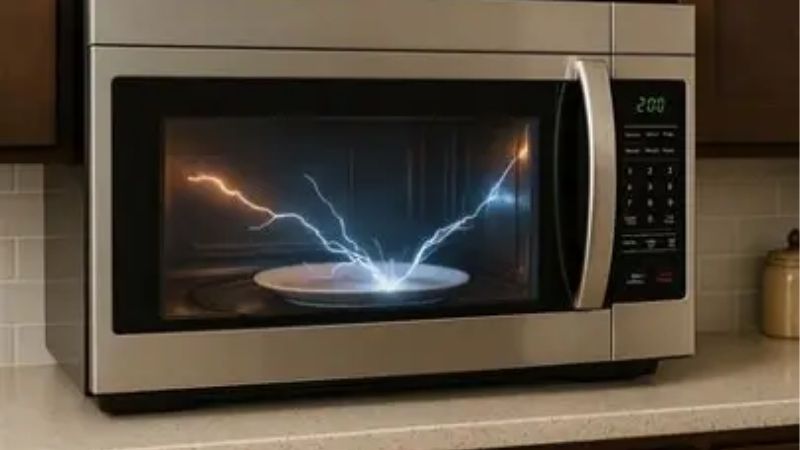
A flash inside your microwave is usually electrical arcing, not a normal cooking effect. The most common triggers are metal or metallic trim, burned-on food, an incorrectly installed rack, or a damaged interior surface. If you are asking why is my microwave sparking, press Stop immediately. A brief flash is a reason to inspect the appliance, not a reason to finish the cooking cycle. GE Appliances warns that repeated arcing can seriously damage the oven cavity.
Quick Answer: Turn the oven off, unplug it when safe, and let everything cool. Remove inappropriate cookware and look for residue or visible damage without opening the outer cabinet. Clean only intact, accessible surfaces. If sparks recur, the waveguide cover is burned, paint is peeling, or the door is damaged, stop using the microwave and contact qualified service.
As an Amazon Associate we earn from qualifying purchases.
By DIY Ideas 4 Home Editorial Team
Why Your Microwave Is Sparking: Common Causes
Microwave ovens have metal interior walls by design, but loose pieces of metal, concentrated food residue, or damaged surfaces can disturb the electromagnetic field and produce a visible arc. GE Appliances’ article “Microwave – Arcing In Cavity” identifies several common culprits, while Maytag’s “5 Reasons Why Your Microwave Might Be Sparking” emphasizes cookware, spills, and internal components. The location and timing of the spark help narrow the possibilities.
| Symptom or Sign | Likely Cause | First Check | DIY or Pro |
|---|---|---|---|
| Flashes near a plate or wrapper | Fork, foil, metallic trim, or twist tie | Examine the food container after stopping power | Remove unsafe items if no oven damage |
| Flash comes from a stained wall or ceiling | Carbonized grease or food splatter | Inspect the cooled interior and door frame | Gentle cleaning only if surfaces are intact |
| Sparks next to a supplied metal shelf | Rack incorrectly seated or support damaged | Consult the model’s rack instructions | Reposition only as directed; service if supports are broken |
| Arc comes from a small side-wall panel | Soiled or burned waveguide cover | Look for scorch marks without removing the cover | Service when damaged; do not operate with cover missing |
| Sparks even with suitable cookware | Cavity damage or an internal fault | Inspect for peeling coating, holes, or damaged door | Stop use; qualified inspection or replacement |
| Brief flash only with certain vegetables | Food-related arcing influenced by moisture and composition | Compare the food and cooking method | Adjust food preparation after confirming an intact cavity |
Metal Utensils, Foil, and Metallic Trim
A forgotten spoon, the wire tie on a food bag, or a gold-trimmed plate can create a bright arc near the object. GE Appliances specifically names metal pans, poultry pins, twist ties, and metallic decorative dishes as triggers. Thin or crumpled foil is especially troublesome when its edges stick up or reach a wall. If the flash happened while reheating food in a package, examine the entire wrapper; a small hidden fastener matters more than the size of the container.
Do not infer that all manufacturer-supplied metal shelves or all foil are automatically unsafe in every cooking mode. Combination microwave-convection ovens have specialized instructions, and some owners’ manuals permit tightly controlled uses. Those exceptions are model-specific; ordinary microwave reheating is simpler with cookware explicitly labeled microwave-safe. If a utensil struck or scorched the cavity, removal alone does not settle whether the oven is still safe.
Burned Food Splatter and Greasy Residue
Spilled sauce or fat can bake onto the floor, ceiling, waveguide area, or joint near the door. Repeated heating may carbonize that deposit, leaving dark material that contributes to arcing. LG USA’s “How to Prevent Sparking” support guidance identifies food crumbs and overcooked residue among the causes. This is especially plausible when the flash appears repeatedly in one dirty spot rather than following a particular plate from side to side.
Distinguish removable soil from damage underneath it. A brown patch that wipes away with a damp cloth suggests food residue. A pit in the metal, a hole, lifting cavity paint, or an area that continues to spark after cleaning suggests something more serious. GE Appliances does not offer an approved consumer repainting method for its microwave cavity coating. Do not cover a damaged area with household paint, foil, adhesive, or a peel-and-stick patch.
Misplaced Rack or Broken Shelf Supports
Some over-the-range or combination microwaves include a metal shelf specially positioned on insulating supports. In its April 2025 troubleshooting guide, LG says supplied racks must rest correctly on all four support brackets. A rack touching the wall, sitting upside down, or relying on a cracked plastic support can create the conditions for arcing. GE also cautions that shelves should be used only as the specific model’s cooking instructions allow.
If the microwave came with a shelf, identify its purpose from the owner’s manual before reinstalling it. A shelf borrowed from another oven is not equivalent to the original part. Even if it fits physically, it may alter spacing and contact points. If a bracket has melted or the cavity around it is burned, stop there and arrange service. Do not improvise a plastic spacer or bend the rack into a new position.
Waveguide Cover or Interior Coating Damage
The thin, cardlike panel visible inside some microwave cavities is commonly a mica waveguide cover, not shipping packaging. GE’s support article “Microwave – Cardboard on Side of Cavity Wall” says it protects the area that feeds microwave energy into the cavity and should not be removed. A cover splattered with food can sometimes be gently cleaned according to the model manual; a charred, cracked, missing, or deeply scorched cover requires service before the appliance is used again.
Arcing can also damage the protective finish on the metal cavity. GE distinguishes a minor stable chip from actively peeling paint, but it instructs consumers to discontinue use and replace its microwaves if coating is actively flaking or there is a hole through the wall. The practical distinction is not whether the mark looks small in a photograph; it is whether the manufacturer considers that type of damage repairable for the exact model. Never sand the lining or use generic microwave cavity paint without explicit manufacturer approval.
Food Effects, Empty Operation, or Electrical Faults
Occasionally the food itself seems to flicker. GE’s arcing guidance names green beans and carrots as examples where moisture, toppings, and food composition can contribute to sparking. Covering the food or adding an appropriate amount of water may resolve this food-specific effect, provided the oven has been inspected and shows no damage. Do not treat recurring wall sparks, crackling at the control panel, or burning smells as food effects merely because vegetables were in the dish.
Running a microwave empty is another avoidable risk: there is no normal food load to absorb the energy. LG warns that operating with an empty cavity may scorch it. Finally, persistent sparks without metal or debris can reflect a component or cavity fault that cannot be diagnosed from the viewing window. Internal electrical tests are not a homeowner troubleshooting step. An arc that continues despite correcting simple external causes belongs with a service professional.
How to Troubleshoot a Sparking Microwave Safely
The goal is to identify an external, correctable cause without defeating a safety feature or exposing high-voltage components. GE Appliances’ “Microwave Do-It-Yourself Repair Recommendations” explains that the capacitor can retain a hazardous charge after the cord is unplugged, which is why GE advises against consumer microwave repairs. Limit the following steps to stopping the unit, inspecting the accessible cavity, cleaning undamaged surfaces, and deciding whether to seek service.
Step 1: Stop Cooking and Check for Fire
Press Stop or Cancel at the first visible arc. If sparks are accompanied by smoke or flames, keep the door closed. The U.S. Fire Administration advises switching the oven off, unplugging it if safely possible, and not reopening the door until the fire has gone out. If a fire is spreading, evacuate and call 911 from a safe place. Do not throw water into the appliance or open the door to inspect the flames.
With no active fire, allow the dish and oven to cool, then disconnect power before cleaning or close inspection. A hot container can cause a burn even when the electrical problem has stopped. If flames occurred, do not restart the microwave afterward; USFA recommends having it checked. Take a photograph of visible damage from outside the cavity if you need to describe the incident to a technician or the manufacturer.
Step 2: Remove Inappropriate Cookware
Once the oven is off, cool, and safe to access, remove the cooking item and examine it under ordinary kitchen lighting. Look for foil corners, metal staples, decorative metallic stripes, twist ties, silverware, or a takeout container with a hidden metal rim. Replace the container with plain, microwave-safe glass or ceramic, not another unfamiliar package. Discard any scorched food or damaged disposable container rather than trying to salvage it.
Use the microwave’s own manual to check rack permissions and cooking modes. Convection settings on a combination unit are not interchangeable with microwave-only operation. If a shelf is installed improperly but its supports and the cavity are intact, follow the manufacturer’s instructions to remove or reseat it. A loose or melted support is a stop-use condition, not a reason to add an improvised bracket.
Step 3: Inspect the Cavity and Door Without Disassembly
With the power disconnected, check the floor under the glass turntable, roller area, side walls, ceiling, and accessible door-facing surfaces. Look for crumbs, hard brown food deposits, scorched mica, flaking coating, rust, pits, or holes. The waveguide cover may resemble cardboard; leave it attached. Do not unscrew the outer case, remove the inner ceiling service cover, bypass the door interlock, or probe the appliance with a meter.
Check that the door closes squarely and that its hinges, latches, and seals are undamaged. The U.S. Food and Drug Administration’s “Microwave Ovens” guidance specifically advises against operating an oven with a bent, warped, or damaged door or one that does not close firmly. A damaged door is not something to confirm by running a cooking test. If you find a cavity hole, lifting paint, a missing waveguide cover, or suspect door damage, skip the remaining operating checks and contact the manufacturer.
Step 4: Clean Only Intact, Accessible Surfaces
If you see ordinary baked-on splatter with no sign of component or cavity damage, gently clean it using a damp cloth or a sponge with mild dishwashing liquid. GE Appliances’ “Microwave – Cleaning Recommendations” also allows baking soda and water on its painted or stainless microwave interiors. Wipe residue from the door frame and the area beneath the turntable without flooding vents or spraying cleaner into controls. Use a soft, nonabrasive tool and dry the area before considering further use.
GE describes a softening technique for otherwise serviceable ovens: heat one cup of water for three minutes, let it stand another five minutes, and then wipe the loosened soil away. That is a routine cleaning technique, not a safe first response to unidentified sparks. Do not heat water to steam-clean a microwave that has visible arcing damage, a burned cover, or an unexplained fault. GE also warns against oven cleaners, abrasive compounds, ammonia, and bleach inside microwaves. Never scrape burned spots with steel wool or abrade the protective finish.
Step 5: Decide Whether a Limited Recheck Is Appropriate
Only consider a brief recheck if the oven is visibly intact and you have identified and removed a clear external trigger, such as a metal twist tie or loose food debris. LG USA’s April 2025 support procedure describes placing an eight-ounce cup of water inside and running a timed cook for 30 seconds as a limited post-inspection check on an undamaged unit. Stay beside the appliance and stop immediately if any sparking, smell, or unusual noise returns. Do not run it empty.
A clear result does not certify a microwave that has a compromised door, scorched waveguide cover, peeling paint, or hidden damage. If the cause was uncertain, the original event was severe, or any visible component was burned, skip the test and seek qualified service. Likewise, if the oven heats inconsistently, trips a breaker, smells electrical, or sparks with several appropriate dishes, stop using it. A professional may advise replacement rather than repair, especially when the cavity itself has been damaged.
Products That Help
For ordinary cooking after the appliance is confirmed safe, the Pyrex 2-Cup Measuring Cup, SKU 6001075, is a concrete alternative to a metal-trimmed mug; Pyrex’s product page identifies its glass as microwave-safe. The Scotch-Brite Dobie All Purpose Cleaning Pad, 3M ID B00042930, is designed for cleaning inside microwaves according to 3M’s product description. Use it gently on intact surfaces with mild detergent, and stop if the finish appears damaged rather than scrubbing harder.
A Nordic Ware 10 Inch Deluxe Plate Cover, SKU 65004, can reduce splatter during later reheating; Nordic Ware’s product page identifies it as a microwave plate cover. Check the cover’s instructions, ventilation clearance, and fit before buying. These accessories help prevent common triggers but do not repair a waveguide, door, magnetron, or damaged cavity. If the appliance needs professional evaluation, spend money on inspection or an appropriate replacement rather than masking the symptom with cleaning products.
When to Call a Pro
Stop using the microwave and arrange manufacturer-authorized service if arcing recurs with microwave-safe cookware, the rack supports are melted, the waveguide cover is scorched or missing, or you notice electrical odors or abnormal sounds. Seek a replacement decision rather than a home patch if the metal cavity has a hole or its coating is actively peeling; GE Appliances expressly regards those conditions as non-repairable on the microwaves described in its cavity-damage guidance.
Microwave repair is different from replacing an ordinary kitchen lightbulb. GE explains that internal high-voltage circuitry can remain dangerous after unplugging, and FDA guidance treats damaged door seals and interlocks as safety concerns. Do not remove the outside case, discharge a capacitor, substitute an electrical component, or run an oven with its door safety switch defeated. Ask for a model-specific repair assessment and compare the quoted cost with replacement if the unit is older or repeatedly arcs.
Frequently Asked Questions
These distinctions help you judge whether a flash is tied to a particular food or container, or whether the appliance itself needs to be taken out of service. Visible arcing is not something to ignore simply because it stopped after a second.
Can a Microwave Spark Without Metal Inside?
Yes. LG and Maytag describe sparks caused by carbonized food residue, damaged internal surfaces, or appliance faults, even when there is no spoon or foil in the dish. GE notes that some vegetables may produce brief food-related arcing. The right response is still to stop and inspect. If you cannot identify a harmless and removable trigger, especially if the arc comes from a wall or cover, have the oven checked before reuse.
Is a Small Spark Enough to Ruin a Microwave?
Not necessarily, but size alone cannot tell you whether damage occurred. A flash from a forgotten twist tie may leave the cavity intact, while a short arc against already-damaged coating can make matters worse. GE says minor stable chips do not automatically impair its microwave performance, but holes and actively peeling coating warrant discontinuing use and replacement. Check the manufacturer’s model-specific guidance instead of relying on a quick visual guess.
Should I Remove the Cardboard-Looking Cover?
No. GE identifies that piece as the mica waveguide cover, a working component rather than packing material. The company advises that the microwave must not be operated without it and that removal requires service to restore it. You may carefully wipe an undamaged cover only if the owner’s manual permits it. If it is blistered, punctured, missing, or visibly charred, leave it alone and contact authorized service.
Can I Keep Using the Oven After a Microwave Fire?
No. The U.S. Fire Administration advises keeping the door closed during a fire and not using the microwave again until it has been checked. Heat may affect components that are not visible from the doorway, even after the flame dies out. A fire, persistent smoke smell, melted parts, or a cavity hole changes the situation from ordinary cleaning to a safety assessment. Ask the manufacturer whether servicing or replacement is appropriate for that exact model.
Final Thoughts
If your microwave flashes during cooking, start with the obvious and safest checks: stop it, inspect the cookware after everything cools, and look for splatter, rack contact, or visible damage. A removable metallic item or ordinary dirt may explain a single incident in an otherwise intact oven. A burned waveguide cover, damaged door, peeling cavity finish, recurring arcing, or any fire is a different category. Follow the model manual and arrange qualified service rather than attempting an internal repair. Buy a microwave-safe glass container or splatter cover only when the appliance itself has been judged safe to use.