Key takeaways
- Cut a scrap of shelf liner to fit each drawer bottom before adding trays. It kills rattle and stops trays from sliding when drawers close hard.
- Label the drawer face, not just the bins. A strip of painter’s tape and a marker is enough while you’re still tuning the layout.
- Load heavy drawers low. A top-heavy rolling chest can tip when you pull a loaded drawer out on an uneven floor.
- Do a five-minute reset at the end of every session. Ongoing upkeep beats another full teardown in six months.
A tool chest fills up the same way a junk drawer does: one rushed project at a time. You drop the ratchet back in, toss the loose bits on top, and six months later you’re digging through a shifting pile of steel to find a 10mm. The fix isn’t buying a bigger chest. It’s deciding, once, where every tool lives, then making the drawer physically enforce that decision.
This guide walks through the approach I use on my own rolling chest: emptying and sorting by workflow rather than by tool type, assigning drawers based on how often you reach for something, and using dividers and magnetic holders so tools return to the same slot without thinking about it. You’ll also get a realistic sense of which organizing gear earns its keep and which just adds plastic to the pile.
Our top picks



As an Amazon Associate we earn from qualifying purchases at no extra cost to you. Ratings are shown as listed on Amazon.
🛒 Best Price Today on Amazon
Prime members get fast, free shipping on everything above, plus member-only deals. New members get a 30-day free trial — cancel anytime.
Start by Emptying Everything Onto a Flat Surface
Pull every drawer completely and lay the contents on a bench or a sheet of cardboard on the floor. This feels like a waste of an afternoon until you see the duplicates. Most home shops surface three tape measures, two identical adjustable wrenches, and a fistful of stripped hex keys. Sort into four piles: keep, repair, donate, toss. Broken or rounded-off tools go straight out, because a stripped 3/8″ socket will absolutely get grabbed again in a hurry and round off a fastener. While the chest is empty, wipe the drawer bottoms and check the slides — this is the only time you’ll ever have easy access to them.
Assign Drawers by Reach Frequency, Not by Category
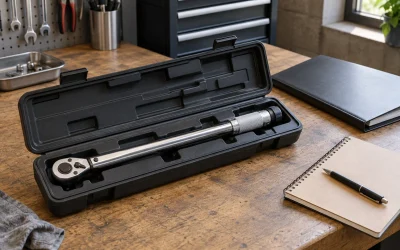
The instinct is to group tools by type: all sockets together, all pliers together, all screwdrivers together. That’s tidy but slow. A better system maps drawers to how often your hand goes there. Waist-height drawers are prime real estate, so they get your daily drivers: the ratchet and common sockets, a driver set, needle-nose and lineman’s pliers, a utility knife, and your tape. Mid drawers hold the second tier — specialty sockets, punches, files, torque wrench. Deep bottom drawers take heavy, rarely used items like a dead blow hammer, pipe wrenches, and pullers, where the weight also helps keep the chest planted.
One rule worth committing to: no drawer should require lifting one tool to see another. If it does, that drawer is over capacity and something needs to move down a tier.
Divide the Drawers So Tools Can’t Migrate
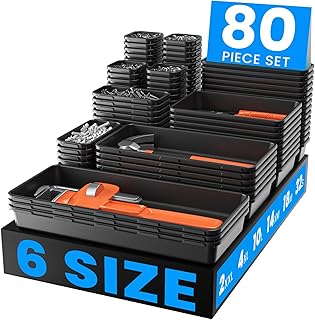
An organized drawer stays organized only if physical walls hold the layout. Modular tray systems are the most flexible option because you build the grid around your tools instead of the reverse. The A-LuGei 69-piece, 5-size divider set is a solid starting point for a mid-size chest, and the 80-piece, 6-size version covers a full rolling cart with enough shapes to fit both long pry bars and tiny bit boxes. If you’re only tackling one or two drawers, the 46-piece set is the leaner buy, and the extra-thick 6-size tray set holds its shape better under heavy hand tools that would flex thinner bins.
Lay the trays out dry before committing. Set your tools in place, shuffle the bin sizes, and only then decide the final arrangement. Leave one deliberately empty bin per drawer as a landing zone for whatever project you’re mid-way through.
Get Sockets Off the Loose Pile
Loose sockets are the single biggest source of drawer chaos, and they’re also the noisiest. Magnetic holders solve both. The EACELIY magnetic socket organizer set covers 1/4″, 3/8″, and 1/2″ drives in SAE and metric, deep and shallow, and holds up to 141 sockets. Because it sticks to the steel drawer bottom or the side of a cart, you can pull the whole rail out to a job and slide it back after. Labeled sizes mean a missing socket is obvious at a glance, which is how you notice it rolled under the car instead of discovering it three weeks later.
Plan for Tools That Leave the Shop
Not everything belongs in the chest. Build a separate grab-and-go kit for work away from the bench so you’re not raiding organized drawers on every trip. The Keter Stack N Rolling three-piece modular system handles this well — weatherproof boxes that lock together on all-terrain wheels with a telescoping handle, so a job’s worth of tools moves as one unit over gravel or a lawn.
Tips
- Cut a scrap of shelf liner to fit each drawer bottom before adding trays. It kills rattle and stops trays from sliding when drawers close hard.
- Label the drawer face, not just the bins. A strip of painter’s tape and a marker is enough while you’re still tuning the layout.
- Load heavy drawers low. A top-heavy rolling chest can tip when you pull a loaded drawer out on an uneven floor.
- Do a five-minute reset at the end of every session. Ongoing upkeep beats another full teardown in six months.
Frequently Asked Questions
Foam inserts or plastic trays?
Custom-cut foam looks sharp and makes missing tools obvious, but it locks you into one layout and wastes vertical space in deep drawers. Plastic trays are cheaper, hold more per drawer, and can be rearranged when your tool collection changes. Foam suits precision sets; trays suit general shop work.
How do I keep drawers from becoming catch-alls again?
Give every tool one defined home and keep one empty bin per drawer for in-progress work. Chaos usually starts when an item has no assigned spot, so it gets set down wherever there’s room.
Should I organize by project instead of by tool type?
It works well if your work is repetitive. A dedicated bicycle or small-engine drawer saves real time. For general home repair, frequency-based drawer assignment is more efficient.
How much drawer space should I leave open?
Aim to fill roughly 80 percent. That leaves room to absorb new tools without triggering a full reorganization.
Conclusion
A well-organized tool chest isn’t about looking good with the drawers open — it’s about cutting the seconds between wanting a tool and holding it. Empty it out, sort honestly, assign drawers by how often you reach for them, and let dividers and magnetic holders do the enforcement. Spend one afternoon on it and a five-minute reset per session, and the system will still be intact next year.