A torque wrench that reads 10 percent high leaves your lug nuts under-tightened; one that reads 10 percent low stretches head bolts past yield. Neither failure announces itself. Click-type wrenches drift with use, with being dropped, and with being stored wound up to 80 ft-lb for a year, and a hobby wrench that has sat in a drawer for five years may be off by 10 to 15 percent against a factory promise of plus or minus 4. A home check with a known weight and a tape measure will not match a certified lab, but it catches anything worse than about 3 percent error.
What You Need
| Item | Why | Optional? |
|---|---|---|
| Bench vise with soft jaws or wood blocks | Holds the drive head rigid and horizontal so all the force goes into the beam | No |
| Known weight, 10 to 45 lb (bagged shot, dumbbell plates, water jug on a scale) | Provides a measured downward force at a measured distance | No |
| Bathroom or kitchen scale accurate to 0.1 lb | Verifies the actual weight; plates are often 2 to 5 percent off their stamp | No |
| Tape measure and fine marker | Measures from the center of the drive square to the point where the weight hangs | No |
| Rope or strap with a loop | Hangs the weight from the handle without slipping | No |
| Socket or extension to fit the drive | Gives the vise something to clamp without crushing the ratchet head | No |
| Digital torque adapter, plus or minus 2 percent | A cross-check on the hanging-weight method; the ATsafepro 7-147 ft-lb adapter runs about $11.85 | Yes |
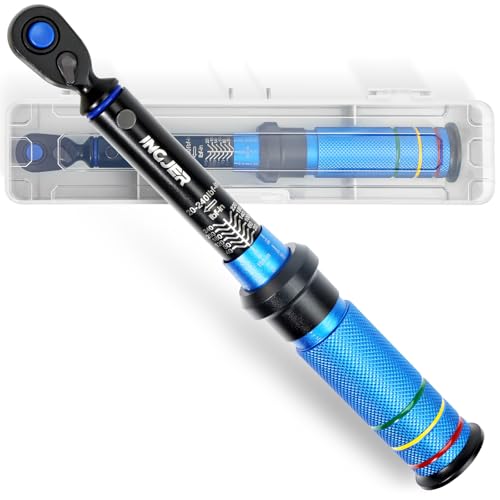
| Small-scale wrench for cross-reference | A 1/4 inch mini wrench such as the INGJER 20-240 in-lb at about $15.29 covers low values a 1/2 inch wrench cannot | Yes |
Step-by-Step
Step 1: Find the wrench’s true pivot and measure (5 minutes)
Torque is force times distance measured from the center of the drive square, not from the end of the head. Lay the wrench on the bench and mark the center of the square drive on the side of the head. Then mark the point on the handle where the strap will hang, ideally at the center of the grip where a hand would apply force. Measure between the two marks to the nearest 1/16 inch. On a typical 1/2 inch drive wrench that is 18 to 22 inches; on a 3/8 inch wrench, 12 to 15 inches.
Our top picks

As an Amazon Associate we earn from qualifying purchases at no extra cost to you.
Step 2: Weigh your test load (3 minutes)
Put the weight on the scale and write down the reading. Include the strap or rope in the weigh-in since it hangs too. For a 1/2 inch wrench, 25 to 40 pounds at 20 inches gives you 42 to 67 ft-lb, right in the range most car work uses. For a 3/8 inch wrench, 10 to 15 pounds at 13 inches gives 11 to 16 ft-lb.
Step 3: Mount the wrench horizontally in the vise (5 minutes)
Insert a socket or a short extension into the drive and clamp the socket, not the wrench head, between wood blocks in the vise. The handle must be level; a 5 degree tilt introduces about 0.4 percent error, and a 15 degree tilt about 3.5 percent, so check it with a small level. Set the ratchet direction so the weight will pull in the clockwise (tightening) direction.
Step 4: Calculate and set the expected torque (2 minutes)
Multiply the weight by the distance in feet. Example: 30.2 pounds hanging 20.5 inches from the drive center is 30.2 x (20.5 / 12) = 51.6 ft-lb. Set the wrench to exactly that value. On a micrometer-style click wrench, unlock the collar, dial to 51.6 (or as close as the scale allows), and relock it.
Step 5: Hang the weight and listen (5 minutes)
Loop the strap over your handle mark and lower the weight on gently; dropping it adds a shock load that will click almost any wrench. If it clicks with the full weight hanging, the wrench reads low; if not, it is accurate or reads high. Adjust the setting down in 1 ft-lb steps, re-hanging each time, until the click just occurs. That setting is what the wrench actually delivers at 51.6 ft-lb of real torque.
Step 6: Compute the error and repeat at two more points (15 minutes)
Error percent = (wrench setting at click minus actual torque) divided by actual torque, times 100. If the wrench clicked at 55 when true torque was 51.6, it reads 6.6 percent high, meaning it under-tightens. Repeat the test near 20 percent and 100 percent of the wrench’s range by changing weight or hanging point, since click wrenches are often accurate at mid-range and off at the ends.
Step 7: Adjust or record a correction (10 minutes)
Many click wrenches have an internal adjuster: remove the end cap at the handle and turn the small nut on the spring 1/8 turn, then retest. If there is no adjuster, write the correction on a label under the handle, such as “reads 6% high; set 47 for 50.” As a final cross-check, tighten a bolt through a digital torque adapter until the wrench clicks; agreement within 2 to 3 percent is as good as home calibration gets.
Mistakes to Avoid
Measuring from the end of the head instead of the drive center adds 1 to 2 inches and 5 to 10 percent error. Clamping the wrench body itself can bend the beam or crush the tube. Using an unweighed dumbbell that says 25 lb but weighs 26.1. Jerking the weight onto the strap. Testing only at one point. Forgetting to wind the wrench back to its lowest setting after you finish, which is the single biggest cause of drift in storage.
How Often
Check a home-garage wrench once a year, after any drop onto concrete, and after roughly 5,000 clicks, which for most hobbyists is several years. Check it before a job where torque matters most, such as head bolts, brake caliper brackets, or aluminum wheels. A wrench bought in 2026 should arrive with a factory certificate; log that value and compare your home result to it as a baseline.
When to Call a Pro or Replace
Professional calibration services charge $40 to $100 per wrench and issue a certificate traceable to national standards, which matters if you do work for others or need documentation. Send a wrench out when your home test shows more than 5 percent error and internal adjustment does not bring it in, when the click has become mushy or inconsistent between pulls, or when the ratchet head has visible play. Replace rather than repair when the wrench costs under $50; a new click wrench in that range is cheaper than one calibration, and a digital adapter for about $12 gives you a second opinion on the new one.
FAQ
How accurate is the hanging-weight method?
With a scale accurate to 0.1 lb and a tape measured to 1/16 inch, the method itself is accurate to about 1 percent. Your ability to detect the exact moment of the click adds another 1 to 2 percent. That is good enough to confirm a wrench is within its rated 4 percent.
Can I calibrate a digital torque wrench the same way?
Yes, and it is easier because the display shows the reading directly rather than requiring you to hunt for the click point. Most digital wrenches also have a calibration menu; check the manual before hanging weights.
Why does my wrench read differently clockwise and counterclockwise?
Most click wrenches are only calibrated in the clockwise direction. Counterclockwise readings can be off by 10 percent or more by design. Do not use a click wrench to torque left-hand-thread fasteners unless it is rated bidirectional.
Should I store the wrench at zero?
Store it at the lowest marked setting, not below it. Winding fully to zero can unload the spring entirely and let internal parts shift, while leaving it at 80 ft-lb keeps the spring compressed and accelerates drift.