Key takeaways
- Keep similar wood parts in the right position with a part register, orientation marks and a dry-fit photo before furniture assembly.
What's inside
Give every part its own identity before the pieces leave your bench layout. Record where it belongs, which face should show and which edge points toward the front. A useful label answers those three questions without relying on memory or on two panels looking slightly different in the light.
Separate size from identity
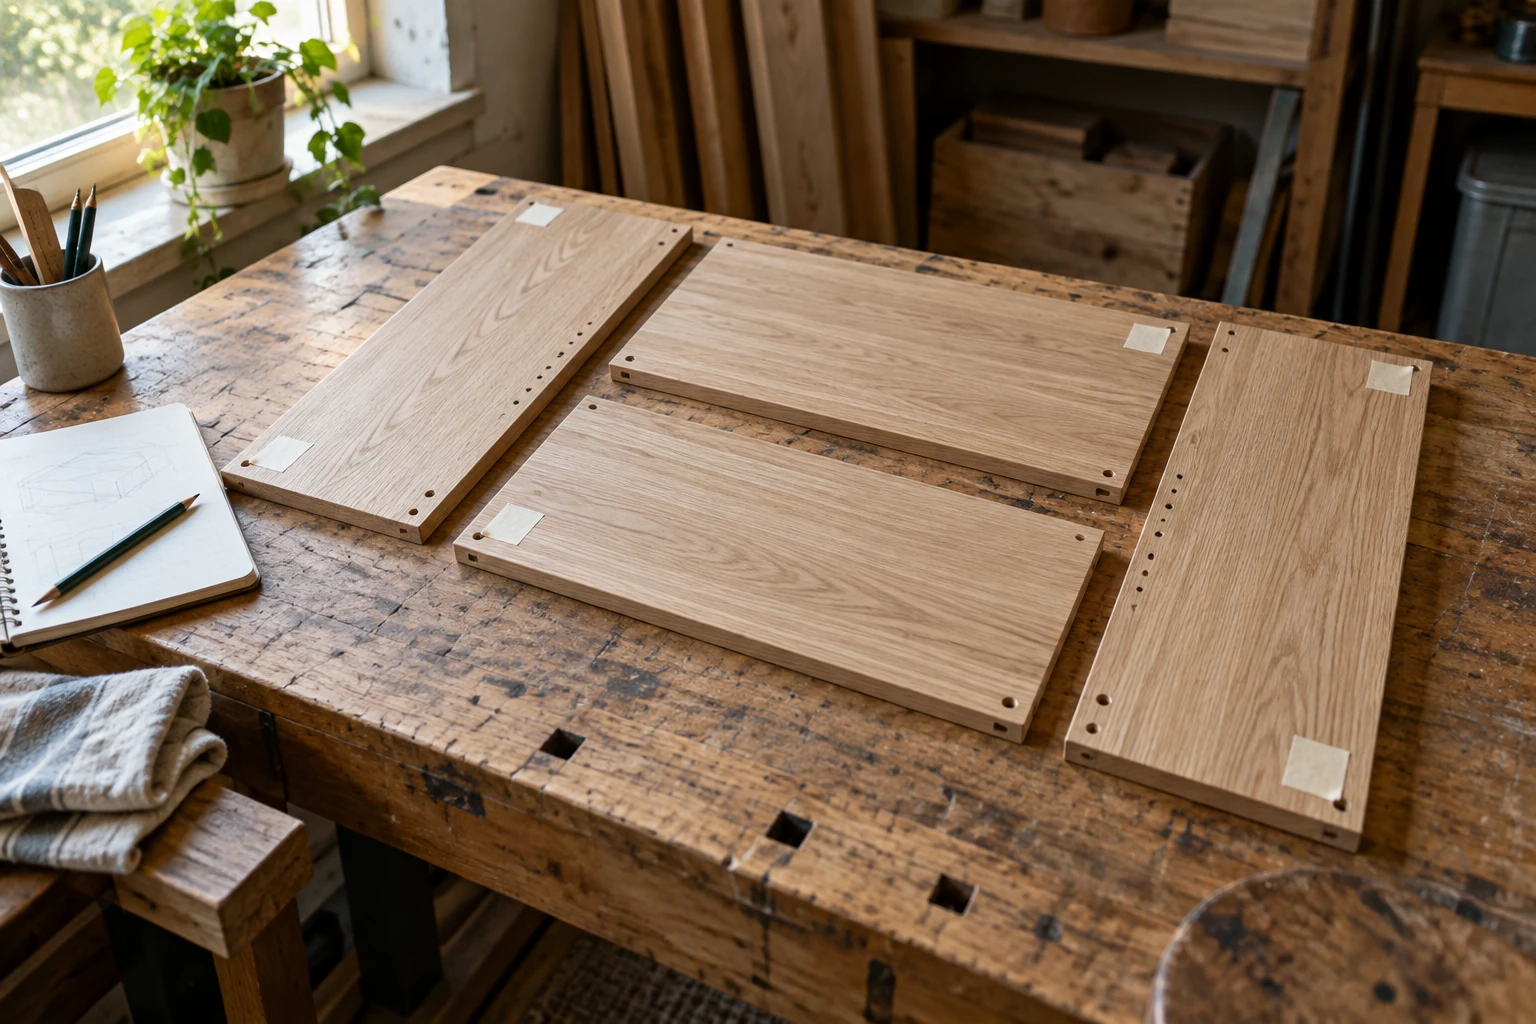
Two side panels may have the same dimensions but different jobs. Shelf-pin holes, edge treatment or the chosen grain face can make them a left and right pair rather than interchangeable blanks. Keep their shared size on the cut list, then assign individual position labels in a separate register. This also helps when you pause a project and return a week later.
Choose one viewing direction and draw it on a small sketch. For a cabinet, you might define left and right while standing in front of the finished opening. Write that convention down. Do not let one helper label from the front while another works from behind, because both can write a perfectly reasonable but conflicting letter.
If dimensions are still changing, finish the cabinet cut-list calculation first. A position label cannot resolve an incorrect panel size or an undecided joint.
Make a compact part register
| ID | Location | Orientation note | Check before assembly |
|---|---|---|---|
| C1-L | Left side, viewed from front | Chosen outer face identified | Front edge and hole pattern |
| C1-R | Right side, viewed from front | Chosen outer face identified | Mirror relationship to C1-L |
| C1-T | Top | Front edge identified | Overhang or between-side position |
| C1-B | Bottom | Upper face identified | Joint position on sketch |
The IDs here are a suggested filing system, not an industry standard. Use whichever short names your project needs, provided each one appears on both the physical part and the drawing. If you are building several matching units, include the unit number. Four parts called only “left” are still easy to mix up.
Choose marks that survive the next step
Test any removable label on scrap or an inconspicuous appropriate surface first. Adhesives and writing can affect appearance or finishing. Keep labels away from bonding areas, hardware seating surfaces and locations where they could interfere with workholding. Never assume a marker will disappear beneath stain or that adhesive residue will be harmless.
A label that will be removed during sanding needs a backup: a photograph, register entry and a clearly identified reference point that you can restore afterward. If a part has already received a factory finish, follow its care instructions rather than experimenting with solvents to remove a stubborn sticker.
Woodcraft describes the traditional triangle marking system: align the parts in their intended relationship, then use connected marks to help recover their orientation. That is a useful option when the material and next operations allow it. For a beginner project, an explicit part ID plus a sketch may be easier to read. Do not combine several marking conventions without a key.
Use a dry layout as a checkpoint
Arrange the pieces according to the project instructions without applying glue or forcing joints. Photograph the layout from the defined front, with the IDs visible. Include a second view if the important feature is underneath. The photo should show relationships, not just a pile of lumber with attractive grain.
In a hypothetical cabinet, both side panels are the same size, but only their intended inner faces have shelf holes. The check is therefore not merely that C1-L is on the left. Confirm that its holes face inward, its designated front edge faces the opening and its top agrees with the drawing. Repeat the same checks for C1-R. This catches rotation as well as swapping.
Have another person use the register to identify one part without coaching. If they must ask what a mark means, improve the key now. This is particularly valuable when assembly instructions contain an underside view that reverses what you see at the bench.
Record changes instead of recycling labels
When a panel is remade, retire the old ID or add a revision suffix. Mark the register to explain which piece is usable. Keep rejected or unfinished parts physically separate so an attractive but incorrect spare does not return to the assembly stack.
Before assembly, check the part count, orientation, drawing revision and required hardware. Remove labels only when their information is no longer needed and removal will not disrupt the specified process. Keep the final layout photo with the project notes; it can help identify components during later maintenance without pretending to replace the actual construction instructions.