Key takeaways
- Build an adhesive timeline that separates assembly, clamping, later work, finishing, and use without guessing a universal cure time.
Plan a glued project around several separate milestones: assembly, clamp removal, later work, and intended use. A bottle’s short working time and its longer waiting instructions answer different questions. Put each instruction beside the task it controls before reserving a weekend or promising a finished piece.

Start with the exact adhesive and joint
Record the full product name, the materials being joined, and the directions supplied with your bottle. A woodworking glue, construction adhesive, and instant adhesive do not share one schedule. Check that the product is suitable for the intended joint and conditions before using its timing information. This planning sheet does not establish the strength of a furniture repair or approve a load-bearing assembly.
For context, Titebond’s wood-glue FAQ distinguishes clamp time from the time before stressing a joint. Its guidance for most of its wood glues gives shorter clamping for unstressed joints, longer clamping for stressed joints, and a separate minimum wait before stressing a new joint. Those are manufacturer-specific instructions, not a universal countdown for every adhesive.
Give each clock its own row
Copy the manufacturer’s wording rather than translating every time into “dry.” If an instruction uses a term you cannot confidently interpret, ask the manufacturer before scheduling the dependent task. Keep any stated temperature, humidity, material, or application conditions with the time; an isolated number loses that context.
| Stage | What to enter | Task that must wait |
|---|---|---|
| Open or assembly time | Exact product wording and start point | Positioning the parts |
| Clamping requirement | Duration and joint conditions | Removing required support |
| Machining or sanding | Specific permission or unresolved question | Work on the glued assembly |
| Finishing | Adhesive and finish instructions | Applying the chosen finish |
| Service or loading | Required wait and suitability limits | Putting the piece into use |
Do not fill an empty row with the nearest number. “Clamp for one hour,” for example, does not by itself authorize sanding, painting, or loading after one hour. A dry-looking squeeze-out bead is not a substitute for the product’s directions about the joint.
Rehearse the assembly before the clock starts
Lay out the parts, identify their orientation, and perform an unglued rehearsal appropriate to the project. Confirm that the planned clamps and support can reach the required places. Count the separate joints and decide whether they belong in one assembly or documented stages. Resolve fit problems before adhesive application; a timing chart cannot rescue an assembly that cannot be positioned in time.
Write a short sequence such as “position first pair, align reference edges, fit remaining part, apply required support.” Keep tools and cleanup provisions required by the product directions available. Avoid adding an unrelated repair halfway through because a clamp happens to be free.
Build the calendar backward from the final use
Start with the time you want the piece available. Subtract the documented wait before use, then allocate the preceding tasks and their own waits. Include finishing only when its compatibility and schedule are known. If the resulting start time is unrealistic, move the completion date rather than shorten a manufacturer requirement.
A hypothetical planning example makes the arithmetic clear: if a documented stage requires a 24-hour wait and starts at 3 p.m. Saturday, that stage’s earliest time boundary is 3 p.m. Sunday. It is not Sunday morning simply because the calendar date changed. This example demonstrates elapsed time; it is not a recommended curing period for your glue.
Reserve space as well as time
Mark where the assembly will remain while it waits, which supports are occupied, and which later tasks can proceed independently. You might sort hardware or prepare a separate drawing while leaving the glued work alone. Do not plan to move the assembly merely to reclaim the only clear bench if that movement conflicts with its instructions.
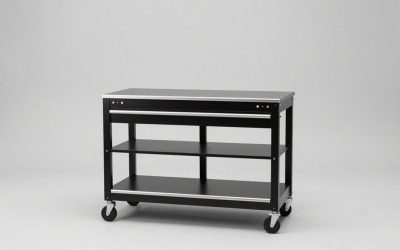
Clamping equipment also needs to match the project. Our workbench vise guide addresses equipment selection; choosing a vise does not settle adhesive timing or replace the required support arrangement.
Use a stop line when conditions change
Add three final fields: actual start time, conditions that differed from the plan, and the next permitted action. If a product requirement was missed or a joint moved unexpectedly, pause and obtain product-specific advice. Do not quietly extend a guessed waiting period and declare the joint reliable.
The completed worksheet should tell another person what is waiting, why it is waiting, and when its next step can be considered. That is more useful than a single sticky note saying “dry tomorrow,” and it leaves unresolved technical questions visible.