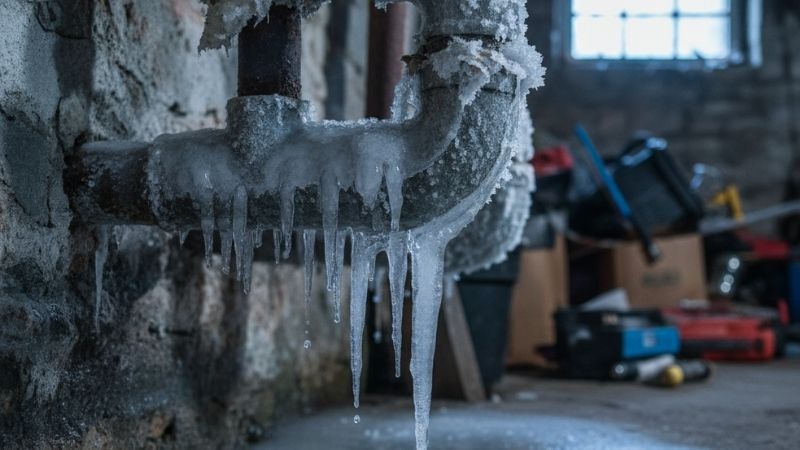
Knowing how to prevent frozen pipes means protecting vulnerable water lines before a hard freeze, not waiting until a faucet stops working. Pipes in unheated garages, exposed crawl spaces, attics, exterior wall cavities, and outdoor faucet connections can lose heat much faster than plumbing surrounded by conditioned indoor air. A good plan keeps warmth around those areas, reduces cold drafts, and gives the household a safe response if the heat or water supply fails.
Quick Answer: Find the most exposed pipes, disconnect outdoor hoses, add appropriately sized pipe insulation, seal cold-air entry points, maintain reliable indoor heat, and open sink cabinets where room air can reach vulnerable plumbing. During especially severe cold, follow your water utility’s guidance on a small cold-water drip from an at-risk line. Learn where the correct shutoff is located and turn off the affected water supply promptly if a pipe splits or leaks.
As an Amazon Associate we earn from qualifying purchases.
By DIY Ideas 4 Home Editorial Team
Before You Start: Find Pipes Most Likely to Freeze
The American Red Cross identifies outdoor supply connections, unheated interior areas, and pipes running along poorly insulated outside walls as frequent freezing trouble spots. Water expands as it freezes and can damage metal or plastic pipes and fittings. Even if a frozen section appears intact, an unseen crack may leak as the ice thaws and normal water pressure returns. That is why prevention should include both temperature protection and a way to stop water quickly.
| Location to Check | Typical Exposure | First Protective Action | What to Watch |
|---|---|---|---|
| Outdoor hose bib or sillcock | Cold air and water trapped by a hose | Disconnect attachments; drain where designed | Drips at the wall or faucet body |
| Garage supply or utility sink | Unheated space and open door drafts | Close garage doors; check pipe coverage | Cold spots at wall and ceiling penetrations |
| Crawl space or unfinished basement | Air leaks, limited heat and bare pipes | Assess insulation and safe air sealing | Wet insulation or visible pipe corrosion |
| Attic plumbing | Little dependable heat around the lines | Arrange suitable insulation or rerouting | Exposed lines outside the insulated envelope |
| Sink against an outside wall | Closed cabinet blocks warm room air | Open doors during severe cold | Reduced flow at the affected fixture |
| Seasonal or empty property | Loss of indoor heat without someone noticing | Use a property-specific heating and water plan | Low temperature or leak alerts |
Understand What a Freeze Warning Means for Plumbing
A forecast below 32°F is a prompt to inspect vulnerable pipes, not a reliable prediction that every pipe will freeze. The risk depends on how long cold weather lasts, whether the line is exposed to outdoor air, whether water is moving, and how much heat reaches the space. A pipe near an exterior opening can be at greater risk than one embedded within a comfortably heated room. Wind can speed heat loss from exposed surfaces, but the wind-chill number is not the actual pipe temperature.
Check the local forecast and watch for repeated nights below freezing, especially when a garage, crawl space, or attic has no direct heat. Do not rely on a universal number of hours until pipes freeze. Instead, treat known exposed lines as higher priority and prepare to inspect them during the coldest part of the event. If a past winter already caused a freeze at a particular fixture, mark that branch as a priority for a permanent repair.
Gather Simple Supplies Without Buying the Wrong Fix
Useful supplies include a flashlight, measuring tape, correctly sized pipe sleeves, compatible seam tape, an outdoor faucet cover, and a written shutoff map. If you use remote temperature or water-leak alerts, confirm they are working before the storm and that someone can act on an alert. These devices are early warnings, not a substitute for keeping a pipe warm. A basic pipe sleeve should fit the actual outside diameter of the line without large gaps at fittings.
Inspect for existing drips, corroded shutoffs, damaged insulation, and open wall penetrations before wrapping anything. Do not cover an active leak with insulation. Avoid dismantling concealed plumbing or attaching electrical heat cable to a pipe without confirming the product is listed and approved for that pipe type, placement, and installation method. For complicated or inaccessible runs, a plumber may recommend moving the water line to a protected location rather than repeatedly applying temporary fixes.
Identify the Water Shutoff Before an Emergency
Find the household water shutoff and, if present, individual shutoffs for outside faucets, laundry connections, irrigation, and garage fixtures. Place a readable label near the valve and make a simple diagram for other people in the home. Test an operable valve only as appropriate for the installation; if it feels seized, leaks, or serves an unknown system, request professional service instead of forcing it. You may need a different valve for a well system or a shared apartment supply.
Before turning off a main valve, confirm whether it affects fire sprinklers, heating equipment, or other safety-critical services. In a burst-pipe emergency, isolate the damaged domestic water line if you can do so safely, then arrange repair. Document the location of the shutoff now; hunting for it while water spreads across a finished floor is much harder. For renters, ask building management who controls the affected supply and how to request emergency assistance.
How to Prevent Frozen Pipes: 8 Practical Steps
Use the first five steps to reduce a pipe’s exposure before the forecast changes. Steps six through eight cover operating the house during the freeze and responding to an unexpected problem. These are protective measures for a normally heated, occupied home. A cabin intentionally left without heat needs a separate, professionally planned draining procedure; simply closing the main valve does not remove water trapped in every line.
Step 1: Disconnect Every Outdoor Garden Hose
Remove hoses, splitters, spray nozzles, irrigation timers, and other accessories from outdoor faucets. Drain the hoses and store them where trapped water will not damage the fittings. Even a frost-free exterior faucet may need a clear outlet so water can drain back from the cold exterior end. Leaving a garden hose connected can defeat that protective design. Check the actual fixture instructions when it includes a vacuum breaker or a special drainage arrangement.
If the home has a separate interior shutoff for an ordinary exterior faucet, close that valve and open the outdoor tap to drain the branch in accordance with the manufacturer’s or utility’s instructions. The American Red Cross recommends this approach for applicable hose bibs before winter. Do not force a rusty valve or assume every faucet is installed the same way. The goal is to avoid water trapped in a cold branch, not simply to hide the fixture beneath a cover.
Step 2: Protect Exposed Pipes in Cold Rooms
Inspect visible hot and cold supply lines in garages, unfinished basements, crawl spaces, and safely accessible service spaces. Fit pipe insulation designed for the line’s material, outside diameter, and environmental conditions. Close the seams, protect the elbows and tees, and follow the product instructions. The U.S. Department of Energy describes continuous coverage of accessible pipe sections and fittings as important for effective pipe insulation. Check any clearance requirements near hot equipment.
Insulation slows heat loss; it does not generate heat. A pipe inside an unheated space can still freeze during prolonged extreme cold or a power outage, even with thick foam around it. If repeated freezes affect the same line, ask a qualified plumber whether the line can be rerouted into conditioned space, better shielded from cold air, or protected with a properly specified, listed pipe-heating system. Never improvise with a household extension cord or heat source around plumbing.
Step 3: Block Drafts That Blow Directly on Pipes
Feel for cold air entering at pipe penetrations, foundation gaps, poorly sealed rim joists, and access doors. Use an appropriate sealant for suitable, accessible openings without sealing required ventilation, combustion air, drainage paths, or electrical equipment. The Insurance Institute for Business & Home Safety recommends closing exterior cracks and gaps as part of winter protection. A small opening that directs outdoor air across a bare pipe may matter more than a large room’s average temperature.
Keep garage doors closed during a freeze if water lines run through the garage or neighboring walls. Replace loose service-door weatherstripping and check insulation that has fallen away from the building envelope. Do not block foundation vents indiscriminately; the correct treatment depends on the foundation’s moisture and ventilation design. Where the home has a sealed, conditioned crawl space, protect it according to that system’s requirements rather than copying a generic basement or vented-crawl-space checklist.
Step 4: Maintain Steady Heat Through Cold Nights
Leave the heating system running during freezing weather and avoid deep overnight temperature setbacks when at-risk plumbing sits against exterior walls. The American Red Cross advises keeping a home at no less than 55°F when going away in cold conditions, and Seattle Public Utilities gives the same minimum guidance for severe cold. Treat 55°F as a baseline household recommendation, not proof that a pipe outside the insulated envelope is warm enough. Some homes require additional localized protection.
Confirm the thermostat, furnace or heat pump, and relevant heating zones are functioning before a storm. Keep supply vents and returns unobstructed and replace air filters when required by the equipment schedule. If one room runs much colder than the others, locate the actual plumbing and heating problem rather than setting an unrelated portable heater beside the pipe. Never leave a portable space heater running unattended as an improvised pipe-protection system.
Step 5: Open Cabinets Serving Exterior-Wall Sinks
Open kitchen and bathroom cabinet doors when an extreme freeze is expected if the cabinets conceal pipes on or near outside walls. This allows more heated room air to reach plumbing that may otherwise sit in a cold, enclosed pocket. Move detergents, cleaning chemicals, and other hazards where children and pets cannot reach them, as the American Red Cross specifically cautions. Keep the surrounding room heated; an open cabinet does not help much if the home itself is getting cold.
Look under the sink while the doors are open. Check for an existing drip at shutoff valves and supply connections, gaps where pipes pass through the wall, or an unusually cold cabinet floor. Report or repair leaks before the storm. In a kitchen with a dishwasher or refrigerator supply routed through an exterior wall, identify those hidden branches too; the sink faucet may not reveal every pipe at risk. Avoid moving or pulling flexible connectors to inspect them.
Step 6: Use a Small Faucet Drip When Recommended
During particularly severe cold, the Red Cross recommends allowing cold water to trickle from a faucet supplied by an exposed, vulnerable pipe. Moving water can reduce freezing risk in some pressurized plumbing systems, and an open faucet can help relieve pressure. Choose a fixture connected to the branch you are trying to protect, confirm that the drain works normally, and follow any local water-utility guidance or emergency conservation restrictions. Do not assume every faucet needs to run.
Seattle Public Utilities cautions against leaving water running in an unoccupied building. A drip is a short-term measure to use when warranted, not a replacement for insulation, heat, or proper pipe routing. It wastes water and may create a problem if the sink drain or waste line is blocked or exposed to freezing. If the household water supply has been intentionally shut off, dripping a faucet will not protect stagnant water remaining in the line.
Step 7: Monitor Vulnerable Areas During the Freeze
During a prolonged cold spell, check the actual spaces where the water pipes are located, not only the central thermostat. If safe and accessible, inspect garage and under-sink plumbing for wet surfaces, frost, unusual noises, or sharply reduced flow. A thermometer in an at-risk service area may show that it is significantly colder than the living room. Check the home periodically after a major overnight temperature drop, especially where repairs or insulation were recently added.
For a temporarily empty heated home, arrange a trusted local contact or reliable monitoring plan that can trigger a prompt response. A temperature alarm can indicate that the heat failed, while a leak sensor near water entry points may detect escaping water. The EPA notes that water-monitoring and leak-detection systems can notify homeowners about abnormal use or moisture, but alerts help only when someone can isolate a leak. If conditions become unsafe, prioritize people over property.
Step 8: Know When to Shut Off Water and Call for Help
If a fixture suddenly produces only a trickle or no water during a freeze, suspect a blocked line, especially if nearby fixtures still work. Inspect only visible, safely accessible sections. If you notice wet insulation, a cracked pipe, hissing, or water spreading from a wall or ceiling, shut off the affected domestic supply immediately if the correct valve is known and safe to operate. Call a licensed plumber. Do not cut into the wall or heat an unknown pipe while a leak is actively developing.
Do not use a blowtorch, charcoal fire, propane burner, or other open flame on frozen plumbing. The National Weather Service and American Red Cross warn against open-flame thawing methods. A separate, detailed guide is appropriate if a pipe is already frozen; this article is about reducing the likelihood of reaching that point. Once weather warms, carefully inspect exposed locations for new moisture or pressure changes, because damage may become visible only when ice melts.
Products That Help
Frost King P11 is a pre-slit, closed-cell polyethylene foam pipe-insulation sleeve sold by the manufacturer in a package of four 3-foot lengths, with a 5/8-inch wall thickness. Its listed fit is for 3/4-inch copper or 1/2-inch iron pipe. Verify the actual pipe’s outside diameter, local installation rules, and temperature compatibility before buying. Use sleeves as one part of a freeze-prevention plan rather than treating the product as protection against any duration of subfreezing exposure.
Frost King FC1 is an oval foam outside faucet cover. The manufacturer markets it to add insulation around an exterior faucet, which may help after the hose is removed and a drainable branch has been prepared correctly. A fitted cover is convenient for a common outdoor connection, but it cannot prevent a freeze in a long uninsulated run inside the wall. Always check how the faucet itself is designed to drain.
Frost King FC2 is a rectangular, plastic-covered faucet protector with foam insulation inside. The harder outer shell may suit homeowners who want added protection from knocks around a faucet. FC1 and FC2 serve similar purposes and are not both required at the same tap. Select either by clearance, attachment method, and fit rather than assuming the rigid version guarantees a higher level of freeze protection under every condition.
Common Prevention Mistakes That Raise Freeze Risk
One frequent mistake is assuming that because the living room thermostat reads 68°F, an unheated garage wall or attic pipe must also be above freezing. Another is focusing exclusively on cold-water piping. Hot-water supply lines in exposed spaces can freeze too when heat is lost. A third is wrapping an active leak in foam so it becomes harder to notice. Fix water leaks, damaged fittings, and cold-air entry before adding protective insulation.
Leaving a hose connected to a frost-free faucet, lowering the heat sharply overnight, ignoring repeated reduced flow, and trusting an uncovered outdoor shutoff all add risk. Do not install a heating cable without following its listing and instructions, do not disable ventilation or fire protection, and do not use an open flame to thaw a suspected blockage. Prevention should reduce exposure and improve response time, not introduce electrical, combustion, or water-damage hazards.
Frequently Asked Questions
These answers address the decisions homeowners most often face when the forecast suddenly turns colder than expected. Because building layouts and local plumbing rules vary, combine general advice with guidance from your water utility or a qualified plumber.
What Temperature Causes Household Pipes to Freeze?
Water can begin to freeze at 32°F, but the outdoor air temperature alone does not establish when a particular indoor pipe will freeze. Duration of exposure, drafts, insulation, pipe location, and available heat all matter. A short dip below freezing may be harmless for protected indoor plumbing, while a longer hard freeze can threaten pipes exposed to outdoor air. Begin protection before the freeze rather than waiting for a specific hour or temperature threshold.
Do Hot Water Pipes Need Protection Too?
Yes. Hot-water supply lines can cool and freeze if they run through a cold, unconditioned space. The Red Cross recommends insulating both hot and cold lines in vulnerable areas. Foam pipe sleeves reduce heat loss, but they do not replace steady building heat. Pay particular attention to a hot-water line crossing a garage, attic, or outside wall, and do not assume intermittent hot-water use will protect the entire run.
Should I Leave Every Faucet Dripping All Night?
No. During severe cold, a small drip may be appropriate at a faucet served by a known vulnerable line, following local utility recommendations. Running multiple taps without a reason wastes water and may create risks where drains are not reliable. The better long-term solution is to insulate exposed lines, maintain heat, eliminate cold-air paths, and repair vulnerable routing. Do not leave water running in an unoccupied building when your utility advises against it.
What If a Faucet Stops Flowing Despite These Steps?
Reduced or absent flow during a freeze can indicate a frozen section, though other plumbing faults are possible. Check nearby fixtures and visible lines without forcing fittings. If there is a visible crack, leak, or other sign of damage, isolate the affected supply and call a licensed plumber. Never use a torch or flame to thaw a pipe. If the blockage is inaccessible or you cannot assess it safely, professional help is the better choice.
Final Thoughts
The most effective freeze-prevention routine starts with locating exposed plumbing, then keeping those areas protected and warm while the weather is severe. Remove hoses, insulate appropriate sections, block cold drafts without compromising ventilation, and keep indoor heating dependable. Opening exterior-wall sink cabinets and using a limited faucet drip can help under the right conditions, but neither is a permanent answer to poorly routed pipes. Keep a shutoff map ready and check for leaks after the cold snap. If the same fixture repeatedly freezes, prioritize a permanent plumbing correction rather than another emergency workaround.