A properly warmed basket can help food start browning as soon as it goes in, but not every appliance needs that extra wait. Learning how to preheat an air fryer starts with checking the instructions for your specific model. Ninja recommends a 3-minute warm-up for several basket models, while Philips says preheating is unnecessary for some Airfryers. The process is straightforward, but the right start signal and cooking time depend on the controls you have.
Quick Answer: If your manual calls for preheating, run the clean, empty cooking basket at the recipe’s temperature until the preheat cycle finishes or the recommended warm-up time passes. Add food afterward and start its full cooking cycle. If the manufacturer specifically says no preheat is necessary, you can load the food first.
As an Amazon Associate we earn from qualifying purchases.
By DIY Ideas 4 Home Editorial Team
Before You Start: Tools, Materials and Safety
There is little setup involved, but preparing the basket correctly matters more than watching a generic countdown. The Instant Pot Vortex recipe library, for example, tells users to wait for an Add Food message, while some Ninja manuals tell users to warm an empty basket with a short timed cycle. Find the procedure that matches the display and heating mode on your machine.
| Tool or Material | Size or Spec | Why You Need It | Substitute |
|---|---|---|---|
| Air fryer manual | Exact model number | Confirms whether preheating is required and how it ends | Manufacturer’s online support page for that model |
| Clean cooking basket | Original basket and crisper plate | Allows normal airflow during the warm-up | Only an approved replacement part |
| Heat-protective mitt | Correct fit for the basket handle | Protects your hand while handling hot components | Dry, suitable oven mitt |
| Food thermometer | Suitable probe for the food | Checks food doneness after cooking | Another calibrated food-safe probe thermometer |
Check Whether Your Model Calls for a Warm-Up
Preheat instructions vary within and between brands. Ninja’s AF100-series guidance recommends a 3-minute warm-up before adding ingredients. By contrast, Philips’ Airfryer information says its covered models do not require preheating, even though certain Philips recipes call for it when handling delicate baked foods. These statements are compatible once you separate basic appliance operation from a particular recipe.
Locate the model label and search the manufacturer’s owner guide if the original booklet is missing. Look for Air Fry, Preheat, Add Food, or a ready signal. An appliance with a dedicated preheat cycle should be allowed to finish that programmed stage; an ordinary countdown timer may need a separate short cycle first. Guessing from another model’s buttons can start the cooking timer too early.
Protect the Basket and Heating Element
Start with the basket and approved crisper plate clean, dry, correctly assembled, and free of packaging. Keep the fryer on its intended stable, heat-resistant countertop with ventilation clearances stated in its manual. Do not put food packaging, cloth, loose parchment, or a disposable liner into an empty basket for preheating. Philips’ US support guidance warns that unsecured baking paper may be pulled toward the heating element and burn.
Warm the appliance with the drawer fully seated and do not reach into a hot basket to test its temperature. A preheated tray can look identical to a cold one. Use the handle and suitable heat protection when transferring food; avoid touching the metal rack, inner basket, or heating chamber. If you notice damaged wiring, a burning electrical smell, or an error code, stop using the appliance and check its support instructions.
Set the Recipe Temperature, Not a Default
Use the temperature prescribed by a reliable recipe or by the fryer manufacturer’s cooking chart. Preheating at a higher setting merely because it sounds faster can expose an empty basket to heat the recipe does not call for. Instant Pot’s published Vortex salmon-and-asparagus recipe selects Roast at 400°F and instructs the cook to wait for Add Food, but that number belongs to that specific recipe rather than to all preheating.
Keep in mind that the display indicates a programmed setting, not necessarily the measured temperature of every spot inside the chamber. Air movement, basket size, and the location of the food all affect cooking after loading. Where a recipe and a manual disagree about startup, follow the appliance’s safe operating sequence and use the recipe for the intended food temperature.
How to Preheat an Air Fryer Step by Step
A conventional basket fryer without a preheat button usually needs a brief empty-basket cycle. A model with an automatic preheat sequence may already handle that waiting period inside its selected program. Use these steps as a decision process, not as an instruction to force every model through an extra cycle.
Step 1: Identify the Program Your Food Needs
Choose the appropriate function before touching the timer. Air Fry, Roast, Bake, and Reheat do not necessarily follow the same startup sequence, even on a single appliance. Check your recipe’s named mode, then locate the corresponding control. If the display offers separate cooking zones, read the manual for whether the zones preheat together or independently.
A fryer that automatically turns on when the timer moves from zero might begin its normal cooking countdown immediately. Another unit may show Preheat first, then pause at Add Food. Recognizing the difference prevents accidentally using up part of the actual cooking time while the basket is empty. If the unit displays a specific prompt, respond to that prompt rather than counting seconds yourself.
Step 2: Empty and Reseat the Cooking Basket
Remove any leftover crumbs or grease, verify that the crisper plate is properly seated, and slide the drawer in fully. Do not wash the appliance immediately before preheating and leave water pooled in the basket. A loose plate may rattle, while residual grease can generate smoke when the basket is warmed without food.
Preheating is not the right moment to add dry parchment just to simplify cleanup. Philips’ US support says an empty sheet can lift toward the heater, and that lining the basket bottom may reduce airflow. If your manufacturer permits liners during cooking, follow its placement rules and secure the liner with food only when loading is authorized.
Step 3: Select Air Fry or the Required Mode
Choose the same mode you will use when cooking. Many basket models expose temperature and time controls only after a function is selected. Confirm the display has moved into that mode before continuing. Some units save previous settings, so check the screen rather than assuming the last recipe’s temperature is suitable today.
For a manual preheat, the selected mode is used for a separate warm-up run. For an automatic sequence, selecting a cooking mode often initiates a programmed heating stage when you press Start. The distinction matters because changing the timer later may be required on a manual unit but unnecessary on an automatic one.
Step 4: Match the Temperature to Your Recipe
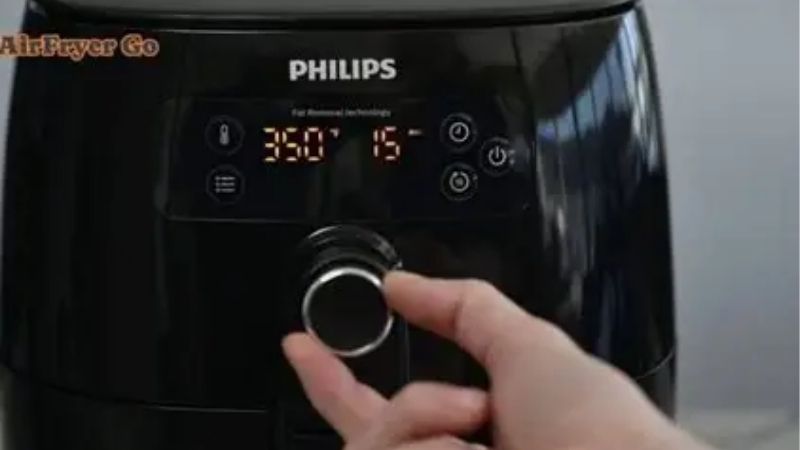
Enter the cooking temperature while the basket is still empty, unless the owner’s guide explicitly directs a different setup. This avoids a sudden change in program after ingredients have been loaded. Instant Pot’s Vortex salmon recipe gives a clear example: it sets Roast to 400°F and waits for Add Food before loading the salmon. It does not imply that 400°F is appropriate for reheating bread or cooking delicate pastry.
Check whether your air fryer uses Fahrenheit or Celsius. American recipes usually list Fahrenheit, but imported guides or settings may display Celsius. Do not silently treat the printed number as interchangeable. If a manufacturer offers a preset with its own temperature, see whether that preset is intended for the specific food rather than overriding it without a reason.
Step 5: Run the Empty Basket for the Right Interval
For a Ninja AF100-style basket unit, the manufacturer’s guidance recommends allowing 3 minutes for preheating before ingredients go in. Set up that short run according to the corresponding owner guide. On an automatic-preheat model, start the selected function and let the appliance determine when it is ready instead of manually adding 3 minutes to a program that already preheats.
If the instructions say preheating is unnecessary, skip this stage unless the recipe specifically calls for a warm basket. A preheat recommendation belongs to the documented model and function. Extra empty-basket time does not automatically produce crisper food. A prolonged warm-up can also waste time or cause trouble when it leaves the cook unsure whether the food timer has begun.
Step 6: Wait for the End Signal or Ready Prompt
Listen for the completion sound or watch the display for the appropriate status. Some machines stop their preheat countdown, while Vortex recipes use the Add Food message as the cue. A manually timed warm-up may simply end its short cycle. Do not assume every beep means the same thing; a beep could mark halfway shaking, completion, or a different function.
If you open the drawer during preheating, check the manual to see whether the unit pauses. Certain Ninja FAQs state that behavior can vary, including whether the timer keeps counting down while a basket is out. Close the drawer completely before restarting or following the next display instruction. Repeatedly opening it to feel for heat is unreliable and increases unnecessary exposure to hot air.
Step 7: Add Food and Start Its Actual Cook Time
When the warm-up is complete, open the fryer by its handle, place prepared food in the basket without crowding it, and return the drawer. Use the full cooking time required by the recipe if you just ran a separate manual preheat. On appliances that incorporate preheating into one programmed cycle, follow the display; the machine may already know when to start the cooking countdown.
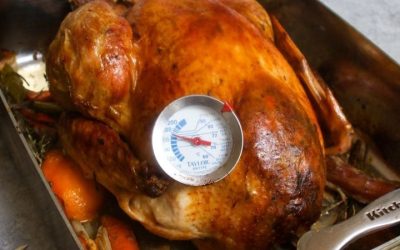
Try to spread pieces so air can move around exposed surfaces. If you are making fries or wings, follow the recipe’s shake or turn instruction rather than relying on preheat alone for even browning. Treat appearance and elapsed time as cooking clues, not food-safety measurements. FoodSafety.gov’s safe-temperature chart, reviewed in 2024, gives 165°F as the minimum internal temperature for poultry and lists a food thermometer as the way to check.
Products That Help
The OXO Good Grips Silicone Oven Mitt, identified by OXO as a 13-inch mitt on its product page, helps when the air fryer basket or accessory is hot after a warm-up. The silicone exterior and fabric interior are intended for handling hot kitchen items, but safe contact still depends on the mitt’s condition and proper use. It is useful if you are regularly transferring a heated basket or tray, not something you must buy simply to preheat a fryer.
The ThermoWorks Thermapen ONE is a fold-out instant-read food thermometer. Its published product specifications list a 1-second response and accuracy within 0.5°F over the stated central range. Its value comes after cooking, when you need to check thick pieces of chicken or another temperature-sensitive food. The probe is designed for measuring food, not for leaving in an operating air fryer to measure hot circulating air.
Common Mistakes to Avoid
Do not assume that a preheat button and an ordinary cook timer operate identically. The most consequential mistake is starting the food countdown while the machine is empty, then loading ingredients with too little programmed time remaining. If that happens, reset or adjust the cooking cycle according to the manufacturer and judge doneness from the food, not from the original clock.
Another avoidable problem is overcrowding immediately after preheating. The small chamber heats quickly, but dense food piles block airflow and can leave some surfaces pale. Avoid draping paper over vents and do not put loose wrappers or unapproved accessories inside. If food begins browning too quickly, check the recipe temperature and batch size before extending or repeating any warm-up.
Frequently Asked Questions
The correct answer depends on how the appliance treats startup time and on what you are cooking. A short warm-up may improve browning in one model, while another appliance has already accounted for initial heating in its programmed cycle.
Do All Air Fryers Need Preheating?
No. Ninja recommends a brief warm-up for various basket air fryers, but Philips states that preheating is unnecessary for its covered Airfryer models. Recipes may still specify it for particular dishes. The owner’s manual for your exact unit is the reference for whether and how to perform an empty-basket warm-up.
Can I Put Food in Before the Preheat Signal?
Only if that is how your model or recipe is intended to run. For a Vortex program that displays Add Food, wait for that message before loading. On a machine designed to cook from a cold basket, the food can go in at the start. Mixing up these sequences makes published cooking times harder to follow.
Should I Preheat When Cooking Frozen Fries?
Follow the appliance and package directions rather than making frozen food a special exception on your own. Preheating can help start surface browning promptly when the manufacturer recommends it, but spreading fries out and shaking when directed still matters. A frozen product with its own air-fryer instructions may not use the same timing as fresh-cut potatoes.
Can I Preheat With Parchment Paper Inside?
Do not leave an unsecured paper liner inside an empty basket. Philips’ US support warns that loose baking paper can reach a heating element and burn. If your fryer permits air-fryer liners during cooking, use the type and placement approved by its manual and do not block designed airflow. A liner is not needed for the preheat stage.
Final Thoughts
The most useful way to approach how to preheat an air fryer is to save the exact model’s warm-up instruction alongside your favorite recipes. Once you know whether your machine requires a separate timed cycle or displays Add Food, the routine becomes repeatable without adding unnecessary minutes. Before changing a cooking time after preheating, check how that particular model handles its countdown; then use a food thermometer for dishes where internal temperature is the safety check.