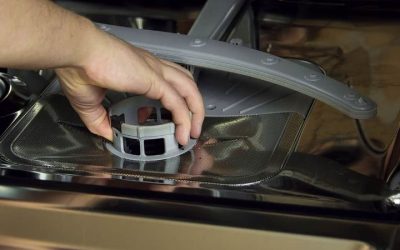
Finding a wet floor or soaked crisper drawer raises the question, why is my refrigerator leaking water? Water under the produce drawers can mean a blocked defrost drain, while a puddle behind a dispenser-equipped fridge may come from its filter, supply tubing, or inlet connection. Condensation from a door that does not close fully can look like a leak, too. Start by identifying the location before buying a replacement part.
Quick Answer: Dry the visible water and check whether it returns inside the cabinet, at the filter, or behind the appliance. Inspect door closure and any recently changed filter first. For a continuing external leak, shut off the refrigerator’s water supply; unplug the appliance before safely examining accessible tubing. Leave hidden drain repairs and damaged electrical components to a qualified technician.
As an Amazon Associate we earn from qualifying purchases.
By DIY Ideas 4 Home Editorial Team
Why Your Refrigerator Is Leaking: Common Causes
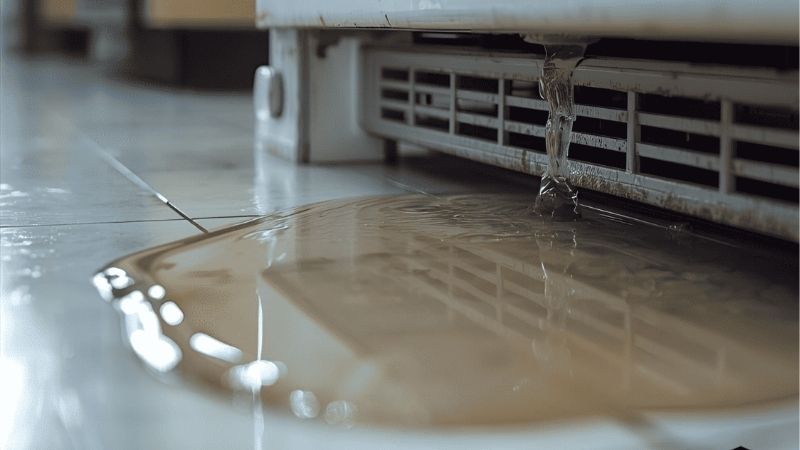
The most useful clue is the first place water appears, not where it eventually reaches the floor. Automatic-defrost refrigerators are designed to collect melted frost in a pan beneath the cabinet. GE Appliances’ drain-tube guidance explains that many full-size self-defrosting models have this arrangement, but some compact refrigerators do not. A wet shelf and a puddle at the wall therefore deserve different checks.
| Symptom or Sign | Likely Cause | First Check | DIY or Pro |
|---|---|---|---|
| Water under produce drawers or ice under freezer basket | Blocked or frozen defrost drain | Look for recurring ice or water after wiping it dry | External checks DIY; hidden drain service often pro |
| Drips around the filter after a filter change | Filter not seated or damaged seal | Confirm the exact replacement model and locking position | DIY if manual permits; damaged housing pro |
| Wet floor behind refrigerator | Loose or damaged supply tube or fitting | Close water shutoff and inspect visible tubing | Simple visual check DIY; plumbing repair pro if unsure |
| Droplets on shelves or door frame | Warm humid air entering through a gap | Move obstructing items and inspect door gasket | Usually DIY cleaning; torn gasket may need service |
| Water below cabinet or around ice dispenser | Pan, leveling, or ice-handling problem | Check if water appears during defrost or ice dispensing | Manual-guided leveling DIY; damaged parts pro |
A Blocked Defrost Drain
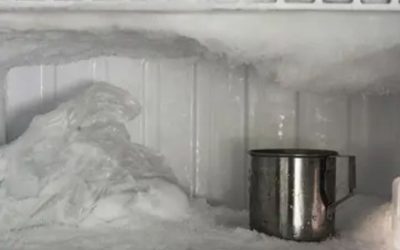
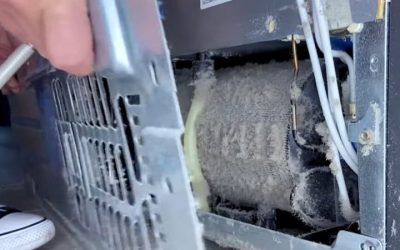
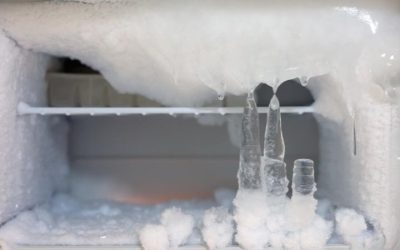
A self-defrosting refrigerator periodically melts frost from its cooling system. That water should travel through a drain tube into a collection pan. When ice or debris blocks the passage, water can spill into the refrigerator or freeze along the bottom of the freezer. GE Appliances’ top-freezer drain-tube instructions identify water beneath vegetable pans as a characteristic sign; its side-by-side guidance also describes a layer of freezer-floor ice followed by water in front of the unit.
A blocked drain should not be diagnosed from floor water alone. If there is no ice buildup and the drip is concentrated next to a filter housing, investigate the pressurized water system instead. The location of a drain opening also depends on the cabinet layout, so do not pry off a back panel based on another brand’s video.
An Incorrectly Seated Water Filter
A leak that begins soon after replacing the drinking-water filter strongly points to its fit, gasket, or housing. Whirlpool’s Water Inside of Refrigerator troubleshooting page advises checking whether a recently installed filter is properly seated and undamaged. LG’s leak instructions similarly describe O-ring damage, an improperly installed cartridge, or a cracked filter housing as possibilities.
Some filters use twist-lock fittings; others push into place or need a different removal sequence. A cartridge that feels firmly inserted is not proof that it matches the appliance. Check the original model number and installation diagram before trying again, and stop if the socket looks split, warped, or wet around a crack.
A Supply-Line or Valve Leak Behind the Fridge
Refrigerators with a dispenser or automatic ice maker are usually connected to household plumbing. Tubing can become kinked after moving the refrigerator, a push-fit connection may not be seated, or a line may crack. Whirlpool’s refrigerator-leak guide recommends unplugging the appliance and closing its water shutoff valve before inspecting the line for damage.
If you can identify a drip at an accessible joint, avoid tightening plastic fittings blindly. The appropriate repair depends on the refrigerator’s connector design, water pressure, and tubing material. Wet drywall or a valve that continues dripping after being turned off suggests a household plumbing problem, not necessarily a refrigerator failure.
Condensation From a Door That Does Not Seal
A misaligned drawer, a tall food package in a door bin, or crumbs on a gasket can hold the door slightly open. Warm humid room air enters and turns to moisture on cold shelves and walls. LG’s August 2025 refrigerator-condensation guidance specifically links excessive moisture to door obstructions, hot food, and dirty door seals.
Inspect the full gasket while closing the door slowly. Look for an obviously folded lip, tears, food residue, or a drawer that does not retract completely. Small droplets following frequent door openings in humid weather may be condensation rather than a pressurized leak. A persistent stream of water should not be dismissed as humidity.
An Overflowing Pan or Ice-System Problem
The collection pan beneath a self-defrosting fridge normally handles water that evaporates over time. Improper cabinet positioning or a damaged pan can allow water to reach the floor. Whirlpool includes an incorrectly leveled refrigerator among its possible leak causes, while Samsung’s leak guide notes that some models should tilt slightly backward for proper door closure and drainage. Follow the model’s own leveling instructions rather than assuming the cabinet should be perfectly level front to back.
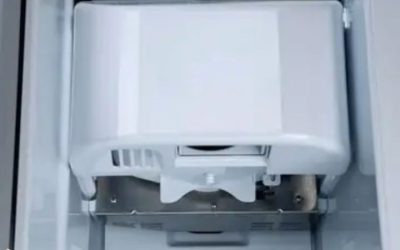
Ice makers introduce another path. Melted ice can escape from a bin, chute, or poorly closed ice-maker compartment, especially if the compartment warms up. Check for clumped cubes and a mispositioned bin before assuming the entire refrigerator needs a new water valve.
How to Stop a Refrigerator Water Leak Step by Step
Begin with observation and only then move toward parts. A towel, flashlight, phone photograph, and the model-specific owner’s manual are usually more useful than a screwdriver at this stage. Water near an outlet or a damaged power cord changes the priority: isolate electricity safely at the breaker if necessary and do not reach through standing water to unplug the refrigerator.
Step 1: Locate the First Wet Spot
Remove any spilled food containers, blot the bottom shelf and crisper well, and dry the floor around the refrigerator. Take a picture of the wet area before cleanup if the stain reappears intermittently. Check the dispenser tray, beneath the ice bin, along the door opening, and behind the fridge without forcing the cabinet over its power cord or water tubing.
Watch where the new moisture first emerges. Water returning beneath the crisper suggests a different route from droplets forming on a door gasket. If the puddle is only on the floor and there is no moisture inside or on the appliance, inspect nearby sink plumbing and other possible sources before blaming the refrigerator. LG’s August 2025 leak guidance makes the same distinction for water coming from adjacent equipment.
Step 2: Shut Off Water and Check Visible Tubing
If a pressurized leak is suspected, close the water valve feeding the refrigerator. The valve may be under the sink, behind the appliance, or in a basement. Disconnect electrical power before any inspection involving rear or lower service areas. Do not disconnect pressurized tubing simply to see if water comes out. If you cannot reach the valve safely, get plumbing help.
Inspect only the accessible length of the line for dampness, sharp bends, abrasion, or an obviously loose connection. A visible crack requires the correct replacement tubing and fittings, not tape around a pressurized joint. Whirlpool’s published leak guidance recommends replacing a torn supply line rather than treating damage as a harmless drip. Once the source has been addressed, restore water cautiously and check the area again for fresh moisture.
Step 3: Recheck the Filter and Door Seal
For moisture around the filter, consult the owner’s manual for the exact removal method. If the instructions require turning the cartridge to release it, never yank it straight out. Inspect its sealing surfaces for an out-of-place or split O-ring, then reinstall a compatible filter to the specified locking position. A cracked filter receptacle is a service issue; repeatedly forcing in another cartridge can make the leak worse.
For interior condensation, remove items that press against the door, clean the gasket gently with a damp cloth, and dry the contact surface. Reinsert drawers so their runners close squarely. Then check whether the door shuts without being pushed past a shelf or food container. LG’s condensation guide recommends these simple checks before treating moisture alone as evidence of an internal failure.
Step 4: Inspect Ice Buildup and Leveling
Look at the freezer floor and the fresh-food area beneath the drawers. A sheet of ice and repeated water accumulation are clues to a blocked defrost route. The June 2026 LG top-freezer leak guide warns against trying to accelerate the thaw with a hair dryer or boiling water because heat can deform internal plastic parts. Do not cut at ice with knives or force an inaccessible drain open.
A full thaw may be necessary on some models, but it can put stored food at risk. FoodSafety.gov advises keeping a refrigerator at or below 40 degrees F and a freezer at or below 0 degrees F. Its outage guidance says a refrigerator that stays closed generally protects food for up to 4 hours without power. That is not permission to keep perishables in a warm open cabinet during a lengthy thaw. Arrange adequate cold storage first or have the drain inspected by a technician.
If your manual provides user-accessible drain cleaning instructions, follow that exact method; otherwise, do not remove cooling panels or probe concealed openings. Check the cabinet’s feet or rollers according to its leveling diagram. Samsung notes that certain designs deliberately sit slightly higher at the front, while Whirlpool likewise recommends consulting model-specific leveling instructions.
Step 5: Confirm the Leak Has Stopped
Dry the area once more, restore any disconnected power and water supply when safe, and watch the location that was originally wet during normal use. Run the dispenser only if its filter and line are correctly installed and there are no signs of damage. Use a dry paper towel near an accessible fitting to help identify fresh moisture without putting your hand around energized electrical parts.
Keep a note of whether new water appears after dispensing, making ice, or a defrost period. The timing is valuable for the service technician if the problem comes back. Check cooling separately: a dry floor is not enough if food is warming or the freezer is accumulating heavy ice. Contact an authorized repair provider if the leak resumes and you cannot reach the drain without cabinet disassembly.
Products That Help
For a filter-area leak on a compatible LG refrigerator, the genuine LG LT1000P replacement water filter is a practical purchase after confirming the current cartridge is damaged or incorrectly matched. LG’s U.S. LT1000P product page rates this specific cartridge for up to 200 gallons or 6 months, subject to the appliance’s filter instructions. It is not a universal remedy for other LG filter types or for a cracked housing, so verify your refrigerator model before ordering.
The Resideo RWD21 reusable water leak alarm is intended for placement at a low spot where water might collect, such as near an appliance supply connection. Resideo’s RWD21 installation sheet describes a replaceable 9-volt battery and an audible alarm that can sound for up to 24 hours depending on battery life. This alarm cannot repair a leak, but it can flag water returning behind a refrigerator after a fix. Position it where a future puddle would reach its contacts without putting it on a wet electrical cord.
When to Call a Pro
Request professional service when water continues after the supply has been isolated, a filter housing is cracked, the drain requires interior panel removal, an ice maker is overflowing repeatedly, or there is evidence of a failed internal valve. GE Appliances recommends service for many top-freezer defrost drain obstructions because accessing the drain can require disassembly; its side-by-side guidance allows DIY work only where the owner’s manual includes that procedure.
Stop immediately if moisture reaches exposed wiring, the power plug, or a damaged outlet. Use an electrician for electrical damage and a plumber for leaking household shutoffs or supply fittings that cannot be safely isolated. A technician should also investigate repeated ice buildup paired with poor cooling, since clearing a puddle alone will not establish whether the cooling or defrost system is operating properly.
Frequently Asked Questions
Even after tracing the main puddle, the difference between a dispenser drip, normal defrost water, and a genuine plumbing leak is not always obvious. These answers address the symptoms that can persist after the immediate wet area is cleaned.
Can a Refrigerator Leak Without a Water Dispenser?
Yes. A refrigerator does not need a dispenser or ice maker to produce defrost water or condensation. GE Appliances’ refrigerator drain-tube guidance explains that full-size self-defrosting models commonly send melted frost to a drip pan. Water from a blocked drain can therefore appear inside a basic refrigerator that has no household water connection at all.
Check your model’s manual before searching for a supply hose. Compact and manual-defrost designs may have different water-handling arrangements, and GE notes that certain under-counter compact refrigerators do not use a conventional defrost drain tube and drip pan.
Why Does My Water Dispenser Drip After Use?
A few drops after dispensing can be caused by air remaining in the system, especially after installing a refrigerator or changing its water filter. Whirlpool’s refrigerator-troubleshooting guide advises flushing the water system after a filter replacement or first connection to the water supply. Follow the flushing volume and method in your particular manual rather than using a generic amount.
A dispenser that keeps running, produces a steady stream, or wets the cabinet behind the controls needs a different diagnosis. Do not treat persistent flow as ordinary residual dripping. Shut off the water supply when appropriate and request service.
Is Water in the Refrigerator Drip Pan Normal?
Some water in the drip pan is expected on a self-defrosting refrigerator. GE Appliances describes the pan as the destination for defrost water, which normally evaporates after collection. Seeing moisture there does not by itself prove a fault, especially when the surrounding floor is dry and the appliance cools normally.
Water running over the edge, a split pan, or continuing puddles outside the cabinet require attention. Do not remove a fixed pan or reach around hot, moving, or powered components to empty it unless the owner instructions specifically allow access.
Can I Keep Using a Refrigerator That Is Leaking?
It depends on the leak and whether the appliance remains electrically safe and cold. A small spill or door-related condensation may be resolved by cleanup and correcting door closure. Active water escaping near wiring, a plug, or the wall outlet is a reason to stop and arrange service. A leaking supply tube should be isolated before it damages the floor.
Food protection is a separate concern. FoodSafety.gov recommends a refrigerator temperature no higher than 40 degrees F and a freezer temperature of 0 degrees F or below. If cooling fails or food has warmed, use its food safety guidance to decide what to discard rather than assuming the interior is safe because the compressor still makes noise.
Final Thoughts
A refrigerator leak is easier to resolve when you record the first wet spot, not just the final puddle. Start by drying the cabinet and checking door closure, recent filter work, and any visible plumbing connections. For water beneath the crisper or recurring freezer-floor ice, compare the symptoms with the drain guidance for your exact model and schedule service when panels must come off. After the repair, check cooling temperatures and monitor the floor for a returning leak; buy a replacement filter or an alarm only when it addresses the cause you actually found.