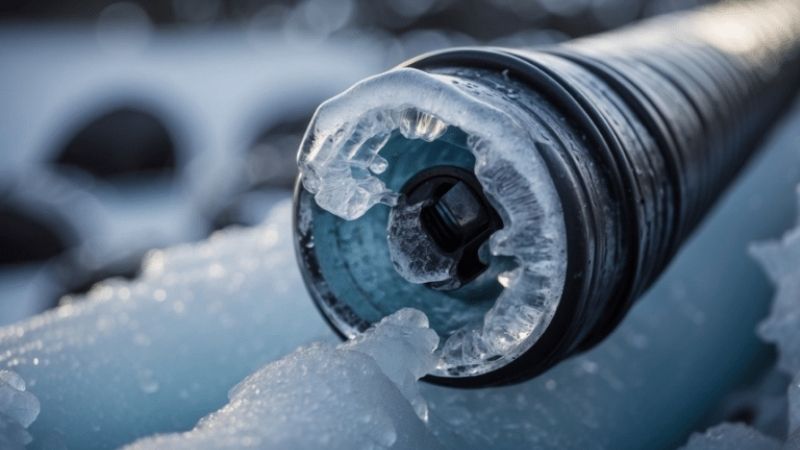
Knowing how to thaw frozen pipes can help restore water to a sink or fixture without turning a minor freeze into a burst-pipe emergency. Start by finding which faucet has lost pressure, inspecting the visible plumbing for damage, and locating the correct water shutoff. If the pipe is intact, dry, and safely accessible, an open faucet and gentle, gradual heat may clear the ice. A pipe concealed in a wall, visibly split, or surrounded by water needs a different response.
Quick Answer: Open the affected faucet, check for leaking or split plumbing, and identify the water shutoff before applying heat. On a sound, accessible pipe in a dry area, use warm damp towels or a gently moving hair dryer, starting near the faucet end and progressing toward the colder section. Watch for leaks as water begins flowing. Never use a torch, open flame, boiling water, or an electrical appliance near standing water. Stop and call a licensed plumber if the line is hidden, damaged, or will not thaw safely.
Frozen pipes often occur in unheated crawl spaces, garages, basements, and exterior-wall plumbing. The American Red Cross warns that water expands as it freezes and may fracture metal or plastic pipe. A frozen line can therefore look harmless while an ice plug masks damage. This guide is for homeowners dealing with accessible domestic water-supply plumbing. Do not attempt to thaw a fire-sprinkler line, gas line, boiler circuit, or unknown piping system yourself.
As an Amazon Associate we earn from qualifying purchases.
By DIY Ideas 4 Home Editorial Team
Before You Start: Confirm the Freeze and Check for Leaks
Most homeowners first notice a frozen line when a single faucet releases only a trickle or stops flowing during a cold snap. A blocked aerator, closed supply valve, utility interruption, or unrelated plumbing fault can cause similar symptoms. Compare affected and unaffected fixtures before assuming that ice is responsible. Always prioritize a possible water leak over restoring normal flow quickly.
| What You Notice | Possible Meaning | Safest Next Step | Do Not |
|---|---|---|---|
| One faucet has no water during freezing weather | Ice may block its supply branch | Check nearby fixtures and visible dry pipe | Assume the entire service line is frozen |
| Several fixtures lose pressure at once | Frozen shared supply or utility issue | Check for advisories and call the utility or plumber | Heat an unidentified line |
| Visible split, damp insulation, or dripping joint | Damaged pipe may already be leaking | Shut off the affected water supply if safe | Apply heat while leaving a known leak supplied |
| Pipe disappears inside a cold exterior wall | Frozen section may be inaccessible | Warm the room and contact a plumber if needed | Cut a wall or aim a heater into a cavity |
| Standing water near an outlet or appliance | Electrical shock risk | Keep clear and arrange safe isolation | Use a hair dryer or heating pad there |
| Water returns but stains or dripping appear | Ice may have concealed a rupture | Close the appropriate valve and seek repair | Assume restored flow proves the pipe is sound |
Look for Signs of an Actually Frozen Line
Compare the hot and cold sides of the affected fixture and see whether a neighboring fixture served by the same area still works. If only one side stops flowing just after temperatures fell, a local pipe freeze becomes more likely. Check exposed lines along the route back toward the home’s heated areas. Typical risk locations include an outside wall, an unfinished basement, a crawl space, or a garage. Frost or an unusually cold pipe can be a clue, but its absence does not prove the line is clear.
Do not disconnect a pressurized fitting, loosen a compression nut, or strike a pipe to locate ice. A damaged line can start leaking as soon as pressure or ice conditions change. If every fixture is affected, confirm that municipal service has not been interrupted. In a multifamily building, the correct first call may be to management because the affected line or shutoff may serve another unit.
Find the Shutoff Valve Before Heating Anything
Locate the closest reliable shutoff for the affected domestic water branch and identify the home’s main water valve as a backup. Determine which direction closes it and whether it can be reached quickly without disturbing a leaking connection. Do not force an old valve that is stuck or corroded. If the line is visibly split, wet, or otherwise suspect, shut off the proper supply if safe and contact a plumber instead of conducting an ordinary DIY thaw.
Advice about turning off the main valve differs by situation because an intact, open water line and a pipe already at risk of bursting need different treatment. For a dry, visibly intact line, the Red Cross describes keeping the faucet open and using gentle heat while observing it. Utah State University Extension also discusses shutting off the main supply first as a conservative approach when thawing, particularly where leaks are a concern. If you cannot assess the line’s condition, isolating the water and obtaining professional help is the safer choice.
Choose Only Low-Risk Tools for the Location
Have dry towels, a bucket, a flashlight, and a phone available. For dry and accessible plumbing, warm-water towels can apply mild heat with no powered appliance beside the pipe. A handheld hair dryer is an option only where the work area, your hands, the cord, and the outlet are dry and the appliance can be used in line with its instructions. Keep the airflow moving; do not press the dryer against the pipe or overheat a fitting.
A portable space heater is listed as a possible heating method in Red Cross guidance, but it must stay away from flammable material and should never be pointed into a tight cabinet, wall cavity, or combustible space. Iowa State University Extension recommends using a heater with proper safety protections and no extension cord. If there is standing water, exposed wiring, nearby insulation that could ignite, or uncertainty about the pipe material, avoid powered DIY heating altogether.
How to Thaw Frozen Pipes: 8 Practical Steps
These steps apply only when you have found a clearly identified, accessible, unbroken section of household water pipe and can work without wet-electrical or burn hazards. The goal is gradual thawing while giving melted water a safe outlet. There is no universal thawing time, because the length of the ice plug, indoor temperature, material, and access vary widely.
Step 1: Open the Faucet Served by the Frozen Pipe
Turn the affected faucet on so that melting water has somewhere to go. You may see no flow at first or only a weak trickle. Leave it open while you work and watch it for the first signs of returning water. The American Red Cross and National Weather Service both recommend starting with the open faucet because flowing water can help clear remaining ice as the blockage melts.
If the supply was isolated because damage was suspected, do not reopen the water just to obtain a trickle. Keep the supply off and have the line evaluated. Likewise, if the faucet or drain itself is obstructed, avoid creating an unattended overflow. The purpose of opening the faucet is controlled release and monitoring, not forcing additional pressure into a line of uncertain condition.
Step 2: Trace the Accessible Route of the Supply Line
With a flashlight, follow the pipe serving that faucet through safe access panels, under-sink cabinets, unfinished basement ceilings, or a dry crawl space that is safe to enter. Look for exposed sections close to outside walls, gaps around rim joists, or places where plumbing passes from a warm room into an unheated garage. Identify the area you can reach without moving electrical wiring or disturbing plumbing connections.
If the line enters a finished wall and the likely frozen section is hidden, do not pry open drywall, drill, or run a heat gun at the wall. Warming the room and opening sink cabinets may help exposed portions, but there is no safe way for a homeowner to confirm where heat is going inside a sealed cavity. An inaccessible frozen section is a reason to contact a licensed plumber.
Step 3: Inspect for Splits Before Applying Heat
Check the visible length for bulges, cracks, separated fittings, water droplets, dark spots on wood, and damp insulation. Inspect below joints and around elbows, where an early leak might collect. Listen for water running when fixtures should be off. If you find an active leak, close the known affected supply if it can be done safely, protect people from electrical hazards, and request professional repair.
Even if the outside of the pipe looks intact, a break could be hidden elsewhere along the same branch. Keep the shutoff accessible and stay present as the thaw begins. Do not treat this visual check as an assurance that the entire pipe is undamaged. Water pressure returning can reveal a crack that was temporarily sealed by ice.
Step 4: Warm the Room and Open the Cabinet
Keep the home’s regular heating system operating and open an under-sink cabinet if it encloses pipes on an exterior wall. Move household chemicals away from children and pets while the cabinet is open. Close nearby exterior doors and windows to reduce drafts; do not seal required mechanical vents or compromise combustion air. Allow warmed room air to reach exposed plumbing before applying direct heat.
Where the pipe passes through an unheated area, do not rely on the household thermostat alone. The living room may be comfortable while a garage wall remains near or below freezing. Avoid carrying an unattended space heater into a cupboard or cramped service chase. Improving the safe ambient temperature is useful, but it is not a substitute for assessing suspected rupture or inaccessible piping.
Step 5: Start With Warm, Damp Towels
Soak a clean towel in warm, not boiling, water; wring it out enough to avoid uncontrolled dripping and wrap it around a visible, dry pipe section near the faucet end of the suspected blockage. Replace or rewarm the towel as it cools. A second towel below the pipe can collect runoff, and a bucket helps keep the floor dry. Warm towels are especially useful when the location makes electric appliances inappropriate.
Work gradually rather than trying to melt a long ice plug all at once. Utah State University Extension advises starting near the faucet and raising the pipe temperature slowly. Do not pour boiling water directly onto plastic pipe, connections, surrounding finishes, or yourself. Hot water and steam can cause burns, and abrupt heating can stress plumbing materials or fittings.
Step 6: Use a Hair Dryer Only in a Dry, Safe Area
If towels are insufficient and the work area remains completely dry, a hair dryer on a gentle setting can warm the accessible frozen section. Keep the nozzle moving along the pipe instead of concentrating heat in one spot. Start near the faucet side of the suspected ice blockage and slowly work toward the colder part of the line while keeping the faucet open. Watch for water movement and changing pressure as you go.
Stay within the appliance instructions. Do not place the dryer against pipe insulation, plastic fittings, paint, wood, or another surface that may overheat. Never use it with wet hands, next to standing water, close to a leaking joint, or near a grounded metal pipe where electric shock is a concern. Do not use a paint-stripping heat gun: its high temperatures are inappropriate for ordinary household pipe thawing.
Step 7: Continue Gradually Until Flow Is Restored
As the blockage begins to melt, the faucet may change from drips to a thin stream before returning toward normal flow. Continue with moderate heat and maintain your visual leak check rather than turning the heat to maximum. The Red Cross advises continuing until normal water pressure returns. Stop if you hear a suspicious change, see wetness, detect a split, or notice a ceiling or wall stain.
If there is no progress and you cannot determine where the ice is, stop. A thaw may take different amounts of time depending on the length of frozen pipe and surrounding temperature, so rigid promises such as clearing every pipe in 15 minutes are unreliable. Repeatedly blasting an unknown location is not a safe alternative to professional diagnosis. Check additional household faucets; more than one branch may be affected.
Step 8: Watch for Leaks and Test the Other Fixtures
Once water begins flowing normally, check the thawed length of pipe and every accessible fitting around it. Dry the surrounding area and inspect again for fresh moisture. Compare hot and cold flow at relevant faucets and check nearby branches, including a laundry sink or exterior-wall fixture. Water returning at one outlet does not guarantee that another frozen section is clear.
If you previously isolated the supply, have a qualified professional confirm whether and how it should be restored, particularly after evidence of a crack. If an intact line was thawed with the supply still on, turn the faucet down while continuing to observe the pipe for leaks. When everything has stabilized, document the freeze location so you can insulate it or correct the cold-air exposure before the next storm.
Special Cases: Plastic Pipes, Frozen Walls and Outdoor Lines
The same emergency principles apply across many residential systems, but the thawing method must fit the material and location. A hair dryer that can reach a copper pipe in a dry basement is not automatically suitable for an unknown plastic fitting hidden behind finished drywall. Where a pipe is not clearly visible and controllable, the safe DIY options become much narrower.
Thawing PEX, PVC or Other Plastic Plumbing
Plastic supply lines can freeze and can be damaged by excessive heat, even though their flexibility or construction differs from copper pipe. Identify the material if possible and follow the pipe and fitting manufacturer’s limitations. Warm towels and gradual room heating may be preferable when direct heat risks softening plastic or weakening a connection. Keep any hair dryer heat low and moving only if the manufacturer and site conditions permit it.
Do not attach an improvised electrical heating cable to plastic pipe, pour boiling water onto fittings, or use an open flame. Heat-trace products have material- and application-specific installation instructions; they are usually a planned cold-weather protection system rather than a way to rescue a hidden, already frozen line. For an unknown line or repeated freezes, ask a plumber to identify the pipe and recommend a permanent correction.
What if the Frozen Pipe Is Inside a Wall?
If a fixture on an outside wall has no flow but the supply pipe cannot be seen, open the cabinet where safe, keep the room heated, and check for staining, bulging finishes, drips, or unusual sounds. These steps may warm an accessible cabinet section, but they cannot establish the condition of a concealed pipe. Do not aim a heater into wall openings or dismantle an electrical box to gain access.
Call a licensed plumber if the blockage remains inaccessible or you suspect a concealed leak. Depending on the home, a qualified professional may need to assess the route, isolate water, and open finishes safely for repairs. It is better to arrange controlled access than to have a hidden break release water after you have left the house.
What About an Outdoor Faucet or Garage Line?
A garage or exterior faucet may have a water line crossing a particularly cold zone. If a visible, dry section can be reached and the pipe is intact, use the gradual methods above. If the line is behind an exterior wall or under frozen ground, do not attempt to heat the surface with fire, torches, or improvised electrical equipment. Depending on the installation, there may be an interior shutoff that can isolate an outdoor branch.
After the emergency, disconnect exterior hoses and confirm the faucet’s winterizing requirements. A frost-free faucet is not invulnerable when a connected hose traps water where the valve needs to drain. Repeated garage freezes often signal a building-envelope or pipe-routing problem, not merely a lack of foam insulation.
After Thawing: Check Damage and Reduce Repeat Freezes
Restoring flow is only the first milestone. An ice plug can hide a damaged fitting until the pipe warms and pressure returns. Inspect plumbing again after the work area has dried and the system has been operating normally for a period, and never leave a newly thawed, questionable line unattended. A small leak is easier to address before it saturates flooring, framing, or insulation.
Recognize a Burst-Pipe Emergency Early
Warning signs include spraying or dripping water, a new wet spot under a sink, water collecting beneath insulation, bubbling paint, a damp ceiling, or water-meter activity when no fixtures are being used. If damage appears, isolate the domestic supply with the appropriate working valve, keep away from electrical hazards, and call a plumber. Contact building management in a rental or shared building. For significant water damage, photograph the affected area once it is safe and follow your insurer’s reporting process.
Do not reopen water to check whether a visibly damaged line still leaks, and do not try to patch a frozen split with tape while the plumbing remains pressurized. A repair must be appropriate for the pipe material, service pressure, and local plumbing rules. If a circuit, receptacle, appliance, or breaker panel has become wet, have a qualified electrician assess the hazard instead of touching energized equipment.
Insulate the Cause, Not Just the Thawed Section
When the pipe is dry, inspected, and back in normal service, identify why it froze. Possible causes include a missing pipe sleeve, an air leak at a rim joist, a garage door left open, low indoor heating, or plumbing routed through an exterior wall. Adding insulation can reduce heat loss from exposed pipe but cannot guarantee protection during extended cold or a power failure. A better solution may require air sealing or relocating the run into conditioned space.
The American Red Cross recommends opening cabinet doors near exterior-wall pipes during extreme cold, keeping heat on, and protecting outside connections. It also advises at least 55°F for a home left vacant during cold weather. Treat that as a general baseline rather than a guarantee for exposed attic or garage piping. Local water utilities may have additional guidance tailored to the regional climate and service design.
Products That Help With Safe Recovery
Clean, absorbent cotton or terry towels are useful for applying gentle warmth and catching small drips while inspecting dry pipes. Choose towels you can rewarm without scalding yourself. A household hair dryer with controllable heat may be useful on an intact exposed section, but only in a dry area where the appliance is allowed and safe to use. Neither product should be treated as a reason to continue an unsafe thaw.
For prevention after the line is fully restored, Frost King P11 is a pre-slit closed-cell polyethylene foam sleeve sold in four 3-foot lengths, with a 5/8-inch wall thickness, listed for 3/4-inch copper or 1/2-inch iron pipes. Measure the actual pipe and follow product installation instructions rather than relying on a nominal pipe label alone. Do not install insulation over an active leak, and do not assume foam alone will keep water above freezing in a completely unheated space.
Common Thawing Mistakes to Avoid
The most dangerous mistake is using a blowtorch, propane heater, charcoal stove, or other open flame against frozen plumbing. The Red Cross and National Weather Service explicitly warn against that approach. Another problem is using a hair dryer while standing in water or holding it with wet hands. The presence of plumbing does not make a powered appliance safe near wet electrical conditions.
Other mistakes include pouring boiling water directly onto pipes, repeatedly applying concentrated heat to one fitting, opening a concealed wall without knowing what is inside, ignoring a valve that cannot be closed, and leaving the house just as water begins moving again. A successful thaw should end with normal flow, a careful check for damage, and a plan to reduce freezing exposure next time.
Frequently Asked Questions
These answers address common situations that arise when a sink suddenly stops running in winter. The right action depends on whether you can see the line, safely isolate the water, and verify that the plumbing is undamaged.
How Long Does It Take to Thaw Frozen Pipes?
There is no dependable universal duration. A short exposed ice blockage in a heated room may clear faster than a long frozen section in a garage wall or underground service line. Continue only while you can use gentle heat safely and monitor the pipe. If you cannot locate the ice or restore flow without overheating materials, stop and call a plumber rather than using a higher-temperature device.
Can Frozen Pipes Thaw on Their Own?
Yes, plumbing can thaw as its surroundings become warm enough, but waiting without monitoring is risky because a hidden crack may begin leaking as the ice clears. Find the relevant shutoff, inspect accessible areas, and watch for signs of water damage. If the pipe is in a wall or the household will be empty, ask a plumber or property manager how to manage the risk instead of relying on a forecasted warmup.
Should I Turn Off the Main Water Before Thawing?
If there is a split, leak, or strong suspicion of damage, isolate the affected domestic supply if safe and obtain professional help. When a clearly visible, dry, intact section is being thawed, the Red Cross method uses an open faucet and gentle heat while checking for leaks. Other extension guidance favors turning off the main first, especially where damage is possible. When uncertain about the line’s condition, prioritize isolation and professional assessment.
Can I Use a Heat Gun or Boiling Water on Pipes?
No. A paint-removal heat gun can deliver excessively concentrated heat, particularly around plastic pipe and fittings, while boiling water creates burn and thermal-shock risks. Choose warm damp towels or an appropriate gently moving hair dryer only when conditions are dry and safe. Never use an open flame, and avoid powered tools entirely wherever standing water or wet wiring is present.
Final Thoughts
The safest way to deal with a frozen household water line is to identify the affected fixture, know how to shut off the water, and decide whether the pipe is actually suitable for a DIY thaw. An intact exposed section can sometimes be warmed gently while the faucet stays open and the homeowner watches for leaks. Warm towels and carefully controlled heat are preferable to any fast, high-temperature technique.
If the pipe is cracked, leaking, concealed in a wall, or too close to electrical or fire hazards, stop and get qualified help. Once normal flow returns, inspect the plumbing again and address the cold-air exposure that caused the freeze. That combination of careful thawing, leak response, and targeted prevention is more valuable than trying to force every frozen pipe back into service quickly.