Key takeaways
- Check paper-template scale, hole centers and reference edges before transferring cabinet hardware positions to a finished panel.
A paper template can transfer cabinet-handle hole positions when it preserves three things: the correct center-to-center spacing, a clearly named reference edge and the intended orientation. Check the paper against the actual hardware before marking a finished panel. Printing a drawing does not, by itself, prove that it came out at the right scale.

Identify what the template must represent
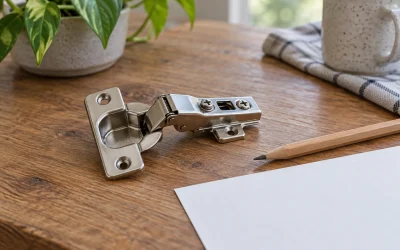
Use the installation instructions for the exact hardware. Separate the distance between mounting-hole centers from the handle’s overall length. Decorative ends can extend beyond the fixing points, so tracing the outside silhouette will not locate the screws reliably.
Also establish whether the hardware has fixed mounting centers or an adjustable arrangement. For example, Liberty’s Inclination Adjusta-Pull is described as fitting center-to-center distances from 1 to 4 inches. That product-specific range does not make a fixed-center handle adjustable. The selected configuration and its instructions still govern your layout.
For this method, limit the task to marking suitable cabinet or drawer fronts for the specified hardware. A paper pattern does not determine safe anchoring for wall-mounted fixtures, structural fittings or concealed services. Those tasks need their own installation guidance.
Build in reference marks before making holes
Start with clean, flat paper large enough to include the fixing positions and at least one useful panel edge. Draw an arrow labeled top, name the reference edge and identify the face that will point toward you. Add the hardware part number and the units used. A plain pair of dots becomes ambiguous surprisingly quickly when a panel is turned around.
Mark the hole centers from the manufacturer’s dimensions. If you download a template, follow its printing instructions and check any calibration line or test square with a ruler. Disable automatic resizing when the document calls for actual-size printing. Check both horizontal and vertical references when provided; the print-preview percentage is not the physical measurement.
If the print is wrong, correct the print settings and make another copy. Do not compensate by moving just one dot while leaving the remaining references at the wrong scale. If a supplied template has no scale check and its dimensions cannot be confirmed, ask the manufacturer for clarification.
Use this original template verification card
| Check | Record before marking | Stop if |
|---|---|---|
| Hardware identity | Exact model and selected configuration | Template belongs to a similar-looking model |
| Hole spacing | Center-to-center distance in one unit | Only overall handle length is known |
| Print scale | Measured calibration dimensions | Physical print differs from its labeled dimensions |
| Reference edge | Top, side or panel centerline | Paper can be positioned in more than one plausible way |
| Orientation | Visible face and top arrow | Turning the paper changes the intended position |
| Trial check | Actual hardware compared with marks on scrap | Fixing centers do not agree |
Check the arithmetic on a trial layout
Suppose a fictional drawer front is 400 millimeters wide and a fixed-center pull needs 128 millimeters between its mounting centers. To center those two positions horizontally, the first center is (400 − 128) ÷ 2 = 136 millimeters from the left edge. The second is 264 millimeters from that same edge.
Both centers are 64 millimeters from the drawer’s 200-millimeter centerline. That provides an independent check. The vertical position is still a separate decision governed by the panel design and hardware instructions; the calculation does not choose it for you.
Mark the template on scrap paper or suitable scrap material first. Place the hardware beside the marks to verify the actual fixing locations without forcing screws or enlarging openings. If the trial disagrees with the instructions, resolve the discrepancy before transferring anything to the finished front.
Transfer without losing the reference
Position the checked paper using its named edge and top arrow. Use a temporary securing method appropriate for the finish, or hold it against a separate reference guide. Do not assume every painted or veneered surface tolerates tape. Recheck that the paper remains flat and has not shifted before making a fine mark at each center.
Remove the paper and measure the transferred marks again from the same references. Check both the distance between centers and their position on the panel. Correct spacing can still be in the wrong location. For paired doors, verify each door’s orientation separately rather than automatically reversing the template.
This completes the layout check. Hole diameter, drilling method, depth, backing support and fastener choice must come from the actual installation instructions and panel construction. Keep the verified template with the hardware record, and replace it if creases, tears or enlarged marking holes make its references uncertain.